Posted on Leave a comment

Timelapse Photography with MewPro

New versions of MewPro and Genlock Dongle software are available at GitHub. This time GoPro’s timelapse shooting is supported.

Genlock Dongle v1.2

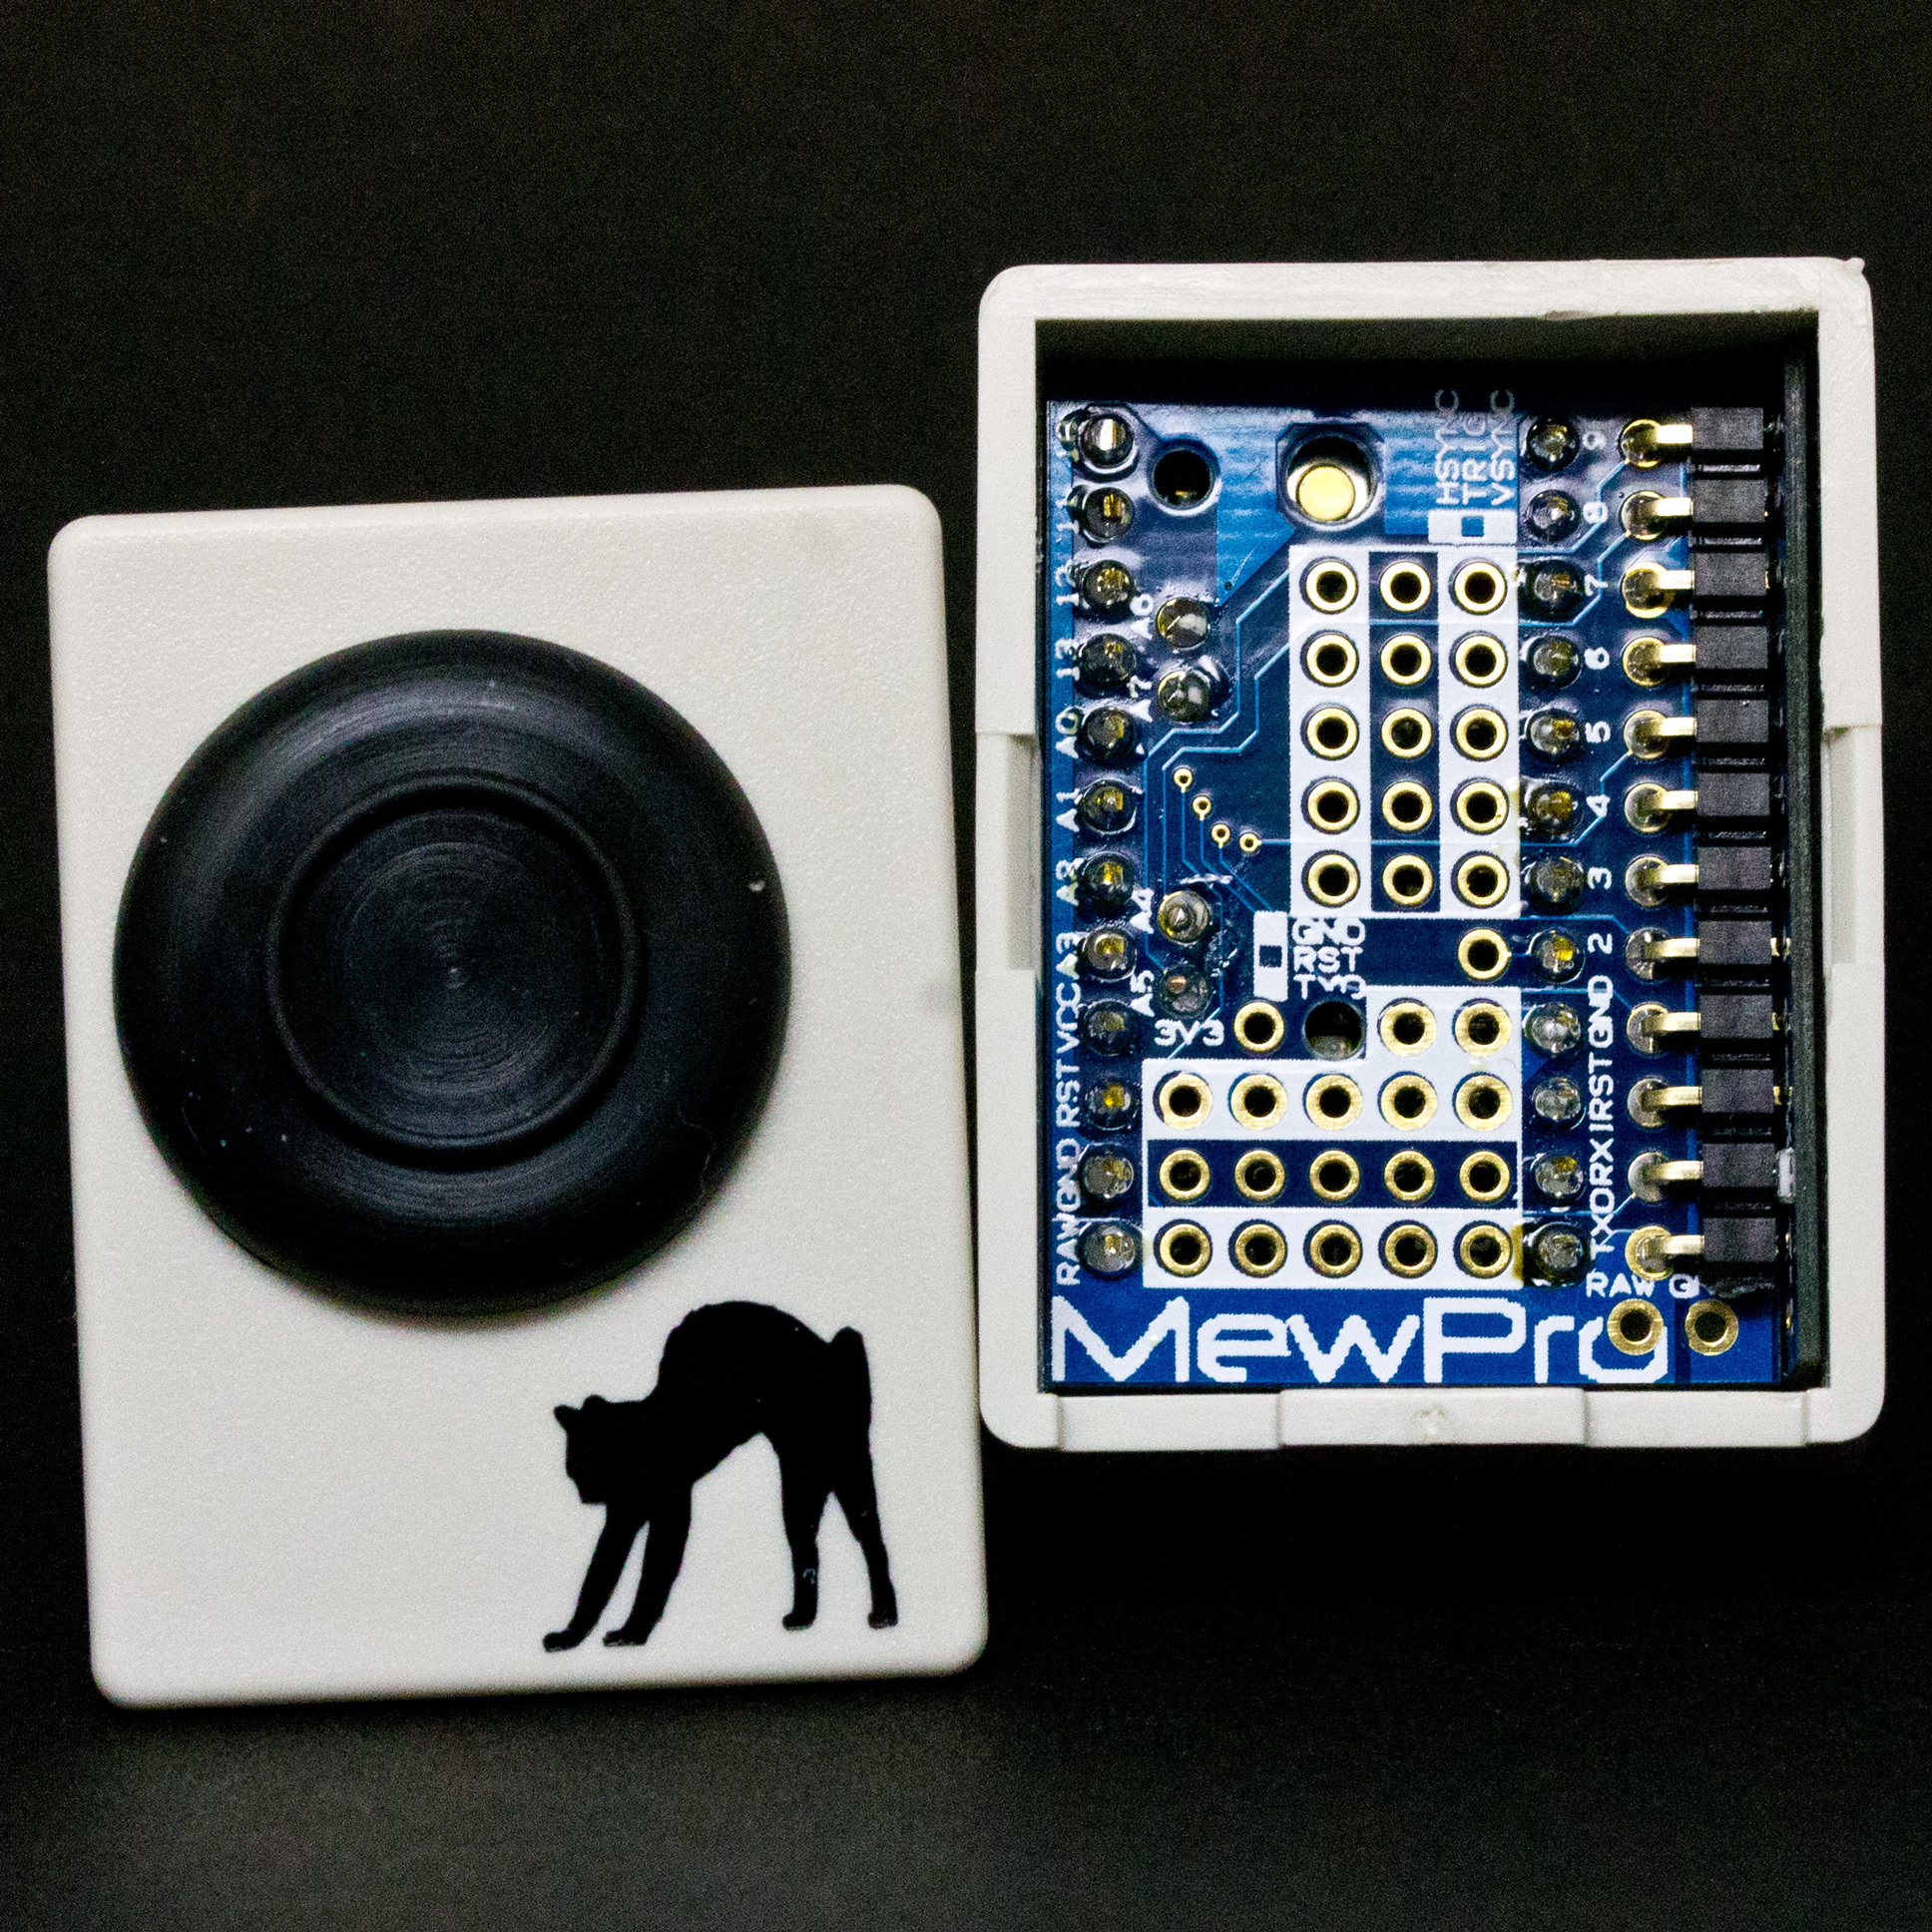
As well as the software updates the enclosure of MewPro Genlock Dongle, which is shipped after last weekend, is updated to have our company logo. Yawn…

How to update your MewPro and/or Genlock Dongle software

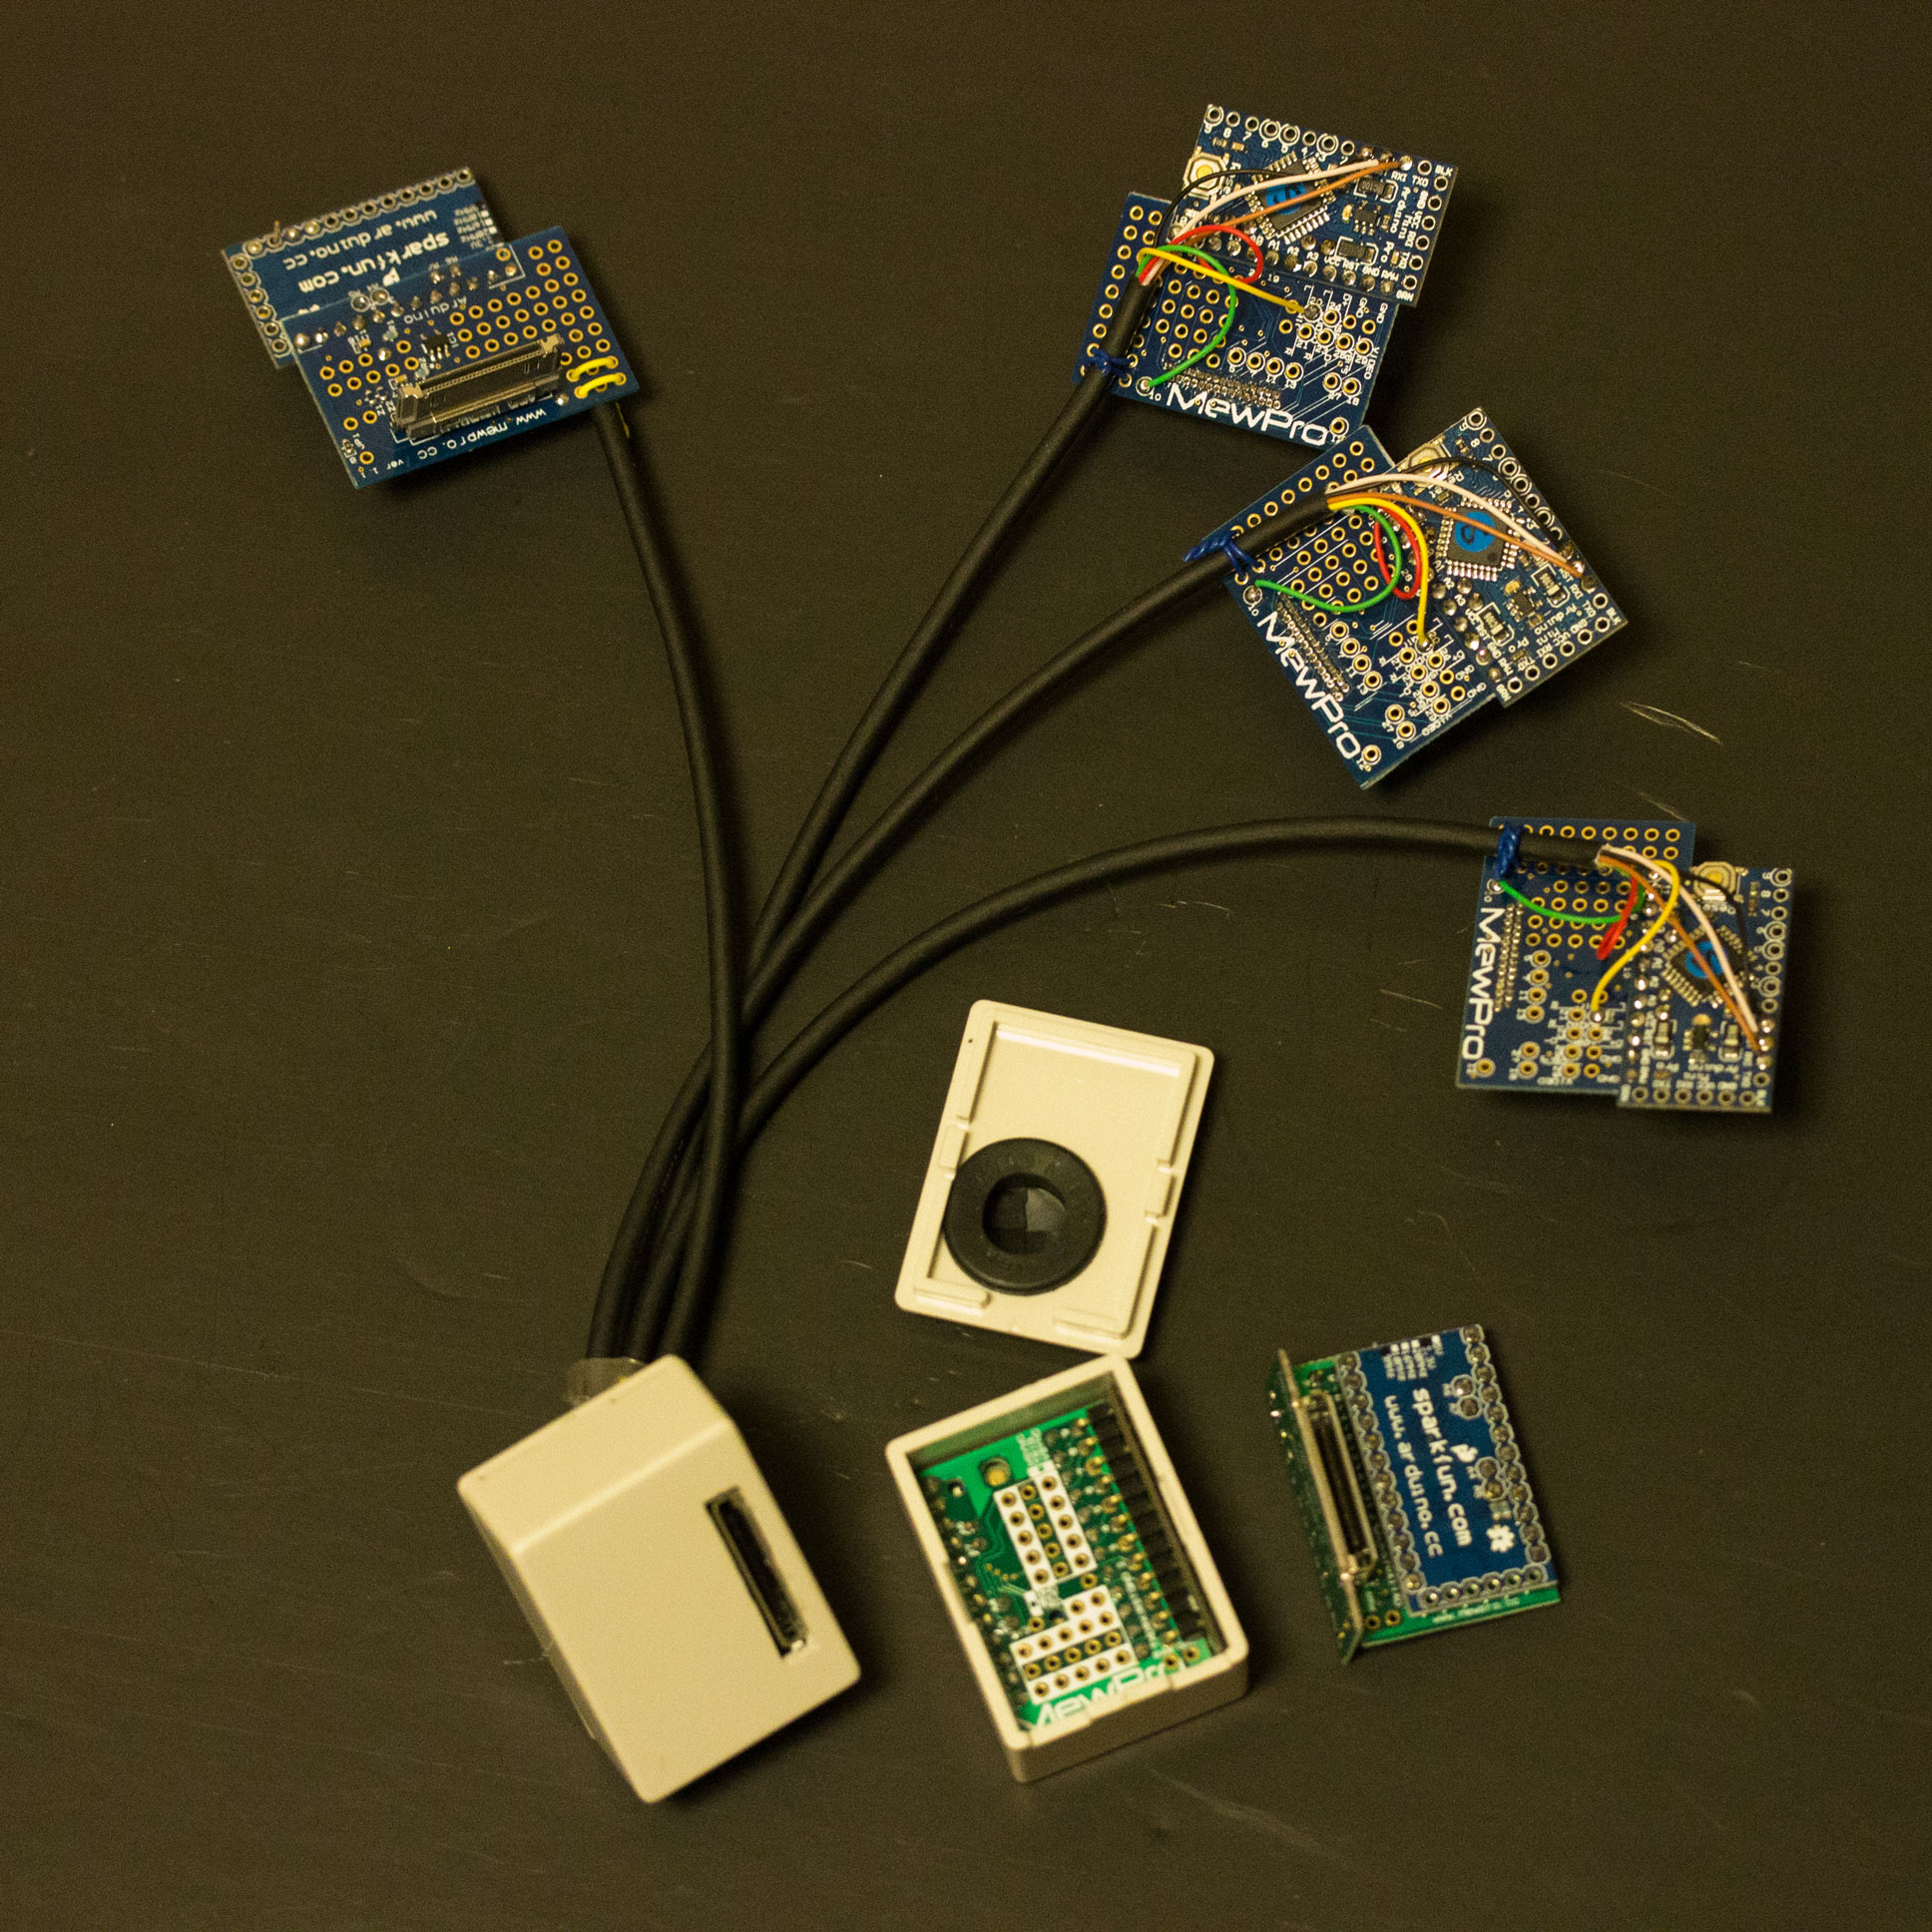
Both of our products have Arduino Pro Mini embedded. So these new pieces of software should be uploaded to the corresponding microprocessor. If you are the first time to burn software to MewPro please also refer our MewPro introduction here.

Step 1 Download the latest source code from GitHub:

Step 2 Launch Arduino IDE (If you don’t have Arduino IDE yet please download/install it from Arduino – Software).

Step 3 Modify the source codes to fit your needs. Especially if you use MewPro with Genlock Dongle the following are required:

  • (MewPro.ino) old: boolean debug = true; -> new: boolean debug = false;
  • (MewPro.ino) old: #undef USE_GENLOCK -> new: #define USE_GENLOCK

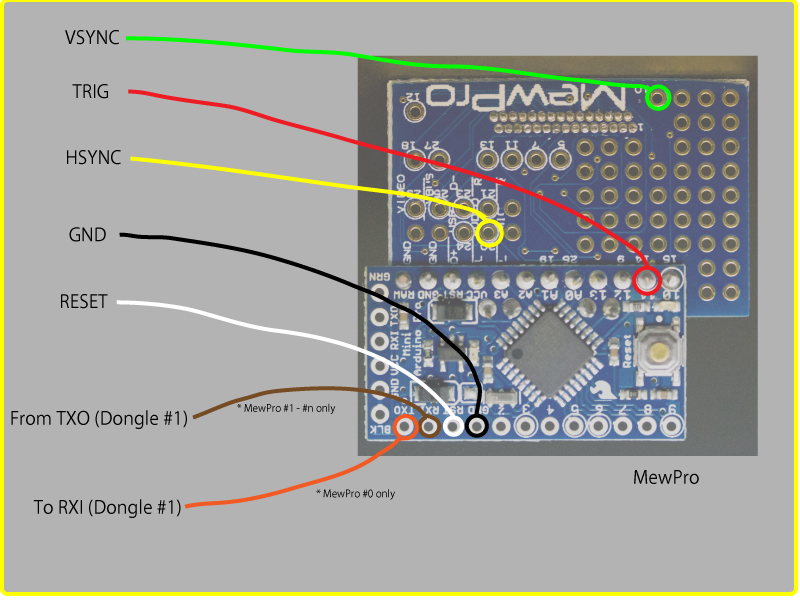
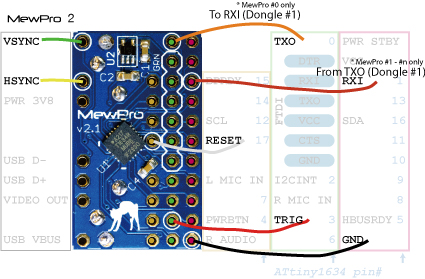
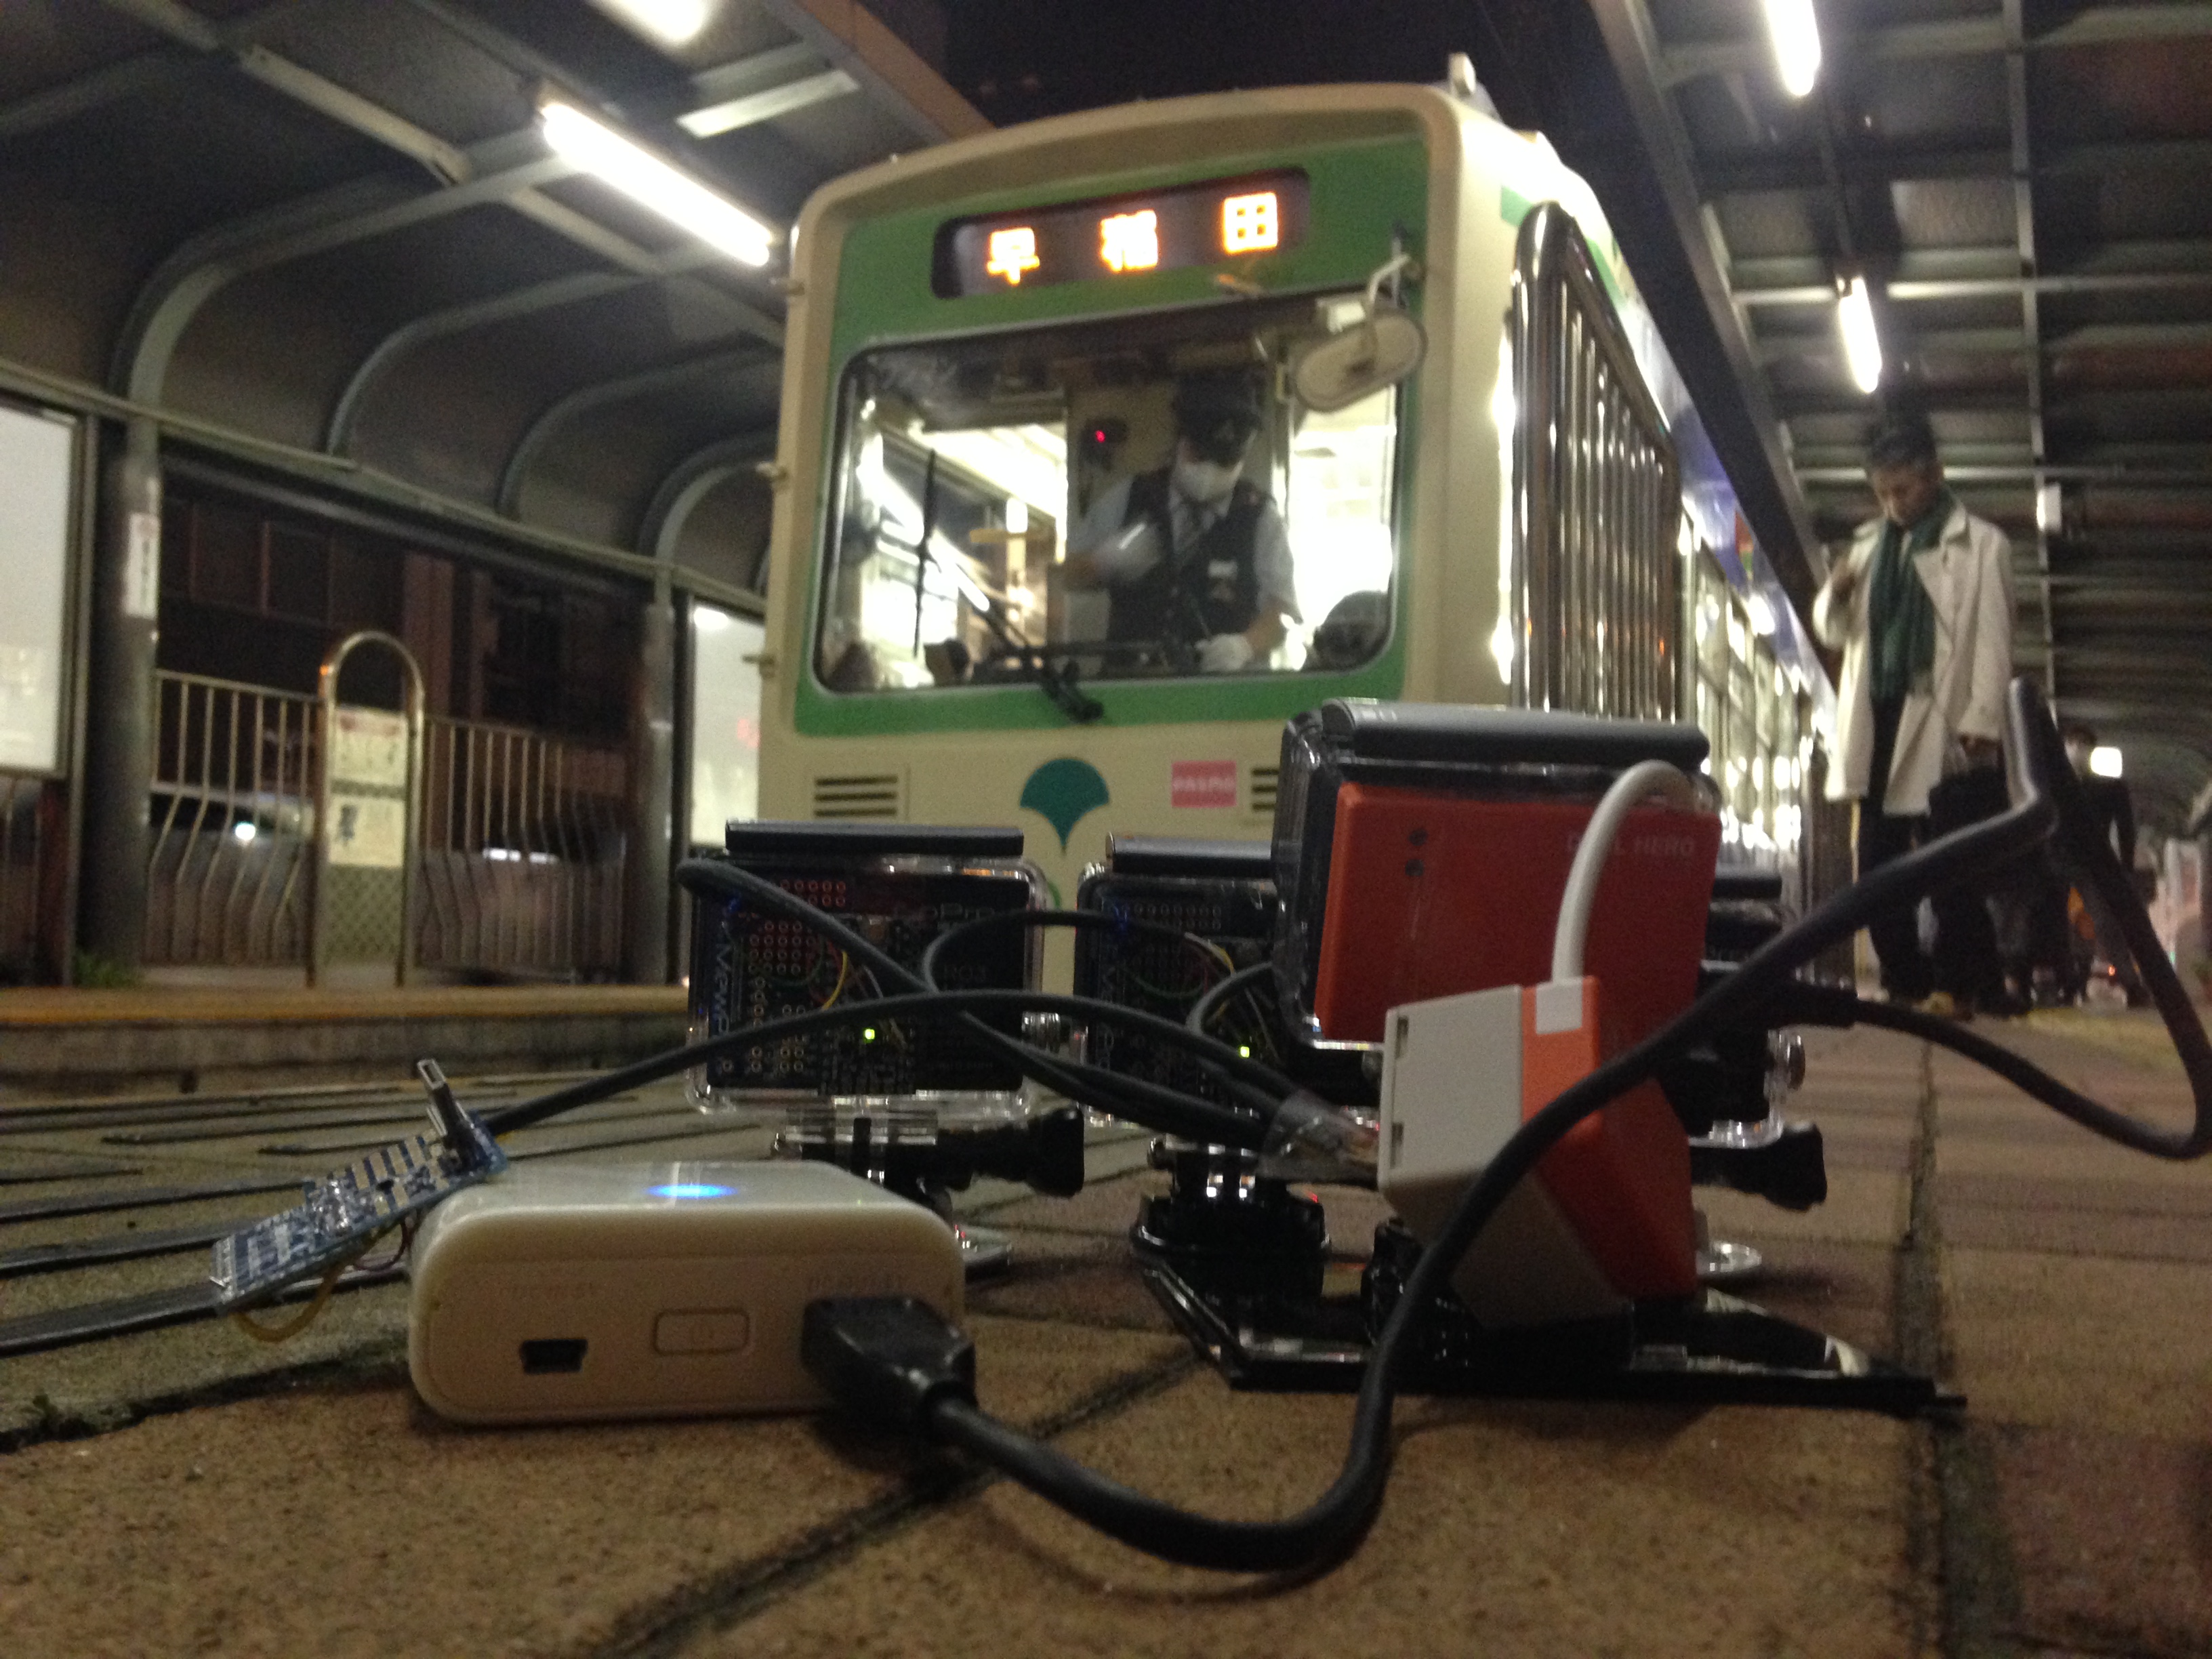
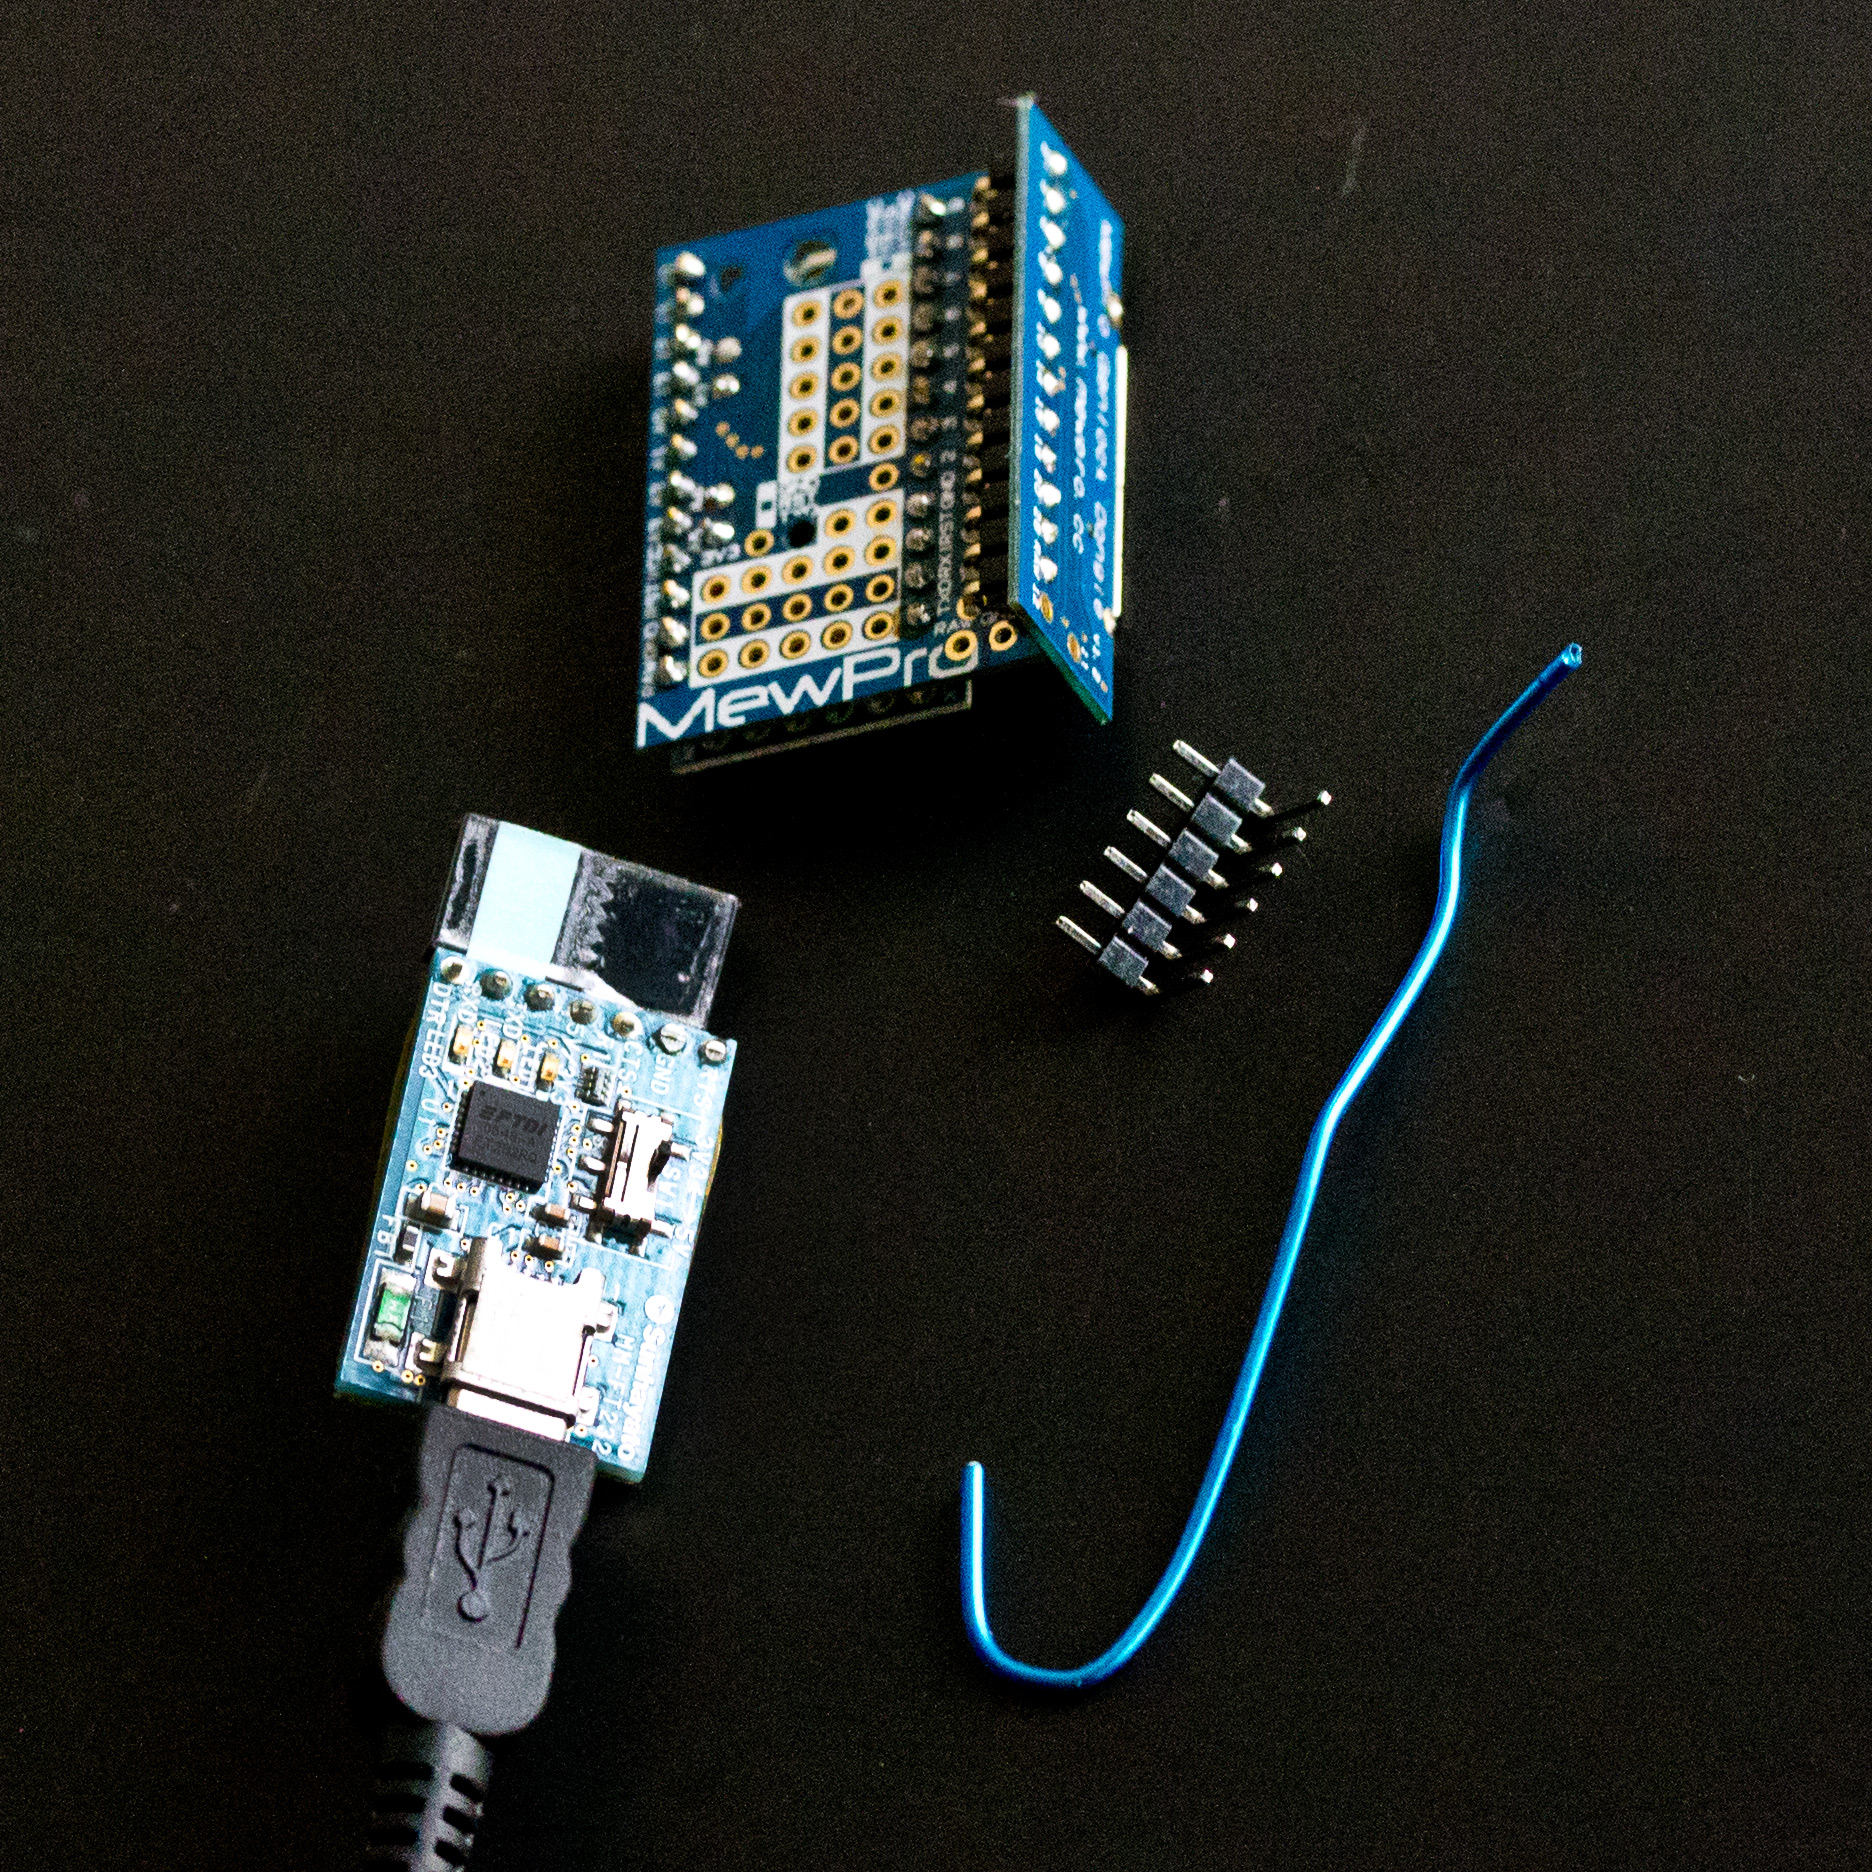
Step 4 Upload the software by using FTDI. To do this it is convenient using a temporary header with MewPro like this
IMG_5942
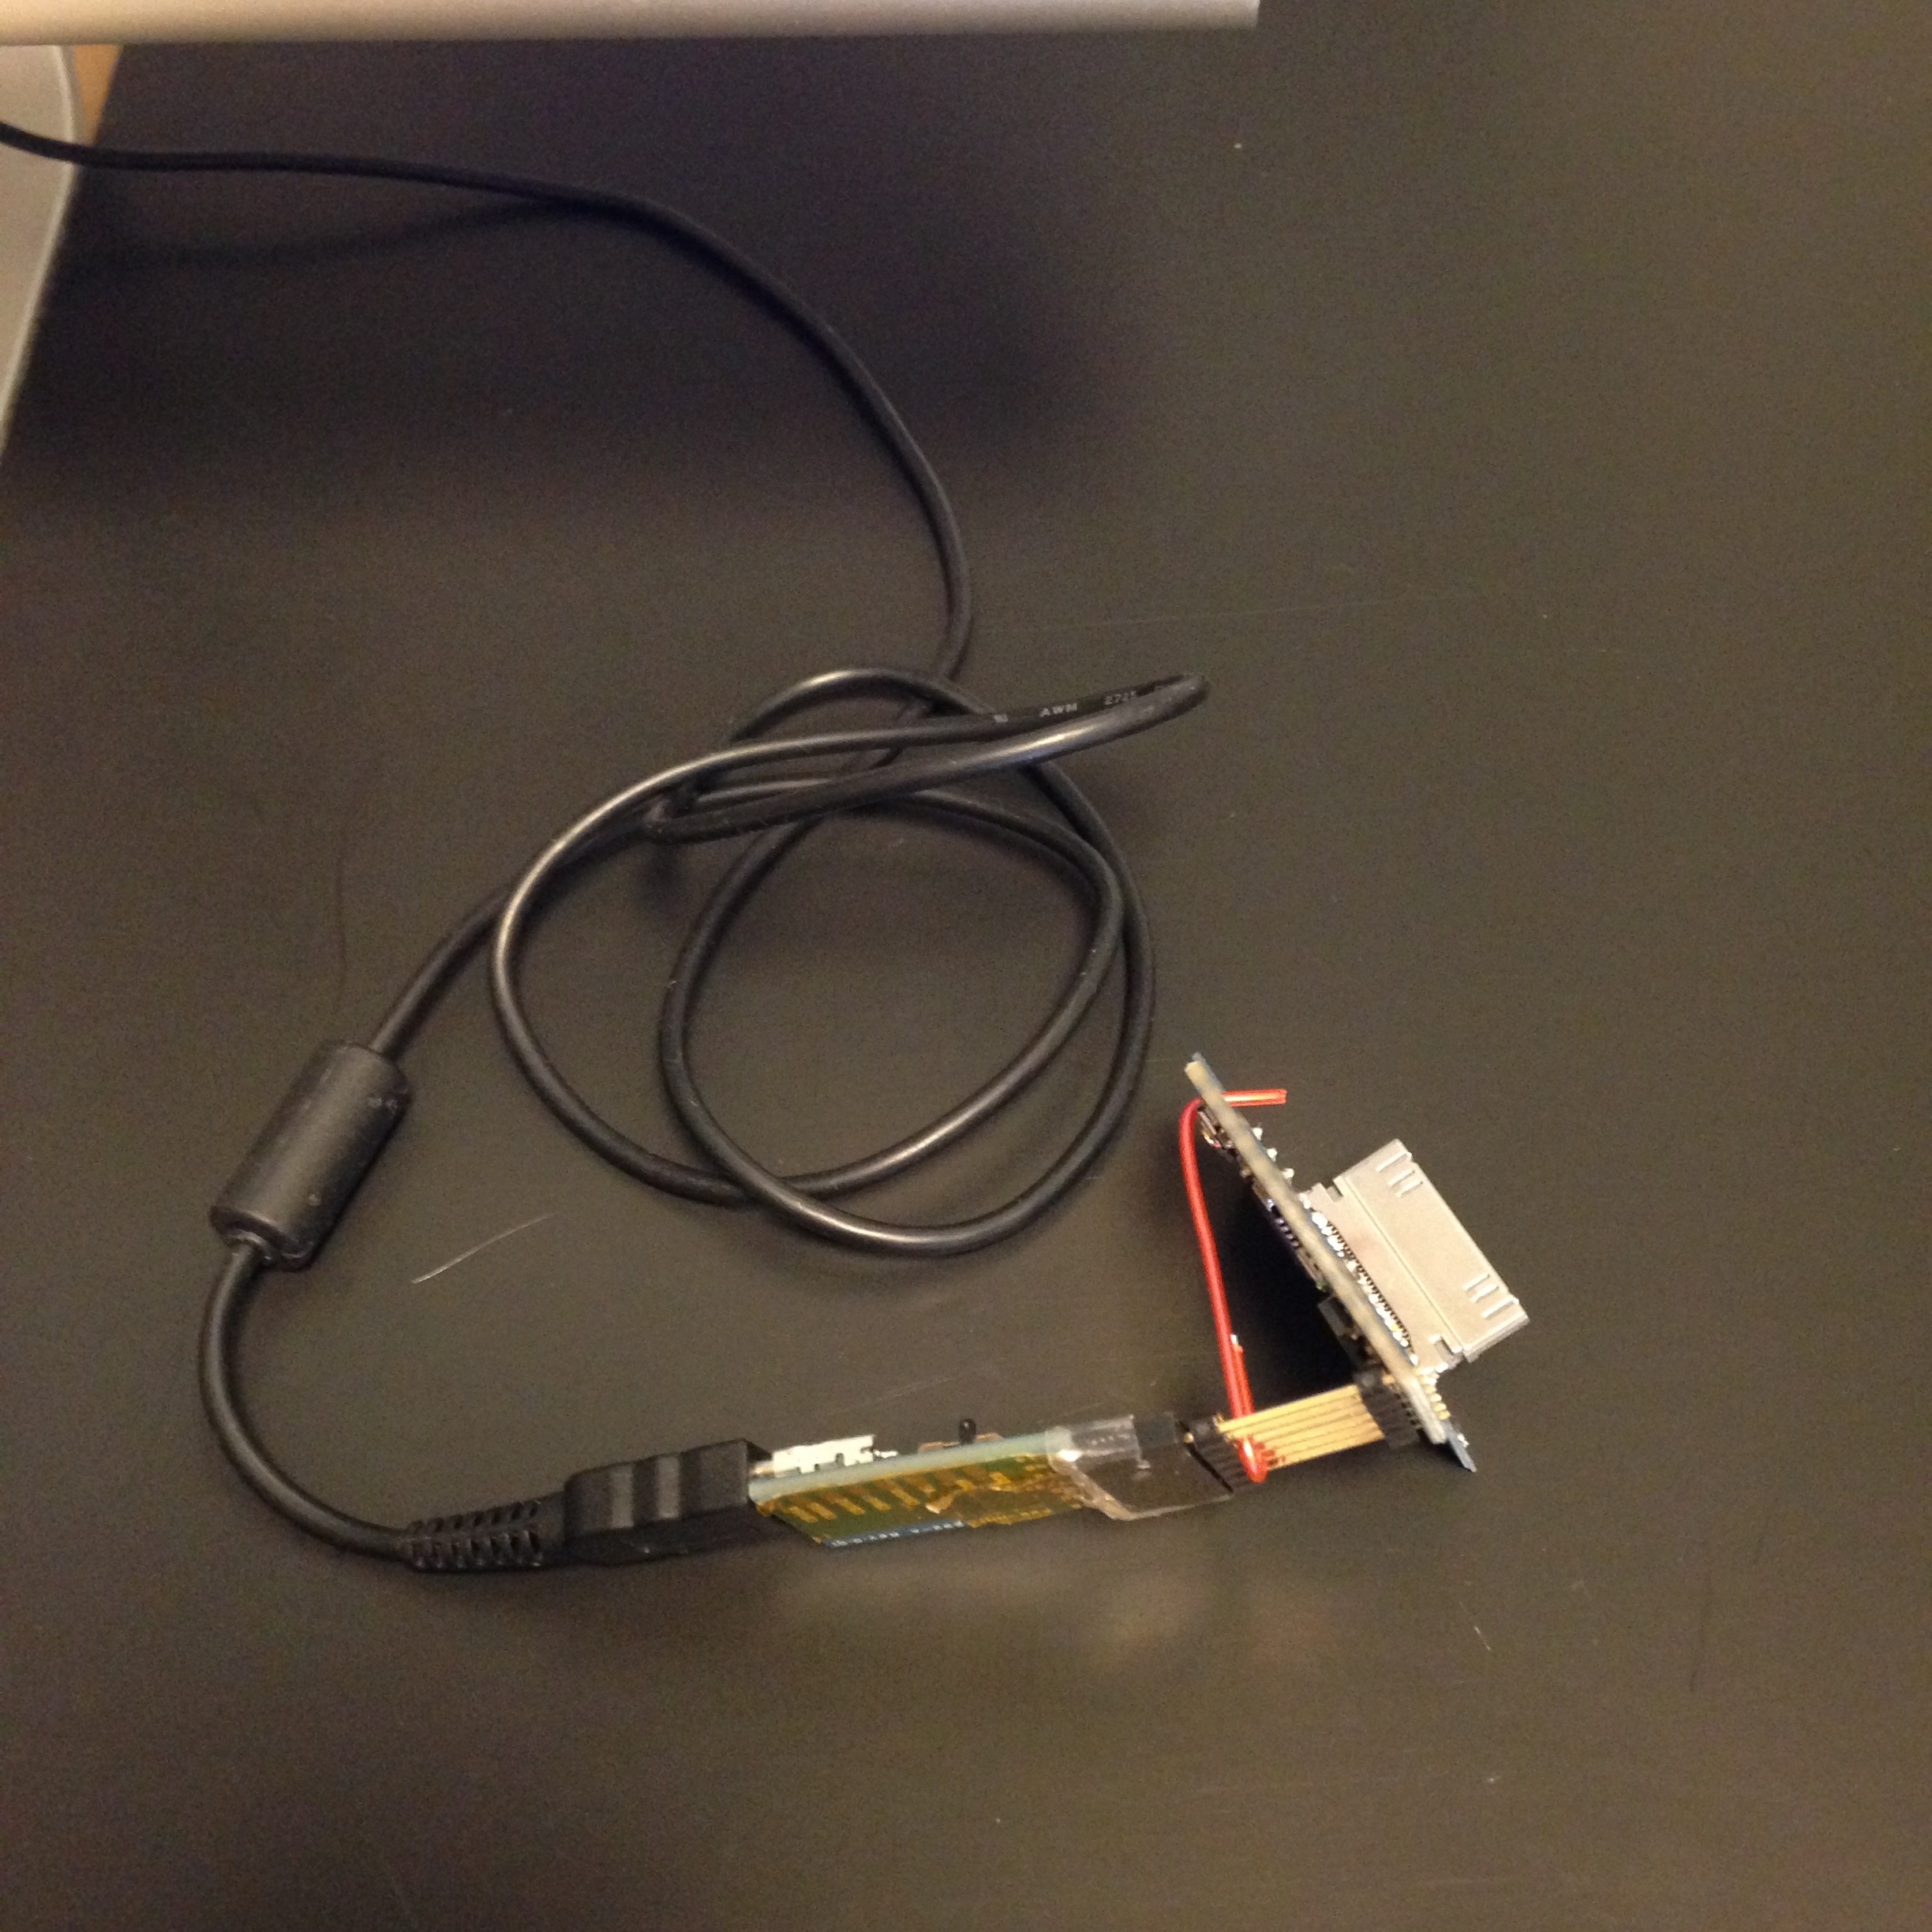
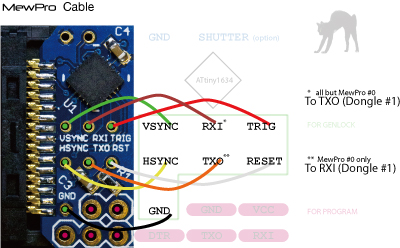
or with Genlock Dongle like this

FTDI, L-shaped pin header, paper clip and Dongle

Using temporary header with Genlock Dongle

Note 1: If your MewPro or Dongle is connected to GoPro camera or Dual Hero please detach it by herobus connector before uploading. This is because Genlock Dongle has wires soldered to UART pins (TXO and RXI) and camera or Dual Hero may interfere with signals between FTDI and MewPro/Dongle.

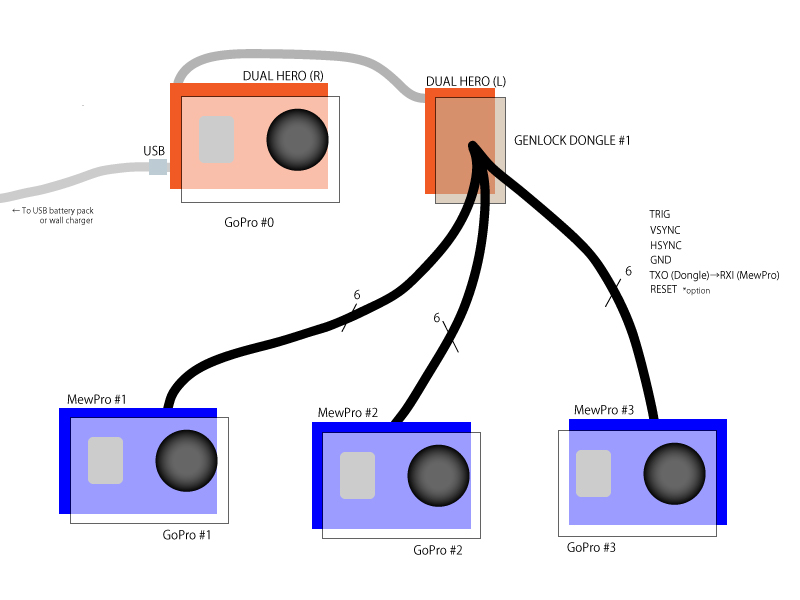
Note 2: MewPro’s EEPROM must be set to “master” if it is used with Genlock Dongle. However, if you buy MewPro (w/ Arduino Pro Mini soldered) with Genlock Dongle from our shop then your EEPROM has already been set to so and you don’t need to touch it.

Remarks

Timelapse of 0.5 seconds or 1 second is not possible if you use Dual Hero System or MewPro. So please set the interval equal to or more than 2 seconds otherwise GoPro will automatically rewrite the setting to 2 seconds when the bacpac is recognized.

Also timelapse of 2 seconds seems unstable if you use Genlock Dongle. So it is safe to set interval more than 2 seconds.

In our experiments on GoPro timelapse mode failings to set one of admissible time interval caused firmware corruptions of GoPro camera. So if timelapse doesn’t work for you we suspect your firwmare also might has been corrupted. In case please re-install GoPro’s firmware again.

Posted on Leave a comment

How To Use MewPro Genlock Dongle

The post is to show you how Genlock Dongle(s) and MewPros work and to explain how to wire them.

Two GoPro Hero 3+ Blacks can record videos/photos in genlock by using Dual Hero System. But more than two it was impossible by now. MewPro Genlock Dongle is a hardware emulator of GoPro camera who communicates with Dual Hero System and steals the required signals, VSYNC and HSYNC, that are generated by Dual Hero System.

How Dongle Works

Here is a demo video of syncing four GoPros. They sync when power on/off, changing modes/settings and shooting.

To make the above video we use the following items:

qty
GoPro Hero 3+ Black n
MewPro n-1
Genlock Dongle 1
USB battery pack 1
Cables and wires

(Note: n is the number of cameras. In our case n=4.)

These items are connected as follows:

Single dongle configuration

  • TRIG: Generated by Dual Hero for start/stop recording
  • VSYNC: Generated by Dual Hero for syncing frames
  • HSYNC: Generated by Dual Hero for syncing scan lines
  • GND: Signal ground
  • UART lines (TXO/RXI) are used by MewPros and Dongle(s) for transferring settings/modes from GoPro #0 to other GoPros (*)
  • RESET line is optional but useful when an error occured. Depressing a reset button on any Arduino Pro Minis will reset all the boards, which has the same effect as detaching/attaching the boards manually

A USB battery pack or wall charger is needed to power the dongle through USB connector of Dual Hero.

* Note: GoPro #0 controls everything: Modes, settings, and start/stop recordings. Commands from GoPro #0 are distributed to other GoPros through UART lines. This transfer is one way without feedback; if another GoPro is busy to do something a message from #0 may be ignored. However, since UART lines are nothing to do with TRIG/VSYNC/HSYNC this unreliability only happens before or after recordings and doesn’t harm video/photo quality.

Alternate Configuration

The above single dongle configuration is normally sufficient and recommended for any new installations of many GoPros in a rig as it needs the minimum number of equipments. But in some cases or already existing rigs following another configuration may be preferred:

qty
GoPro Hero 3+ Black n
MewPro n
Genlock Dongle 2
USB battery pack 1
Cables and wires

(Note: n is the number of cameras. In our case n=4.)

The wiring is as follows:

Double dongle configuration

Advantages of double over single include symmetric wiring (except the UART line between MewPro #0 and Dongle #1) and the less space required on the back of GoPro #0.

Here is the similar demo of the double dongle configuration: Power on, changing modes, shooting, power off.

How To Wire Boards

Both in single and double dongle configurations connections between Dongle #1 and MewPro #i (i=0,1,2,…,n) is summarized as follows:
wiring

It is clear that the only difference on wiring in two configurations is whether MewPro #0 exists or not.

All of these wires need to be soldered by yourself to the boards: Please refer the following pictures.

Wires to Dongle #1
Wires to Dongle #1

Wires to MewPro
Wires to MewPro 1
Wires to MewPro 2
Wires to MewPro 2
Wires of MewPro Cable

(Update:29 Jun 2015, 7 Sep 2015. Added figures for MewPro 2 and MewPro cable boards.)

Remark: We only confirmed the configurations work with four GoPro Hero 3+ Blacks and the wire length less than 30cm. If your number of cameras or length of a wire exceed these limits there is no warranty but there is always hope: Please try shortest lengths of wires as possible!

References To Other Resources

Posted on Leave a comment

Sample Videos by Four H3+B and Genlock Dongle

PCB of Genlock Dongle has arrived for us. Here are example shots by using it.

Tonight I went nearby streetcar station and test the dongle. The equipment is as in the following photo and four GoPro Hero 3+ Blacks.

Genlock Dongle connected to 4 MewPros

(FYI: There are three dongles in the photo above; Connected, box opened, the reverse side.)

I set the cameras on the platform.
IMG_6156

And shoot.


Note: These videos are completely untouched. No editing at all. This is why three videos are upside down. 🙂

Next post of this blog will be the announcement the item being ready for purchase. So stay tuned.