Posted on Leave a comment

Tips on Arduino Console w/ Double Dongles

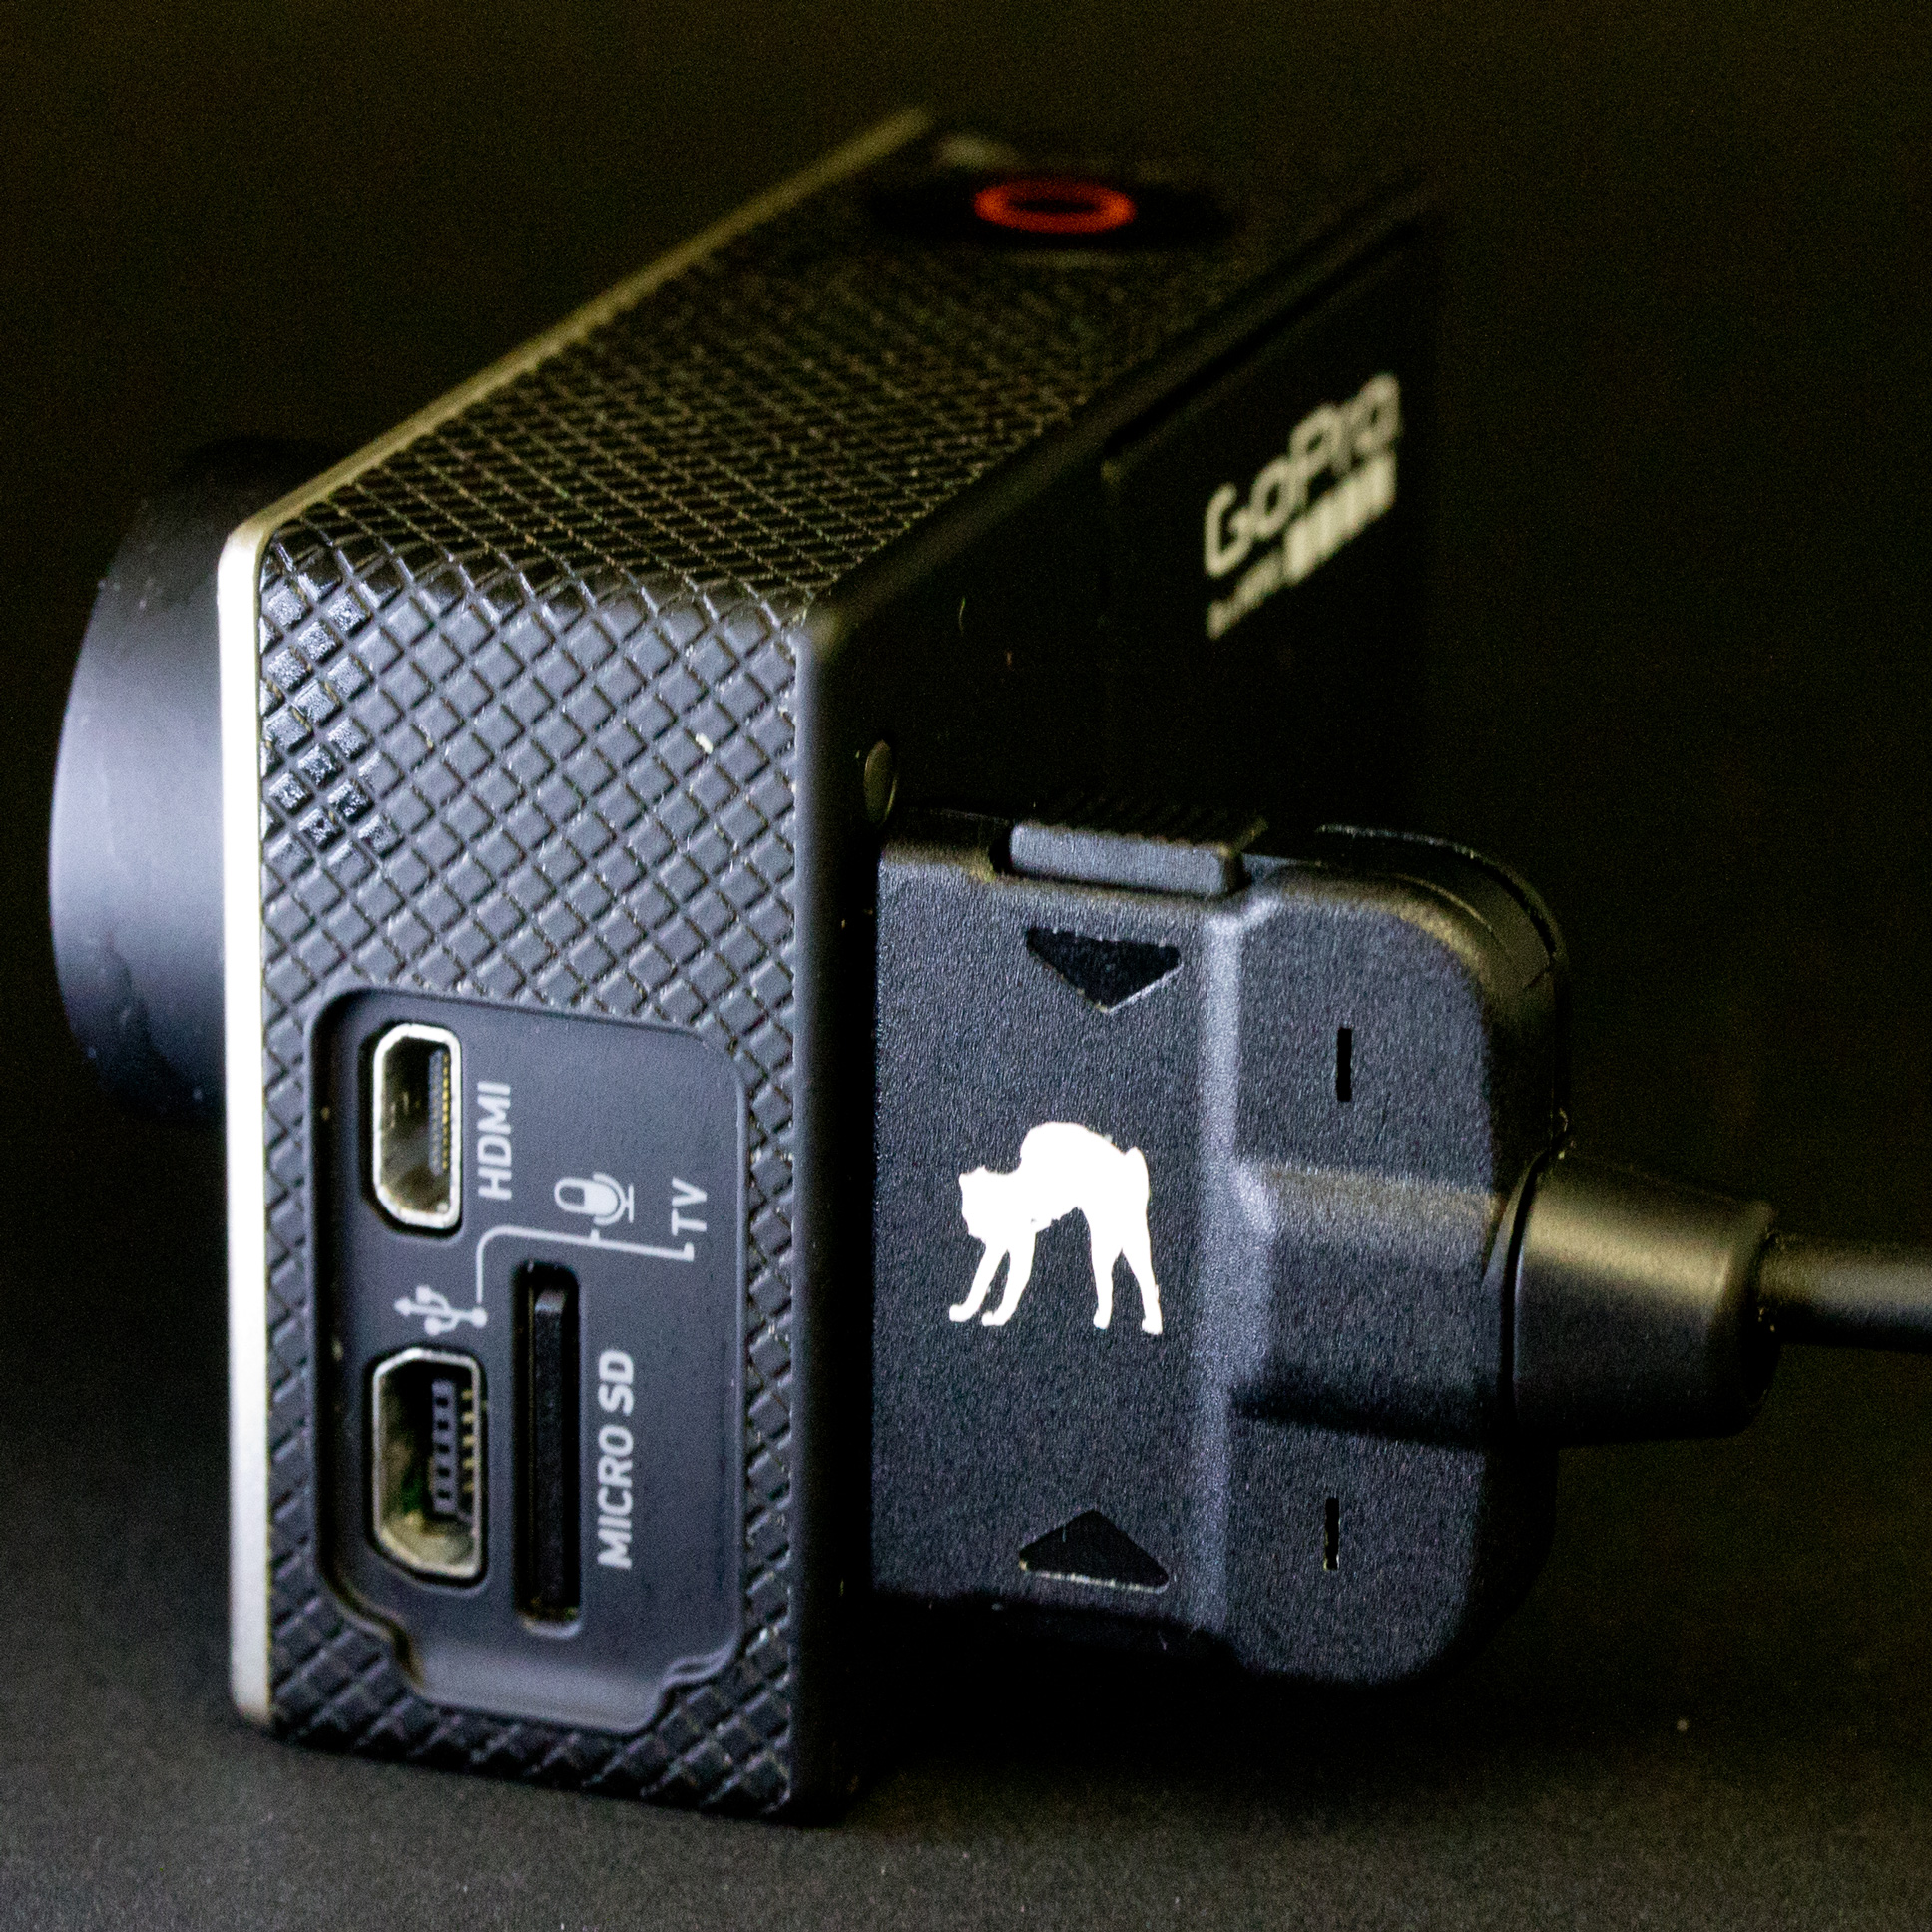
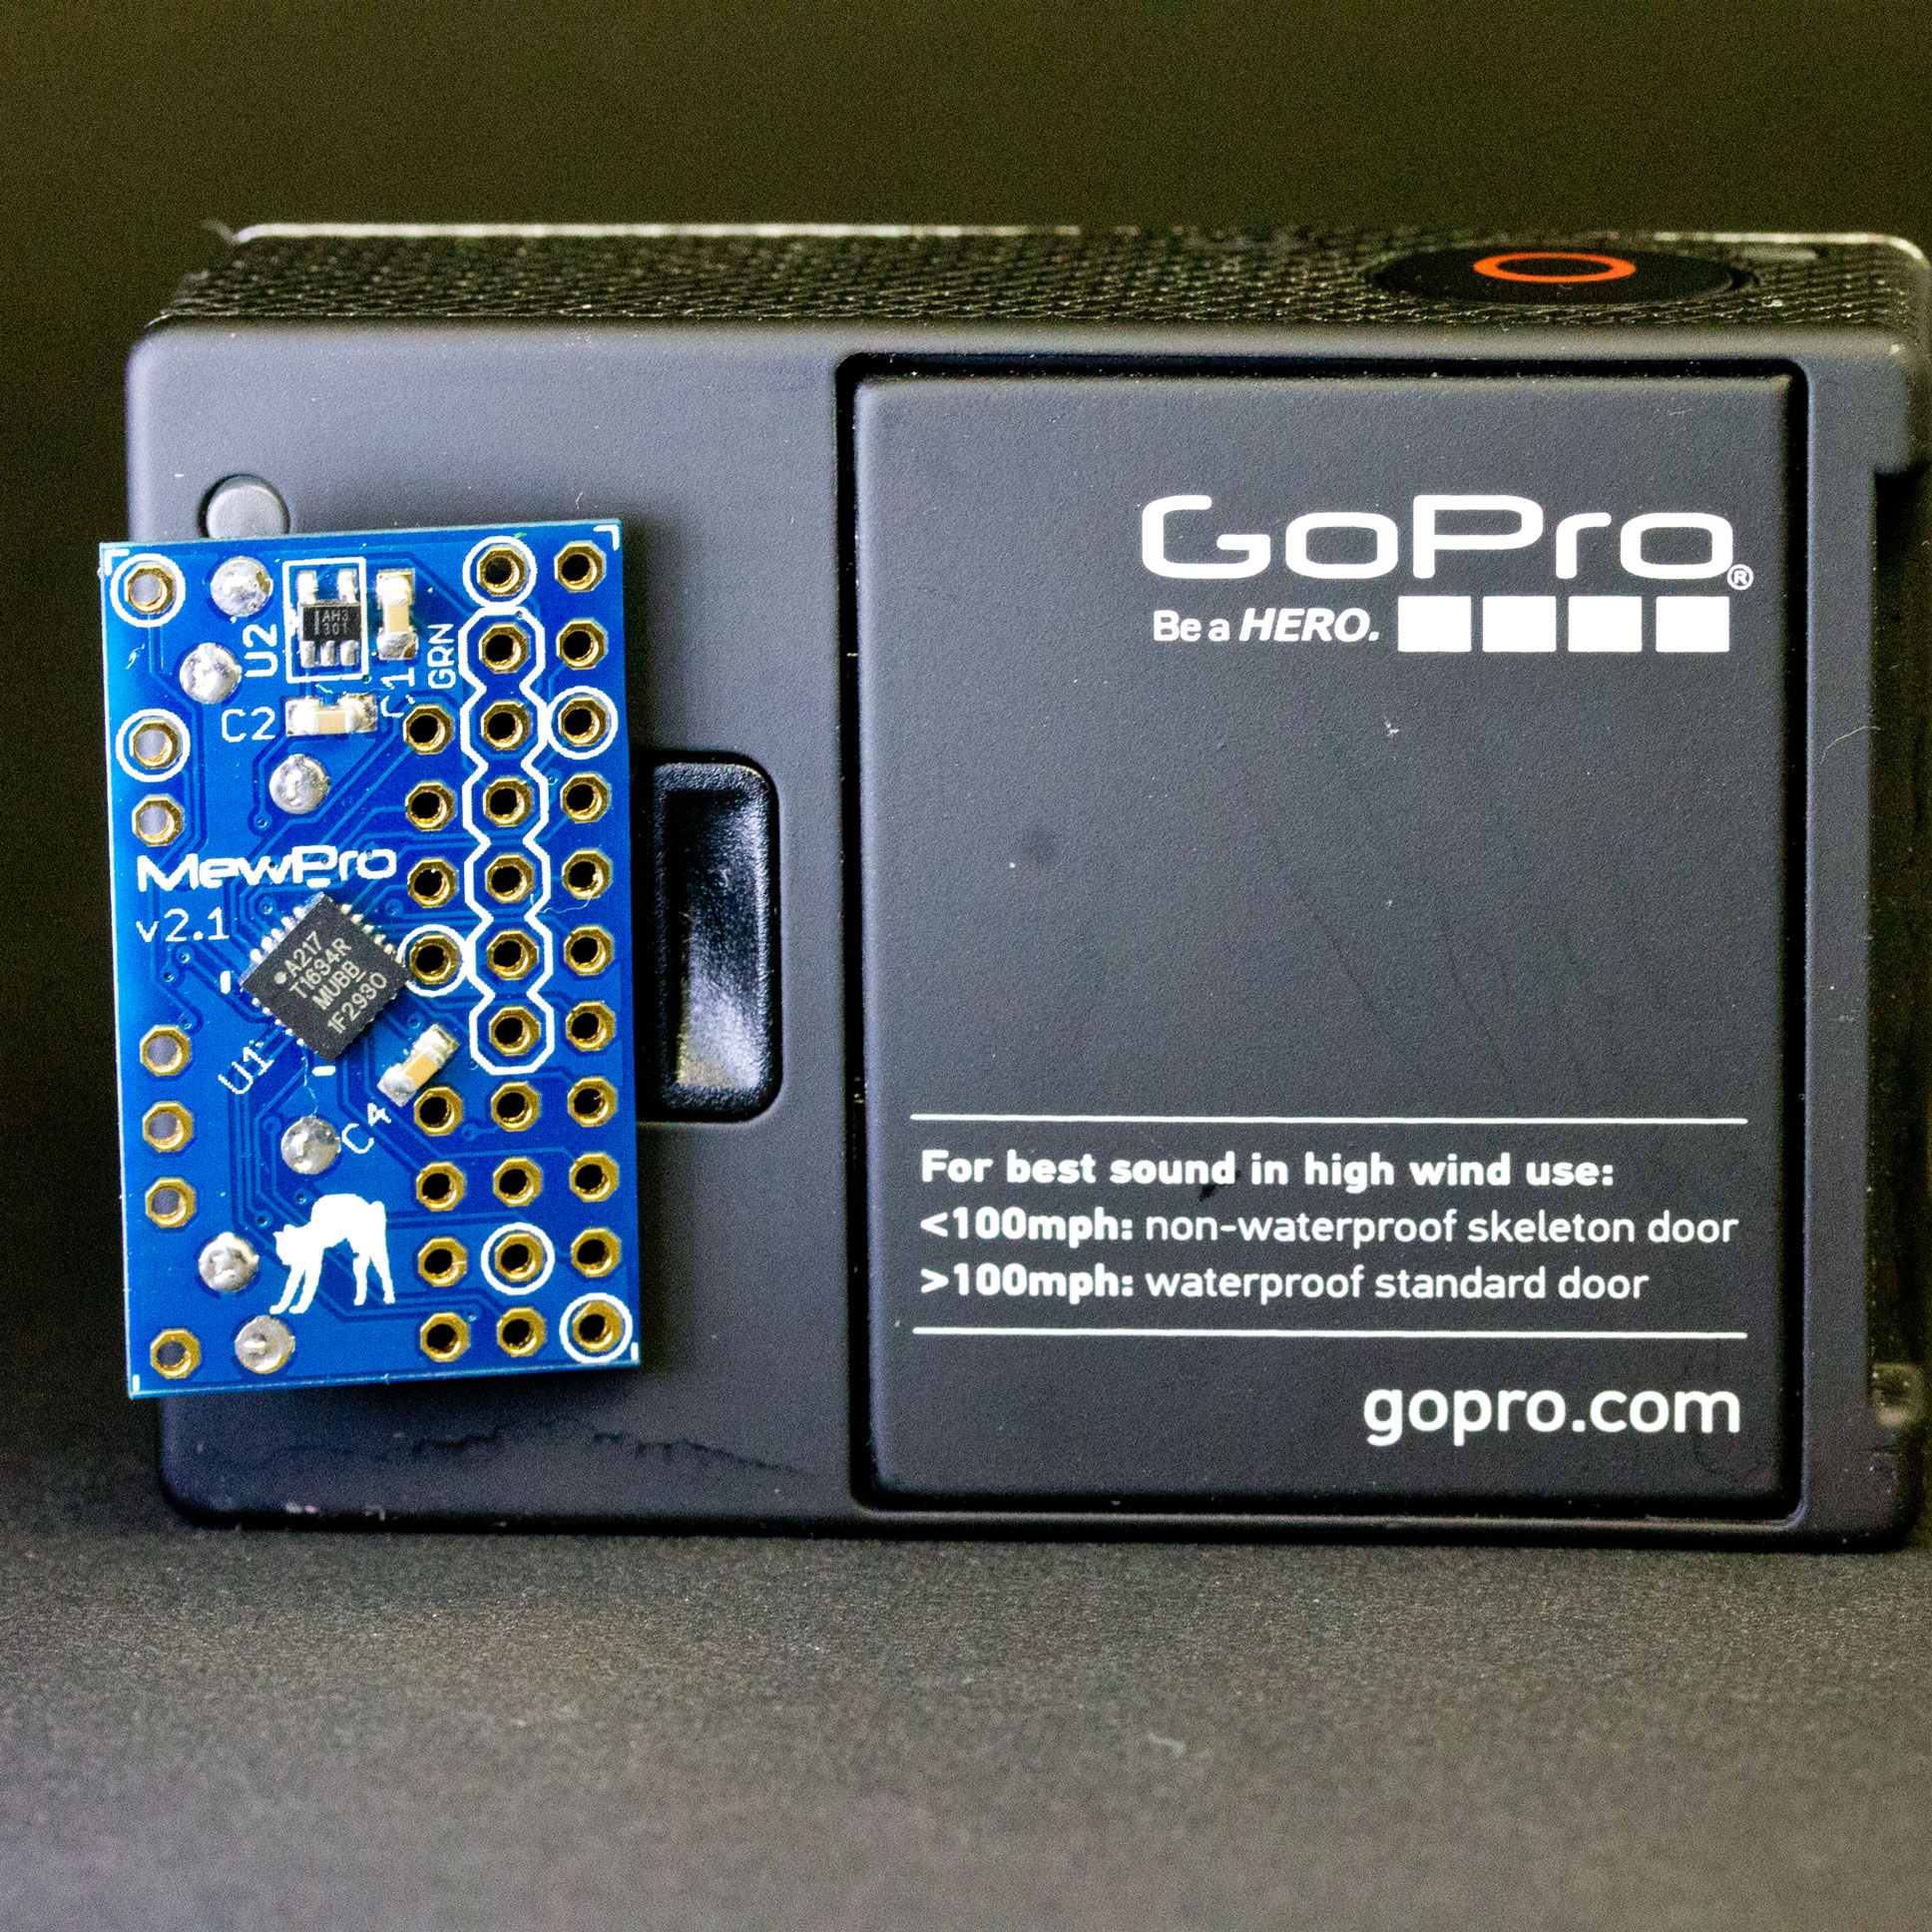
When genlocking in dual dongle configuration a serial terminal such as Arduino IDE’s console can be attached to MewPro #0 that is on the back of GoPro #0 (see top-right of the following figure).

double-config-w-PC

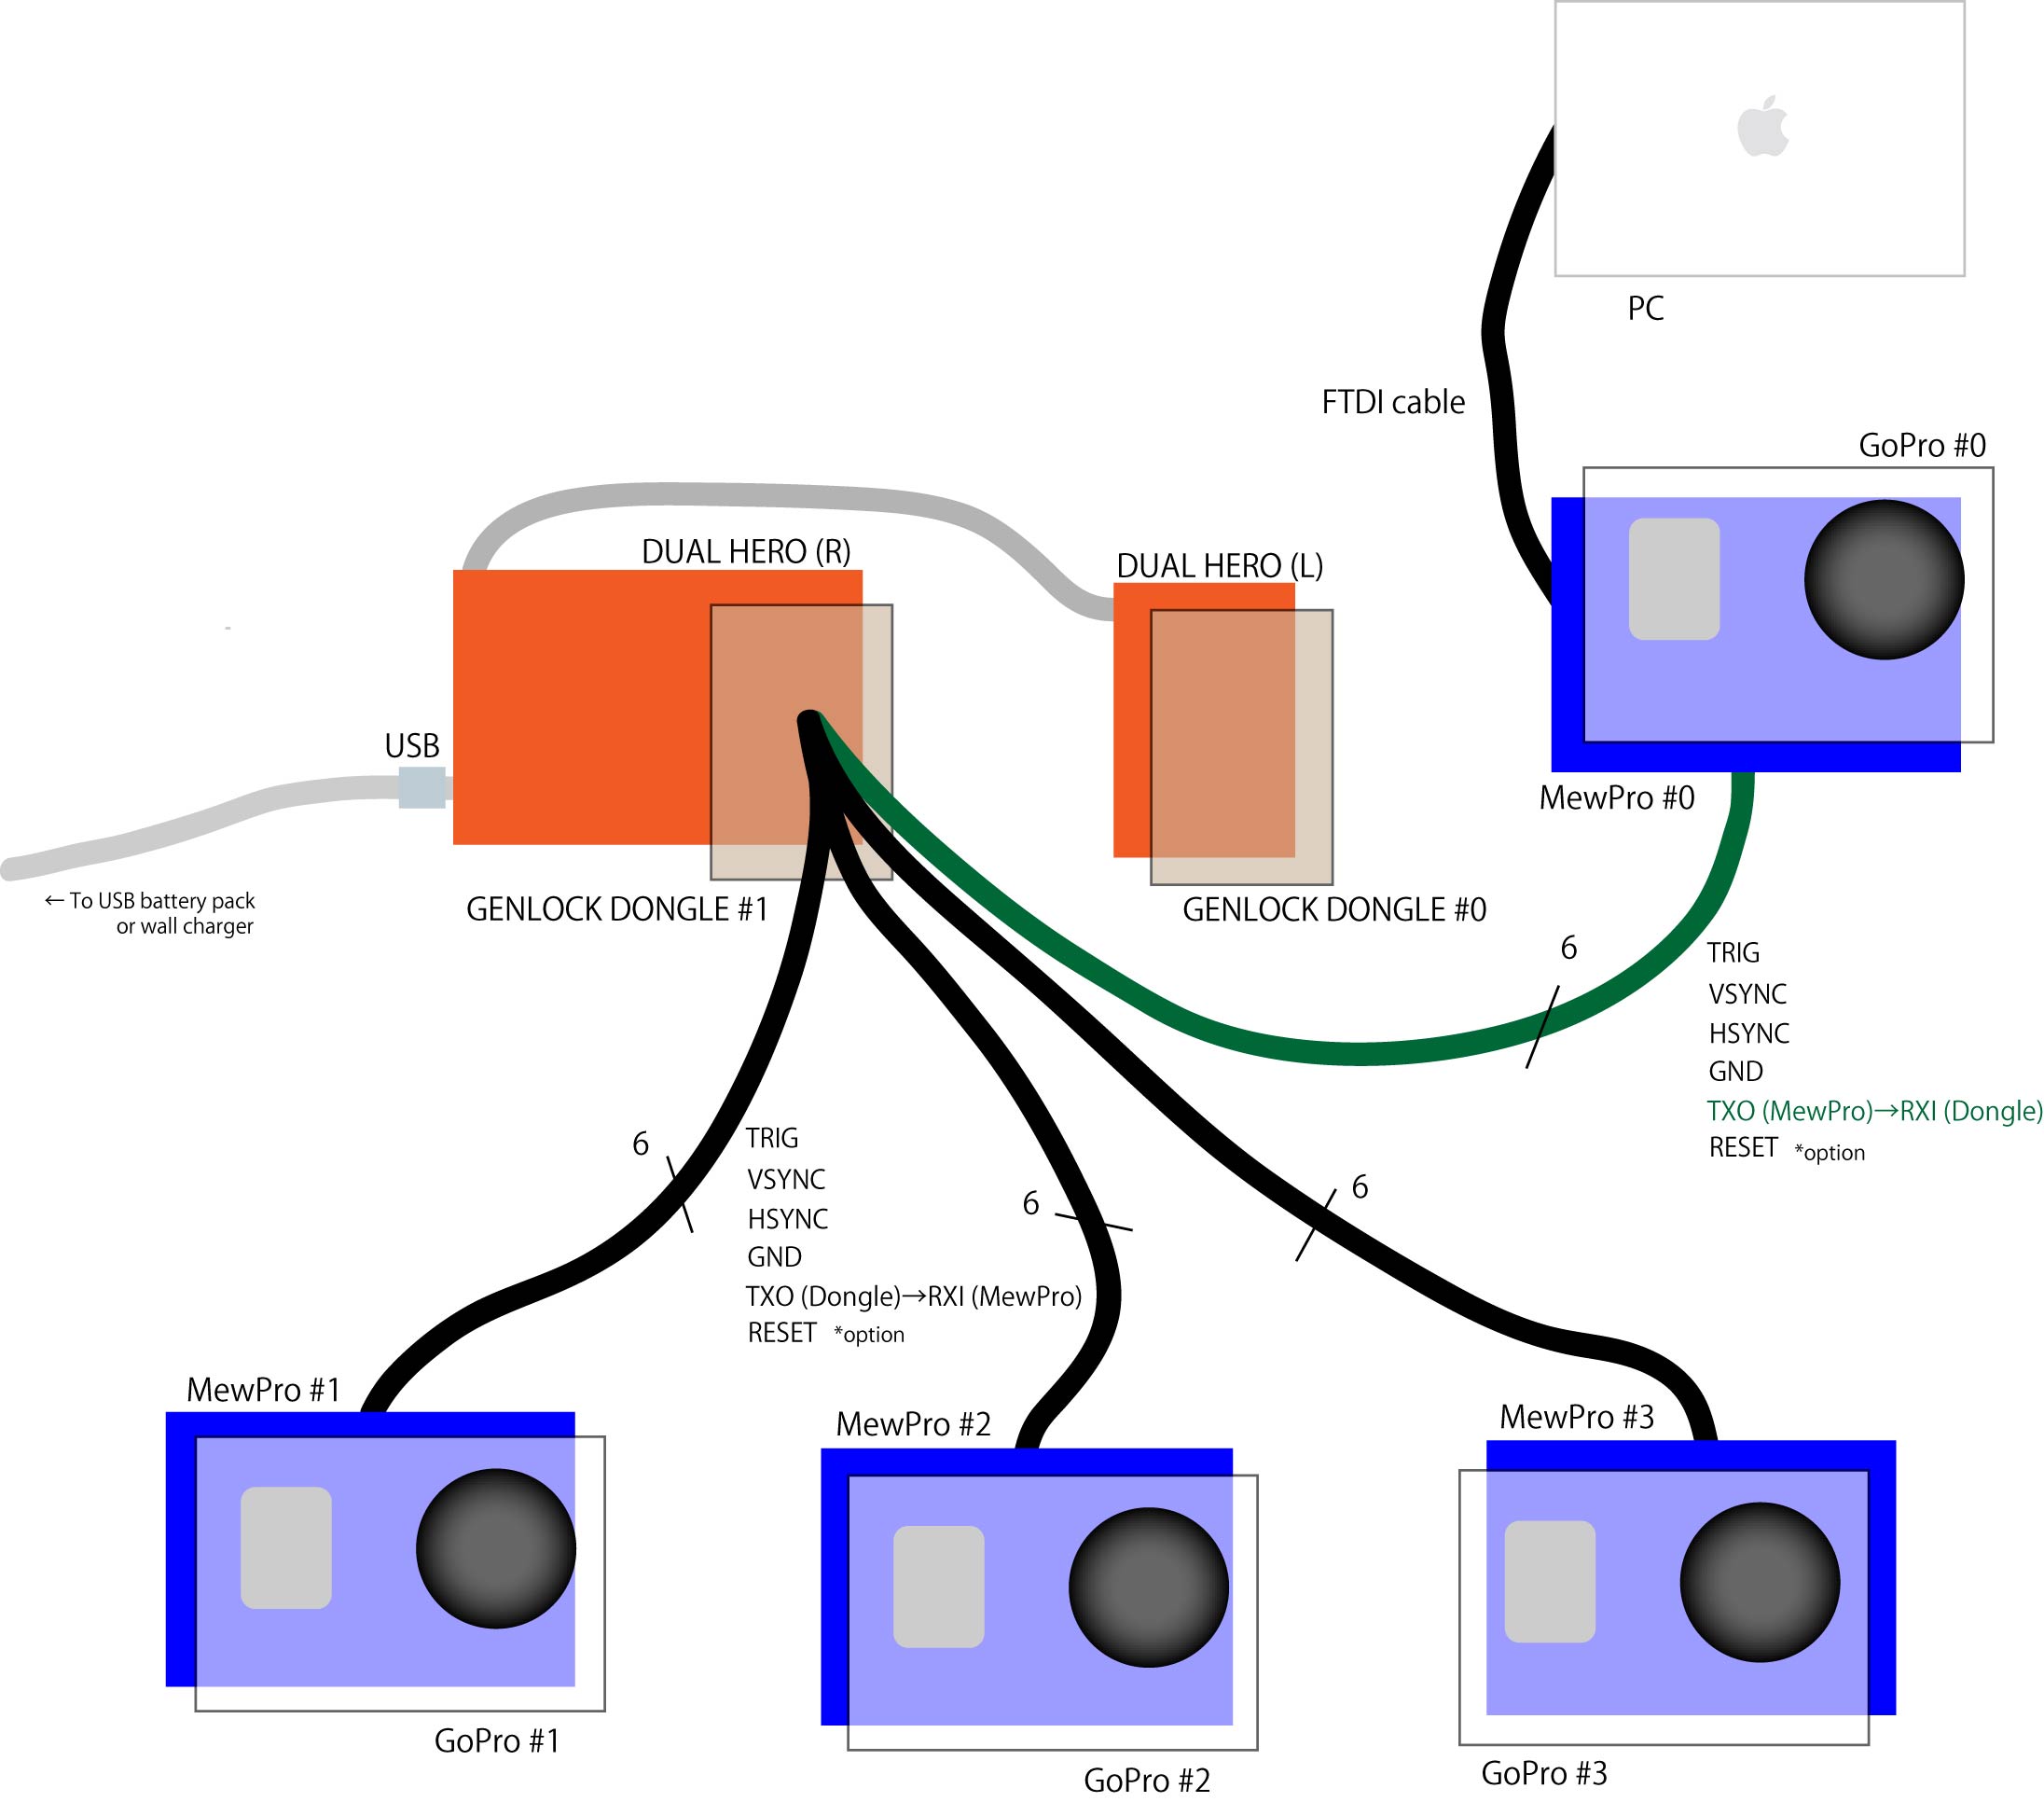
Any sensors or switches can be also installed to the board and they will work for starting/stopping of all cameras.

Note: In single dongle configuration the controlling GoPro #0 has no MewPro board attached. So the method described in this post is not relevant.

Tips on Arduino Console

  1. Output displayed in console is nothing but I2C command sent to Dual Hero Bacpac.
  2. Console settings are: baud [57600], enter key emulation [Newline].
  3. Compile MewPro with #undef UART_RECEIVER_DISABLE (this is the default).
  4. The I2C command you type in is not displayed at all but don’t worry it is surely sent to GoPro #0.
  5. To start recording type “SY1”. This will start all cameras.
  6. To stop recording type “SY0”. This will stop all cameras.
  7. Power on/off all cameras is done by “@” and “PW0”, respectively.
  8. Change mode command “CM” and so on works only for GoPro #0.
    In order to distribute the changes to other cameras, type “td”.
  9. “UM” command is special. The command is not sent to Dual Hero Bacpac but sent to all cameras.
Posted on Leave a comment

MewPro Cable and MewPro 2

Two new products, MewPro Cable for genlocking GoPro and MewPro 2 for general purposes are available in our shop.

MewPro Cable

cable-1
MewPro Cable is designed for genlocking GoPro Hero 3+ Black cameras. It has a microcontroller ATtiny1634 inside the plug enclosure and controls camera into 3D capture mode as easy as just plug the connector into Herobus socket. For genlock purpose it is interchangeable to our previous product “MewPro 1 w/ SMD parts, Herobus connector and Arduino Pro Mini compatible (soldered)”.

As there were many requests from our customers that if there were a plug-and-play genlock solution, now we sell bare plugs as well as fully assembled/soldered, plug-and-play packs with cables and Dongle(s). But we should say soldering a lot of wires to small plugs and dongle is extremely weary task. So if you order a plug-and-play pack please allow us minimum of 4 days before ship.

Product page: MewPro Cable

An article, introduction to MewPro Cable is to appear soon.

MewPro 2

mew2-1
MewPro 2 uses the microcontroller ATtiny1634 and is a redesigned version of MewPro 1 that used in conjunction with Arduino Pro Mini. All signals of Herobus and the microprocessor are broken out to 2.54mm pitch pins for hand-soldering convenience. ATtiny1634 can act as complete I2C slave, hence the new board comes without I2C EEPROM that is emulated.

Product page: MewPro 2

An article, introduction to MewPro 2 is to appear soon.

Compare MewPro Specs

The following is the comparison table of our MewPro line of products:

Posted on Leave a comment

MewPro in Jǐnán China

MewPros to synchronize a 40-camera motion capture system for studying bats during flight, Hunter McClelland (hgm at vt dot edu) a researcher working with Shāndōng University, Jǐnán, China, and Virginia Tech University told us today.

The following photos are courtesy of Hunter McClelland, Dr. Rolf Mueller (project leader), Matt Bender (senior code developer) and the team of researchers:

Many GoPros with MewPro
Dual Hero and Genlock Dongles
Flight tunnel
Flight tunnel
Soldering wires to MewPros and Dongles...
Soldering SMD parts and wires to MewPros and Dongles…

We are very glad to hear about this kind of user reports. 🙂

Bug Reports

The above team of researchers also found some issues in MewPro+Dongle system including:

A) start-frame error, i.e. cameras begin frame 1 of their videos at different starting times.
This turned out to be a bug in Genlock Dongle code and should be fixed now.
B) inner-frame delay, i.e. cameras are not taking pictures at exactly the same time.
To genlock every scan line must nearly attain image sensor’s performance limit. So we don’t think this is a bug in our system and/or signaling.

These kind of bug reports are also welcome as MewPro is an open source project.

Posted on Leave a comment

FTDI USB TTL Serial Cables and MewPro

Today I experienced failure in uploading software to MewPro/Dongle using a newly purchased FTDI TTL-232R-3V3 cable. The post notes the issue caused by these bad cables and proposes a DIY remedy.

The Issue

In order to upload a sketch or software from PC to Arduino Pro Mini, a kind of cables (or breakout boards) to convert USB to TTL serial is required.

Most popular one for this purpose among hobbyists is, I think, SparkFun FTDI Basic Breakout because the designer company is the same and Pro Mini’s pins are ordered for the breakout board. And also there are a lot of pin-compatible clones, for example, Sanhayato MM-FT232 (in Japan only), FT232RL USB to Serial 232 TTL Adapter Module for Funduino, and so on.

FTDI USB TTL Serial Cable TTL-232R-3V3, which I bought, is one of these. However, it caused the following problem:

Suppose MewPros and Dongle are already connected by wires. Then uploading of a sketch always fails even if all the GoPros and Dual Hero bacpac were detached.

The very same USB TTL cable doesn’t fail when no wires are soldered to MewPro or Dongle.
Contrary to this, SparkFun’s breakout board always succeed in uploading even when all the wires are soldered to MewPros and Dongle.

DIY remedy

According to the datasheet the troubled USB TTL cable has current limiting resistors on TXD and RTS# signal lines (cf. datasheet p.21 Figure 8.1. The value of resistors is 270 ohm in this case). These are the culprit! Let’s remove them!!

Step 1: Cut open USB Connector. I used a ultrasonic cutter to do this.
cut-open
Our targets are the resistors marked R1 and/or R2.

Step 2: To remove R1 and R2 two soldering irons were heated. I pinched and removed them.
remove-resistor

Step 3: Soldered two zero ohm jumpers in their places. If you don’t have zero ohm jumpers in your toolbox then solder bridging will do the same job.
zero-ohm

Modification completed. Confirmed, the cable can now upload sketches to Arduino in any case with no problems. 🙂

Conclusion

Some USB TTL serial cable/breakout has current limiting resistors inside. They sometimes cause failure in uploading software to Arduino especially when other Arduinos are connected by wires. If the issue occurs then removing/bridging these resistors will be the solution.