Posted on Leave a comment

MewPro 2 in Germany

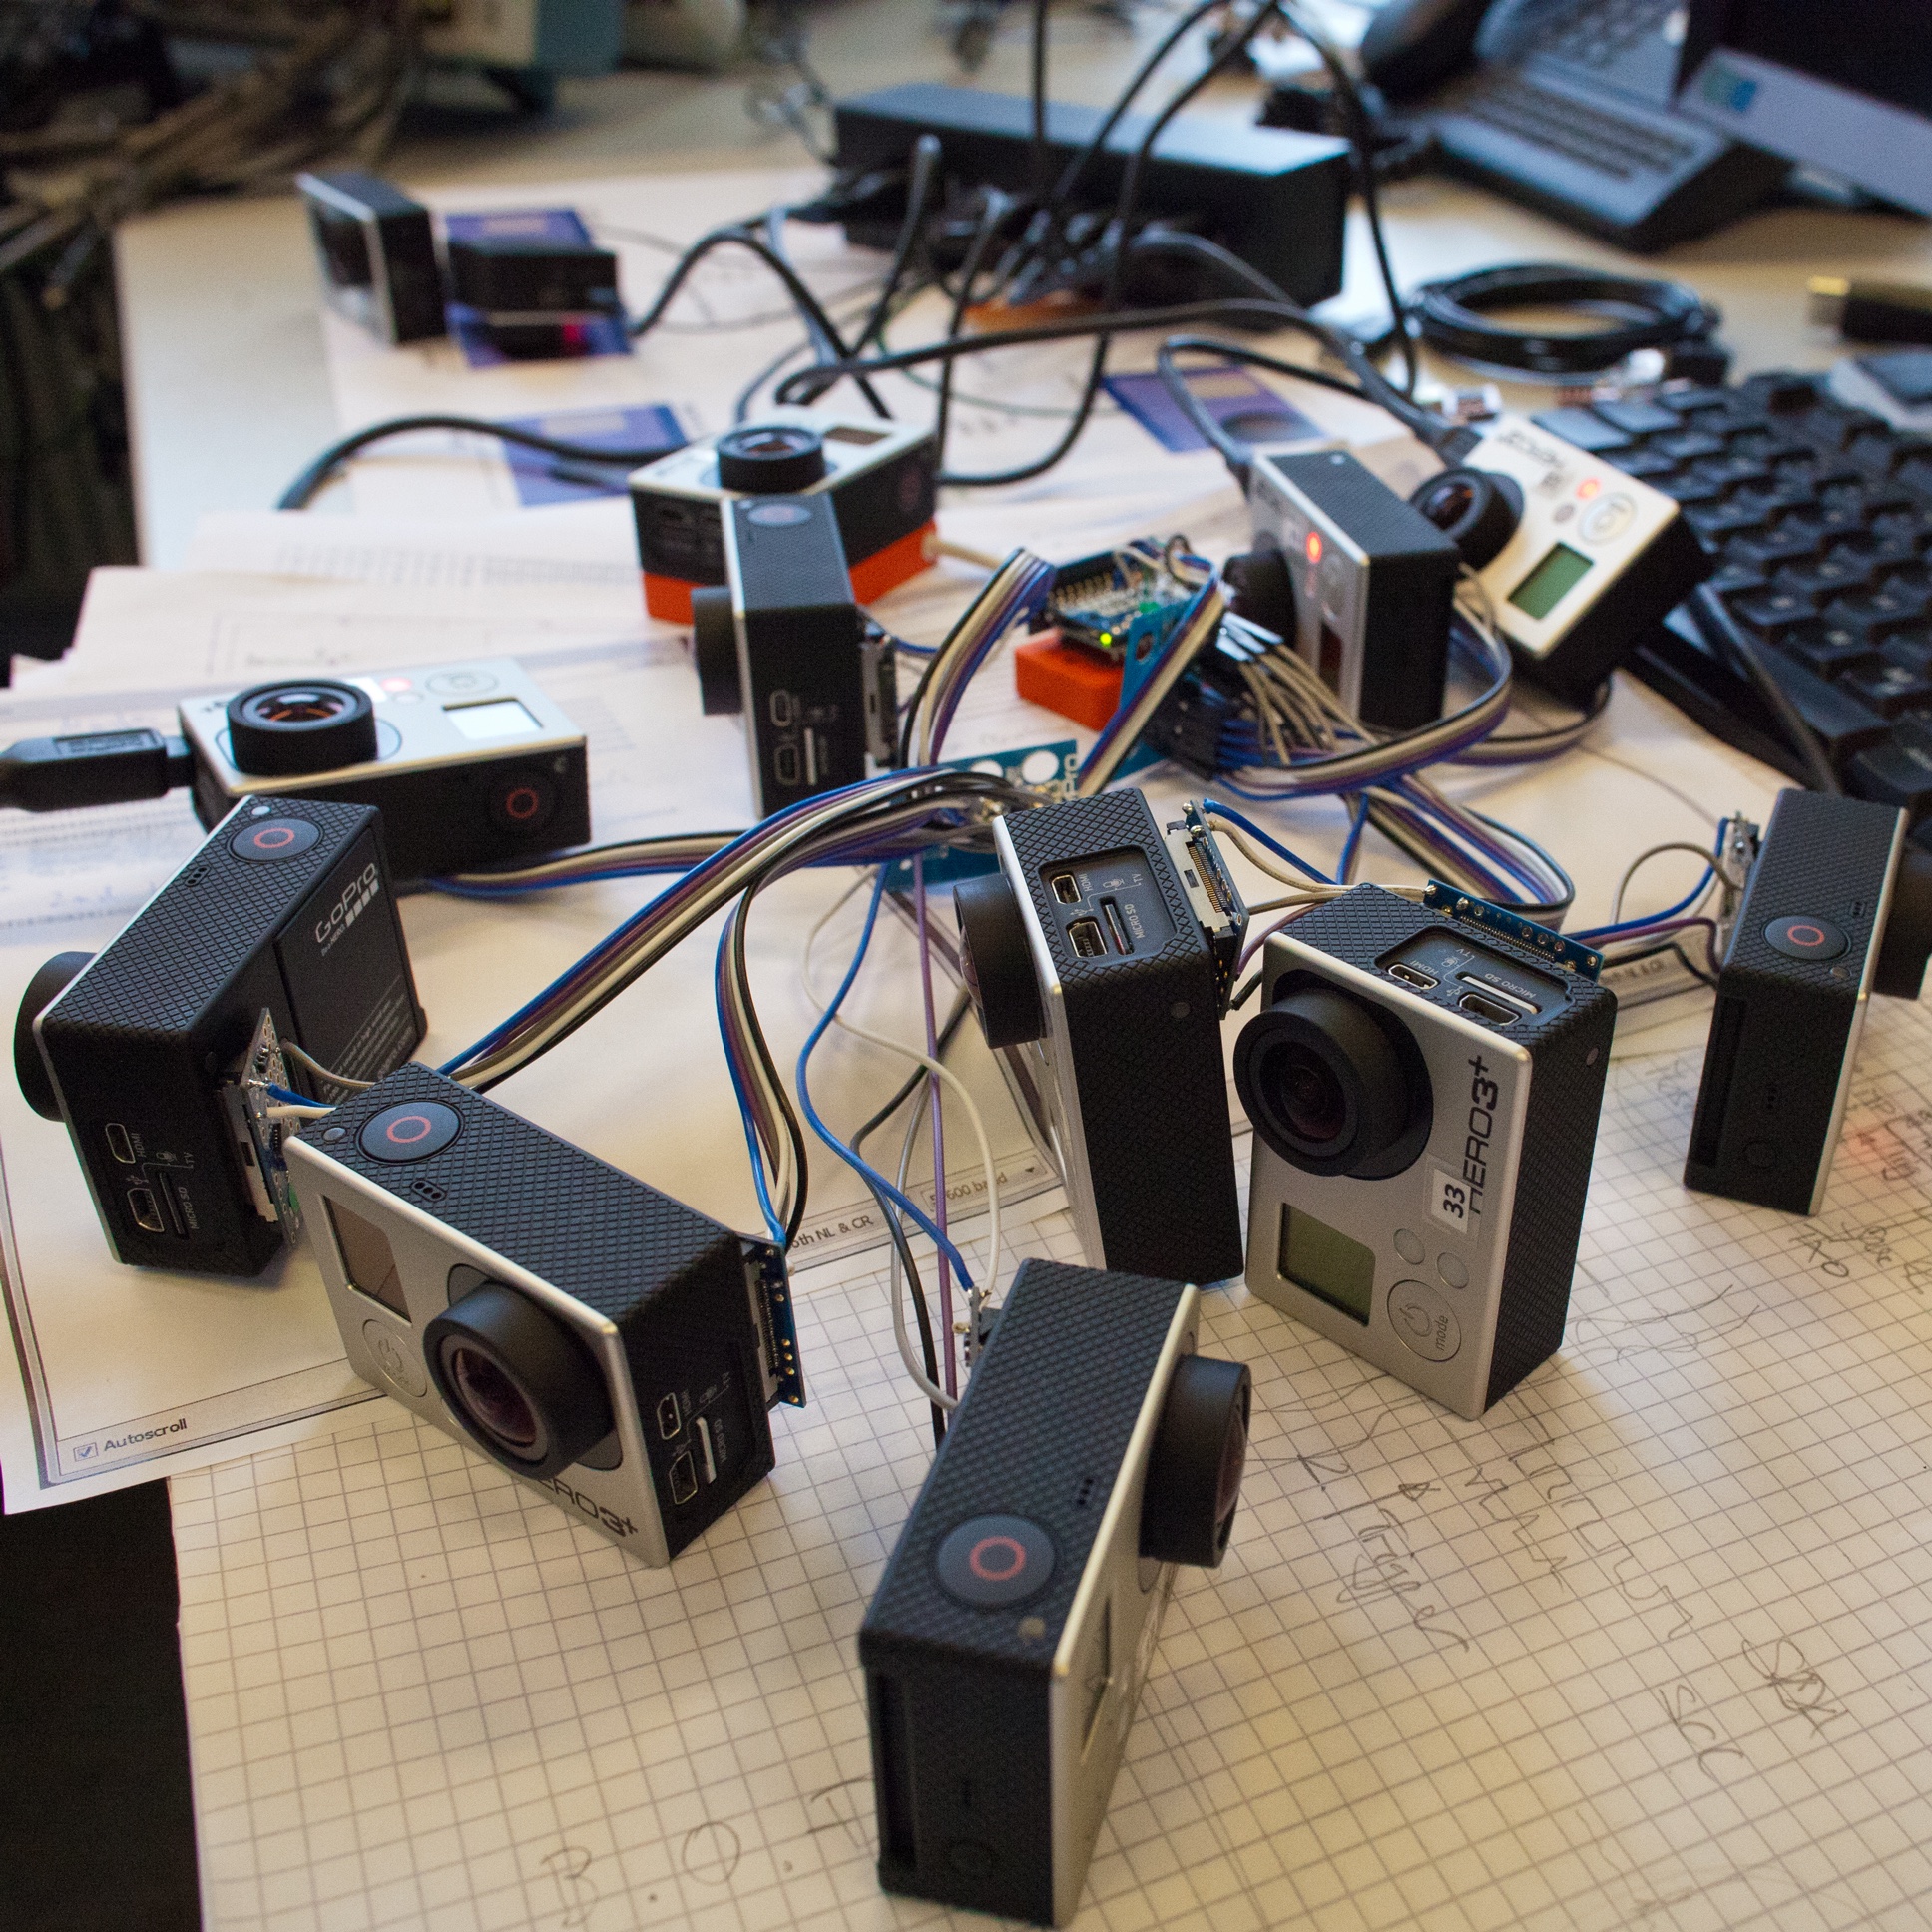
Last week I went to Germany and saw a 3D rig made by a customer.

The system consists of a lot of GoPro Hero 3+ Black’s and MewPro 2’s.
goprogopro2

Tips To Make MewPro + Dongle System

I realized the following six points/hints while I was there in Germany:

1. Random Power-On Bug

Here in Japan I’ve never known such a bug existed, but in Germany I also experienced that some GoPros do power-on randomly even after they received the power-off, “PW0” command. The bug is fixed now at GitHub (cf. dcc9a4f783ba381f5caa646a835adb78884ea01d)

2. Better Connect RESET

For small sized genlocking system I thought it was overkill to connect all RESET pins of MewPro’s and dongles each other; because if something wrong happens then simply detaching/attaching the MewPro or dongle will solve the problem. However, if it is a large system involving a lot of GoPro’s and MewPro’s then connecting RESET and pushing reset button on Arduino Pro Mini of the dongle much helps to solve the unstable situations.

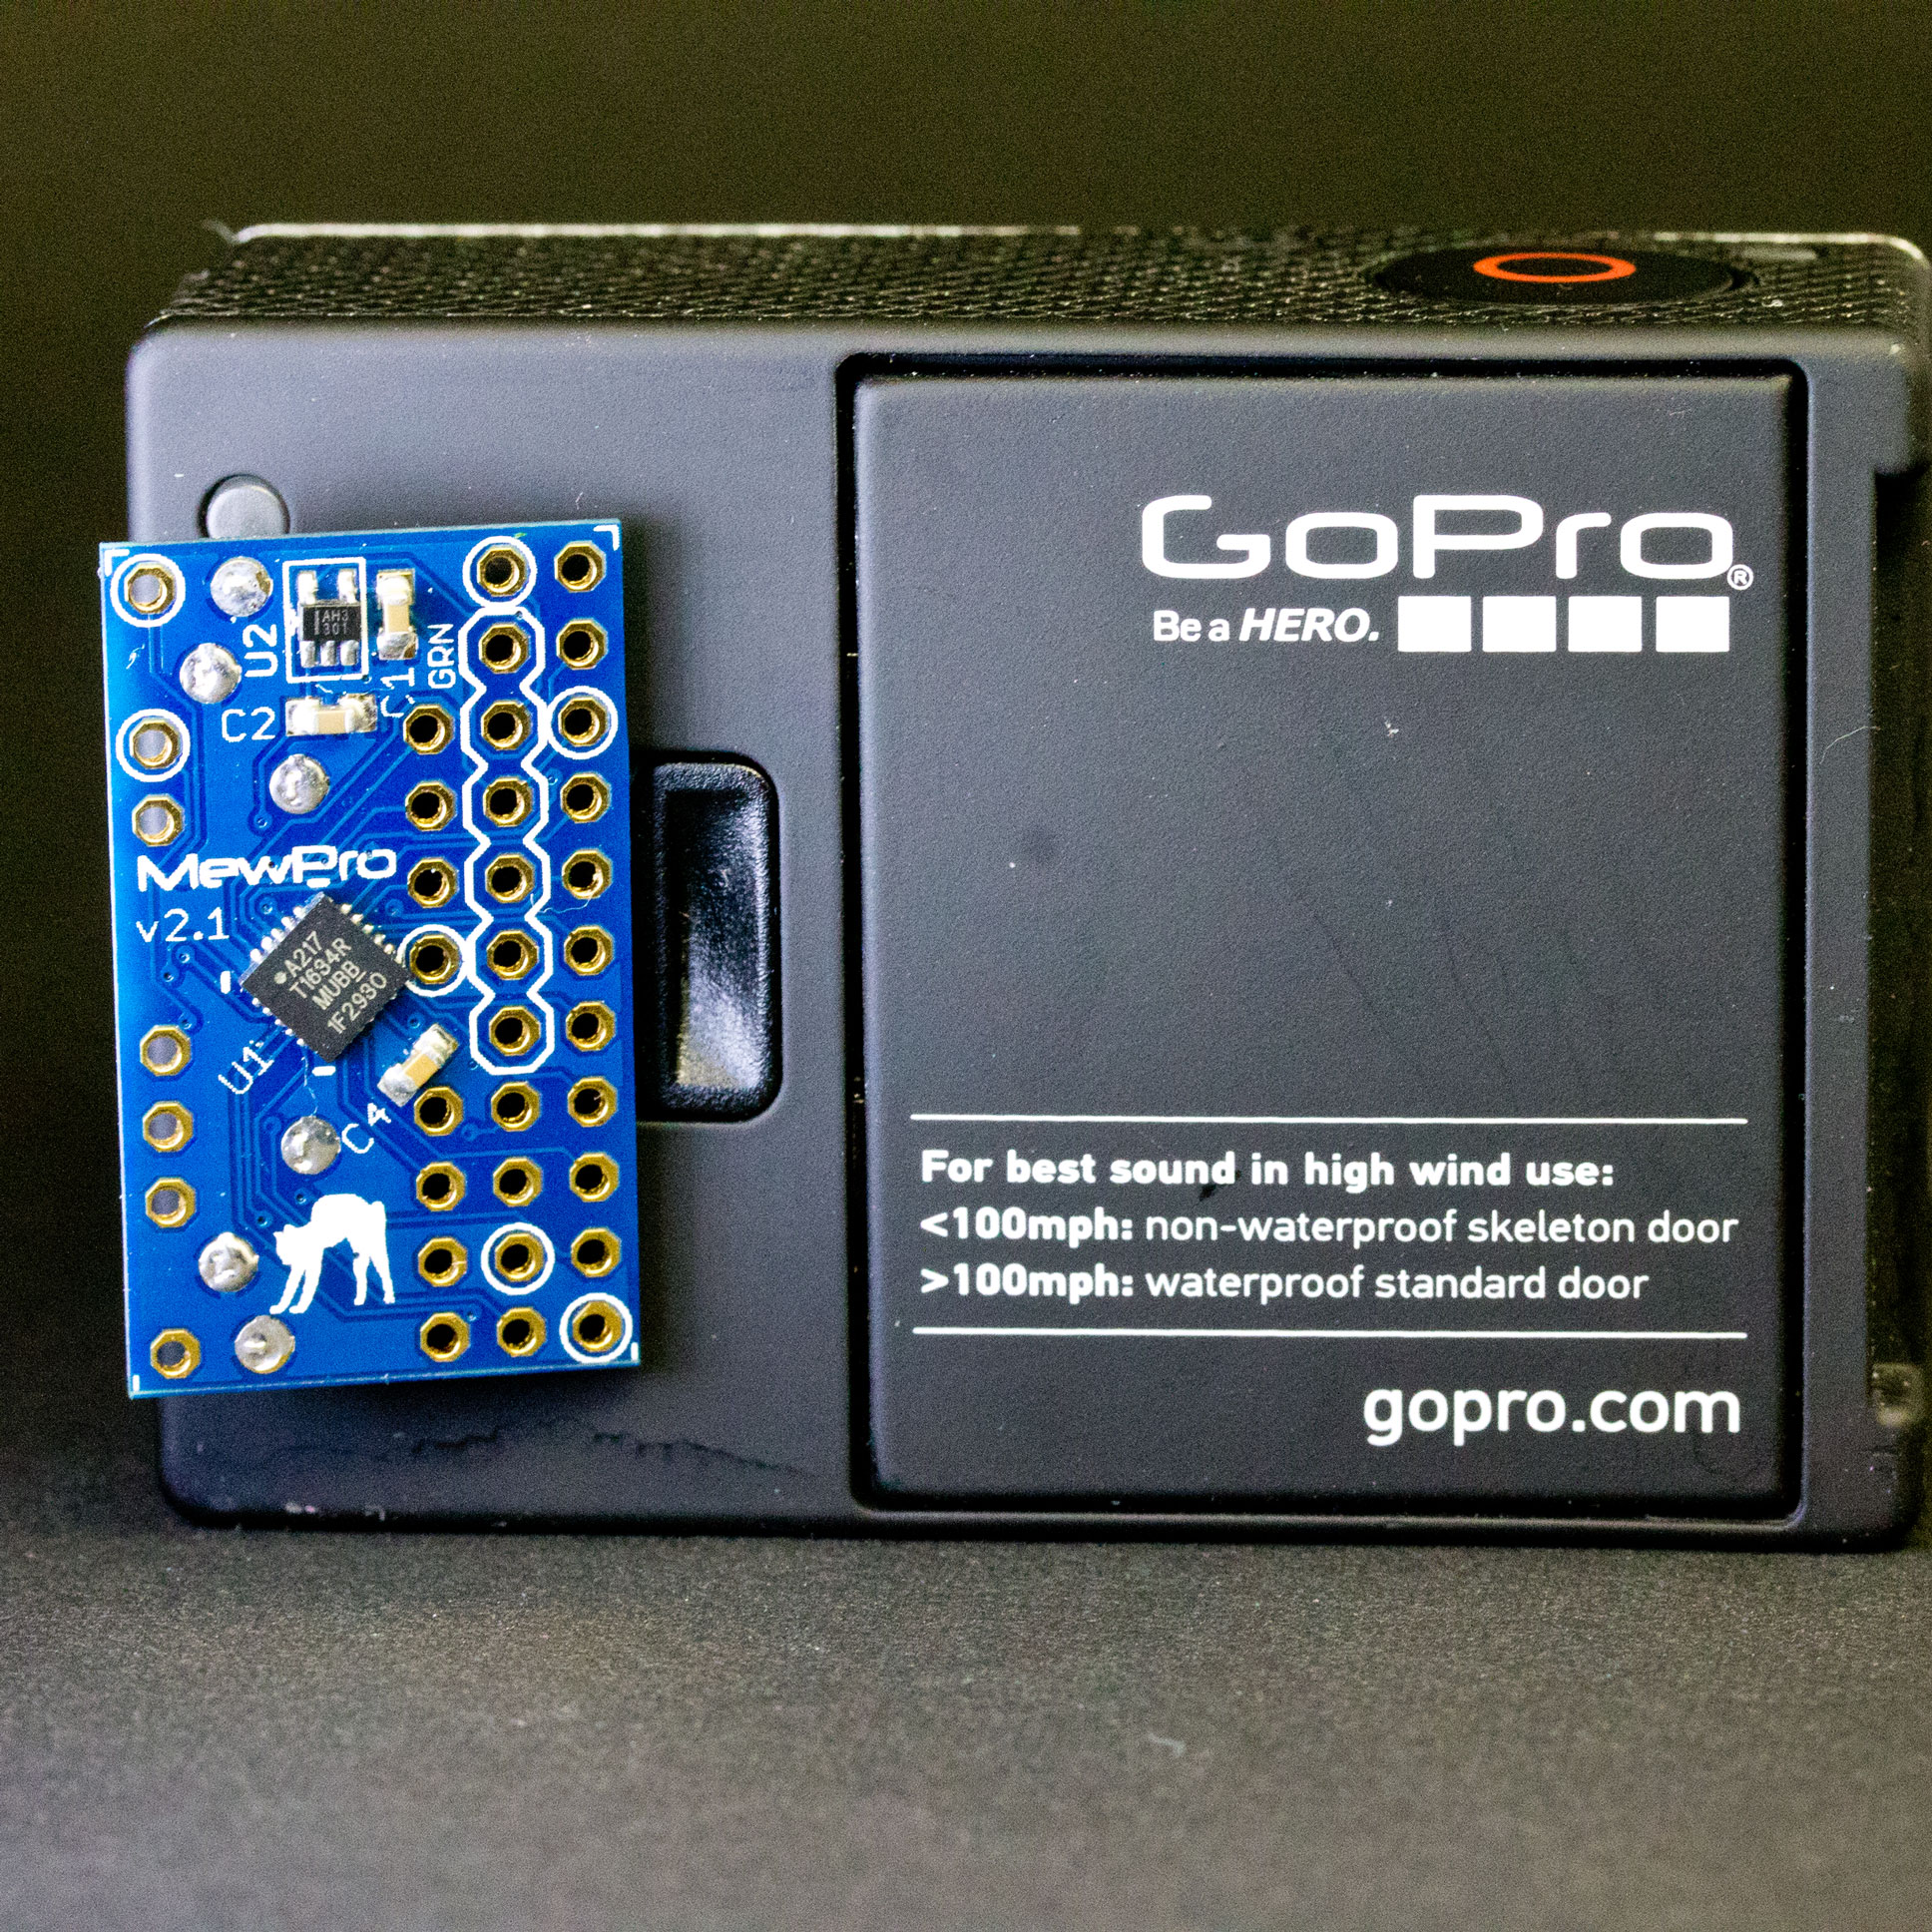
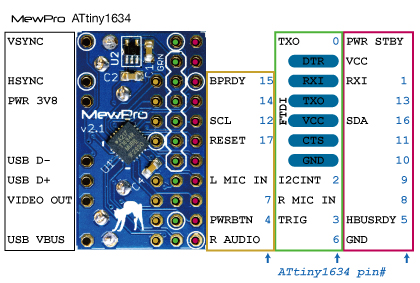
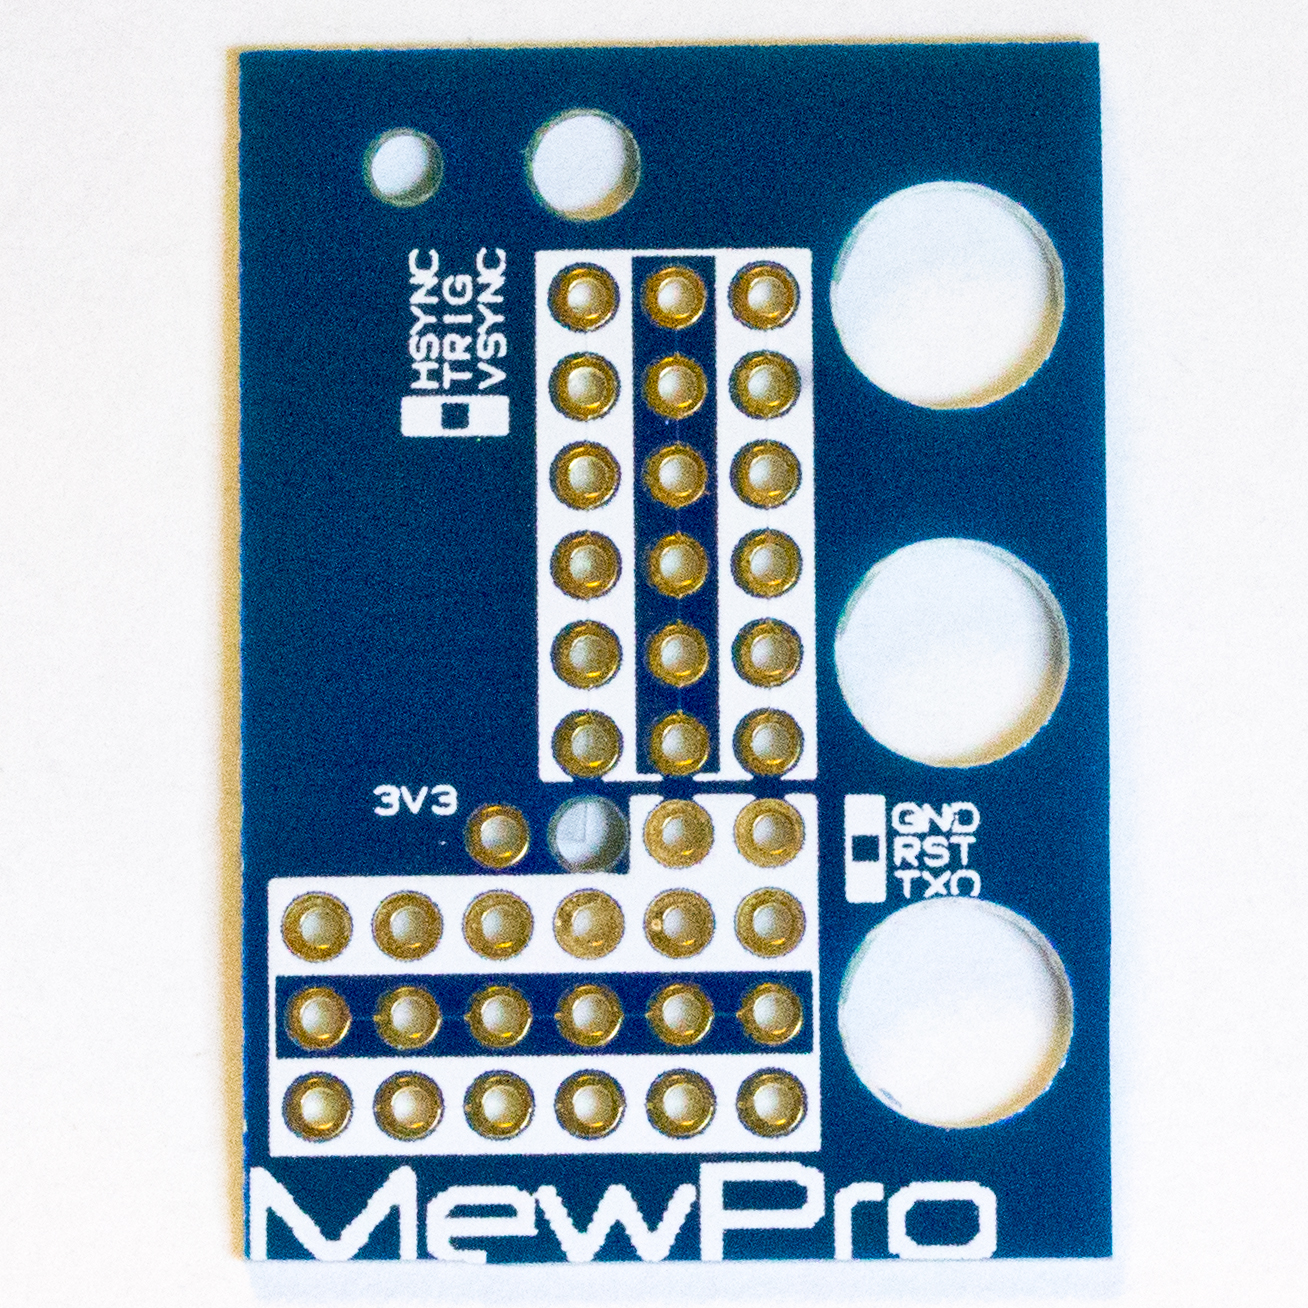
3. Daughter Board As Hub

Genlock Dongle is shipped with a complementary daughter board (photo: below).
daughter
As you can see, the board has the identical design in soldering area of Genlock Dongle: There are aligned/connected pins for HSYNC, TRIG, VSYNC, GND, RESET, and TXD. Using the board as a “hub” to MewPros, after finished soldering to the hub you could use six (or five if you don’t connect RESET) wires connecting each group of pins on the board to the corresponding pin on the dongle. Soldering like this way is much easier than soldering all the wires directly upon the dongle.

4. Keep Soldering Joint Shortest

I realized the following pitfalls in soldering wires:
joints
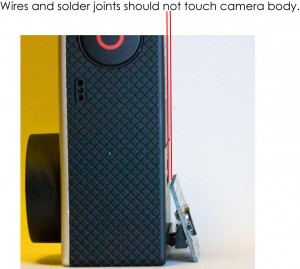
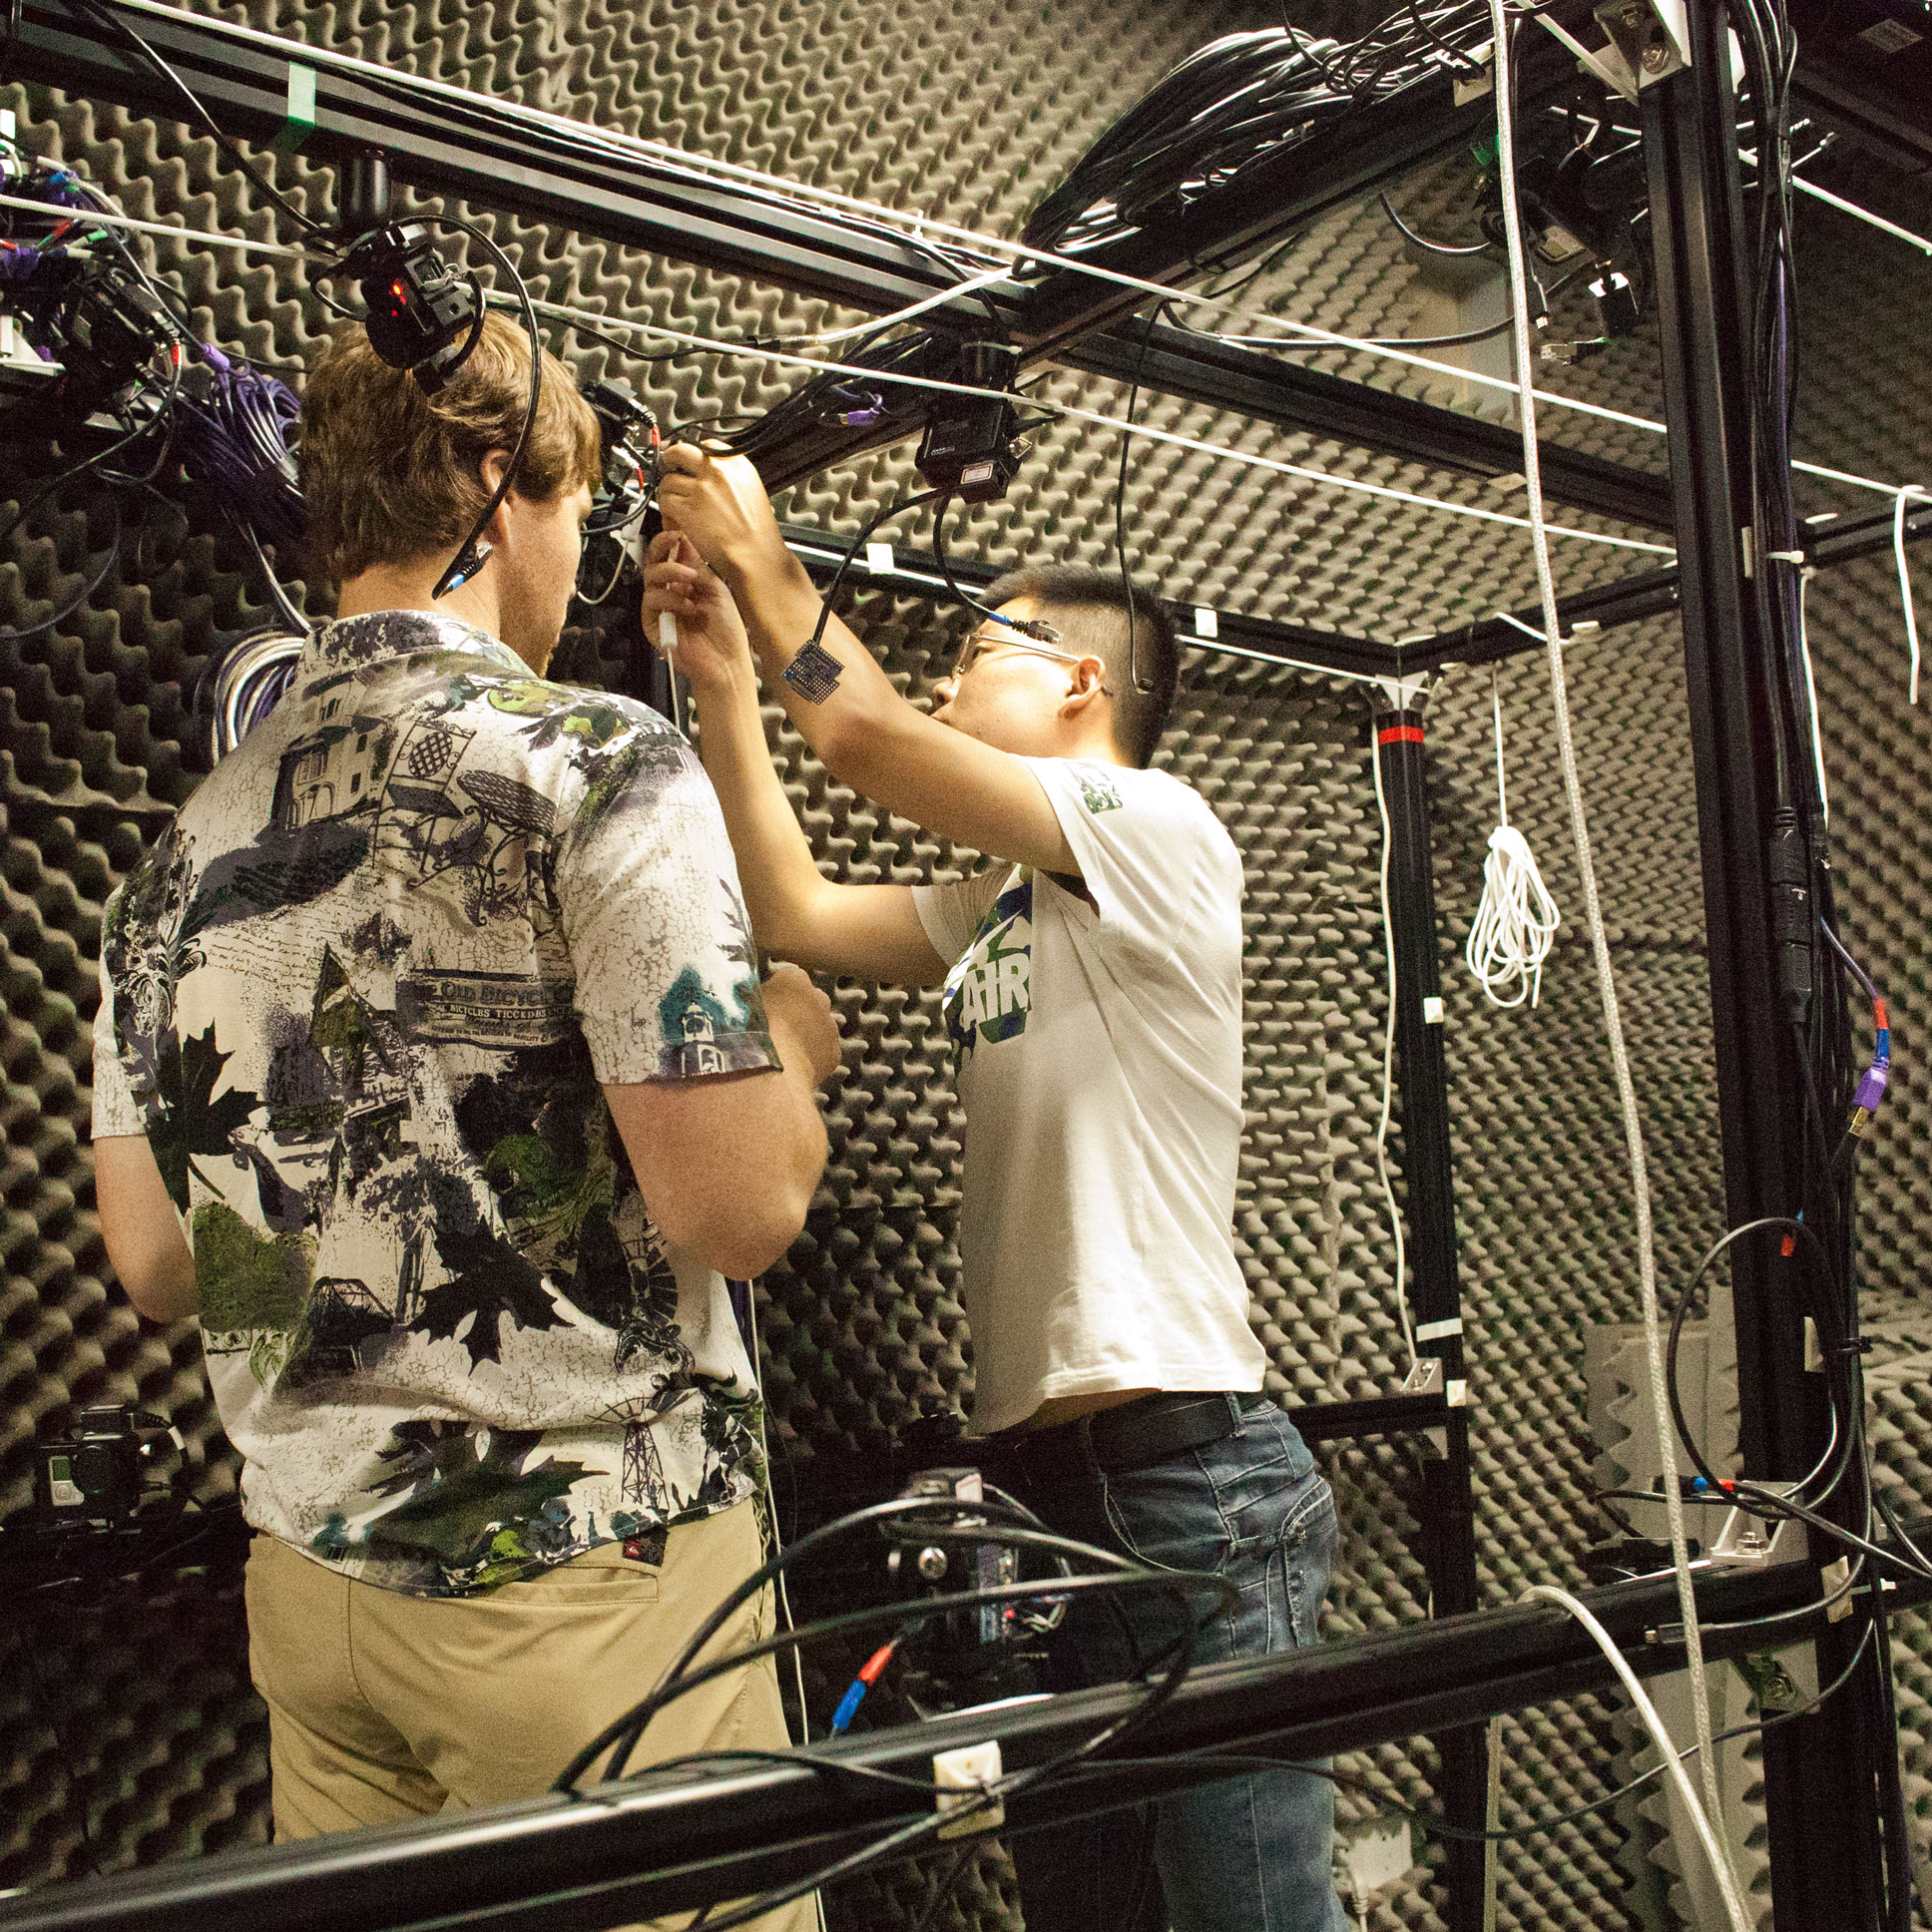
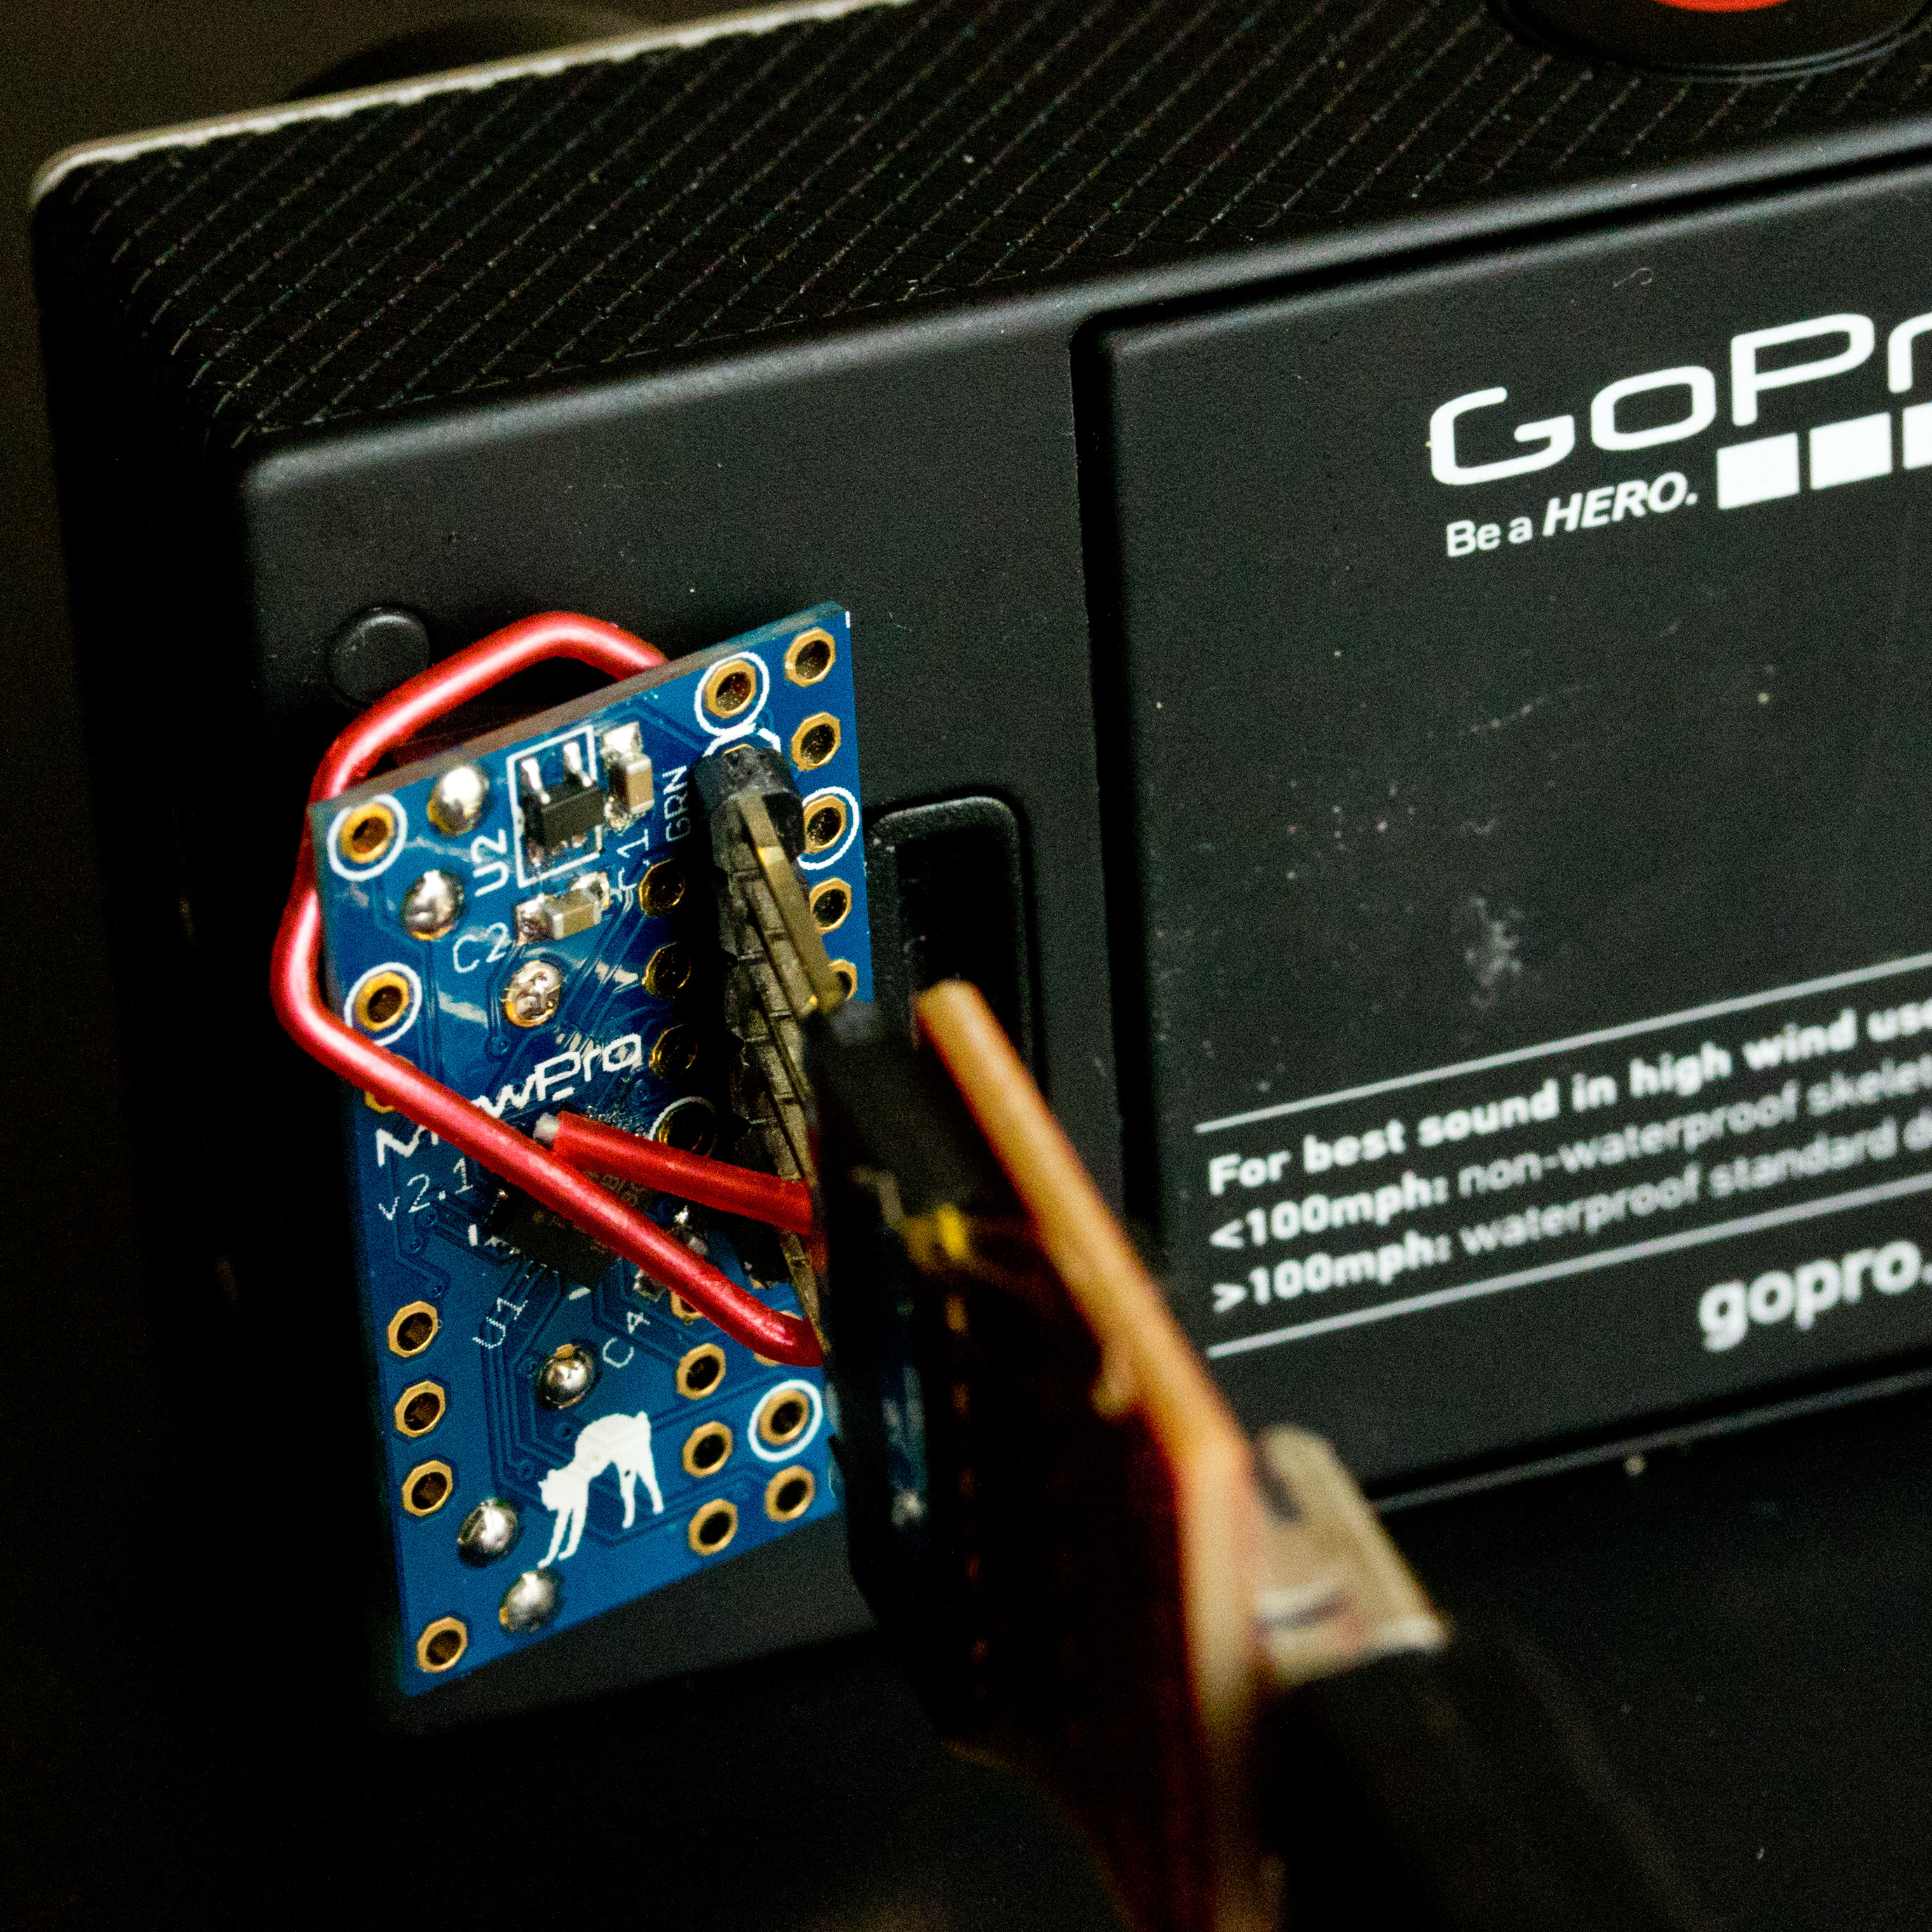
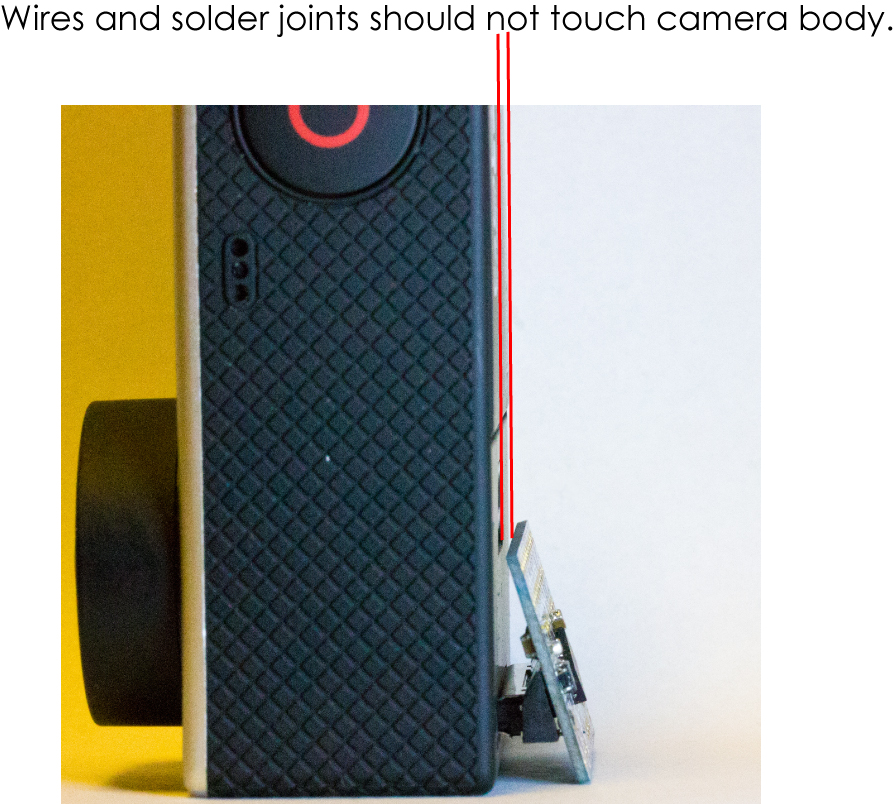
Wires and solder joints should not touch the camera body (photo: above) as they pry up the herobus connector and cause insufficient contacts.

promini
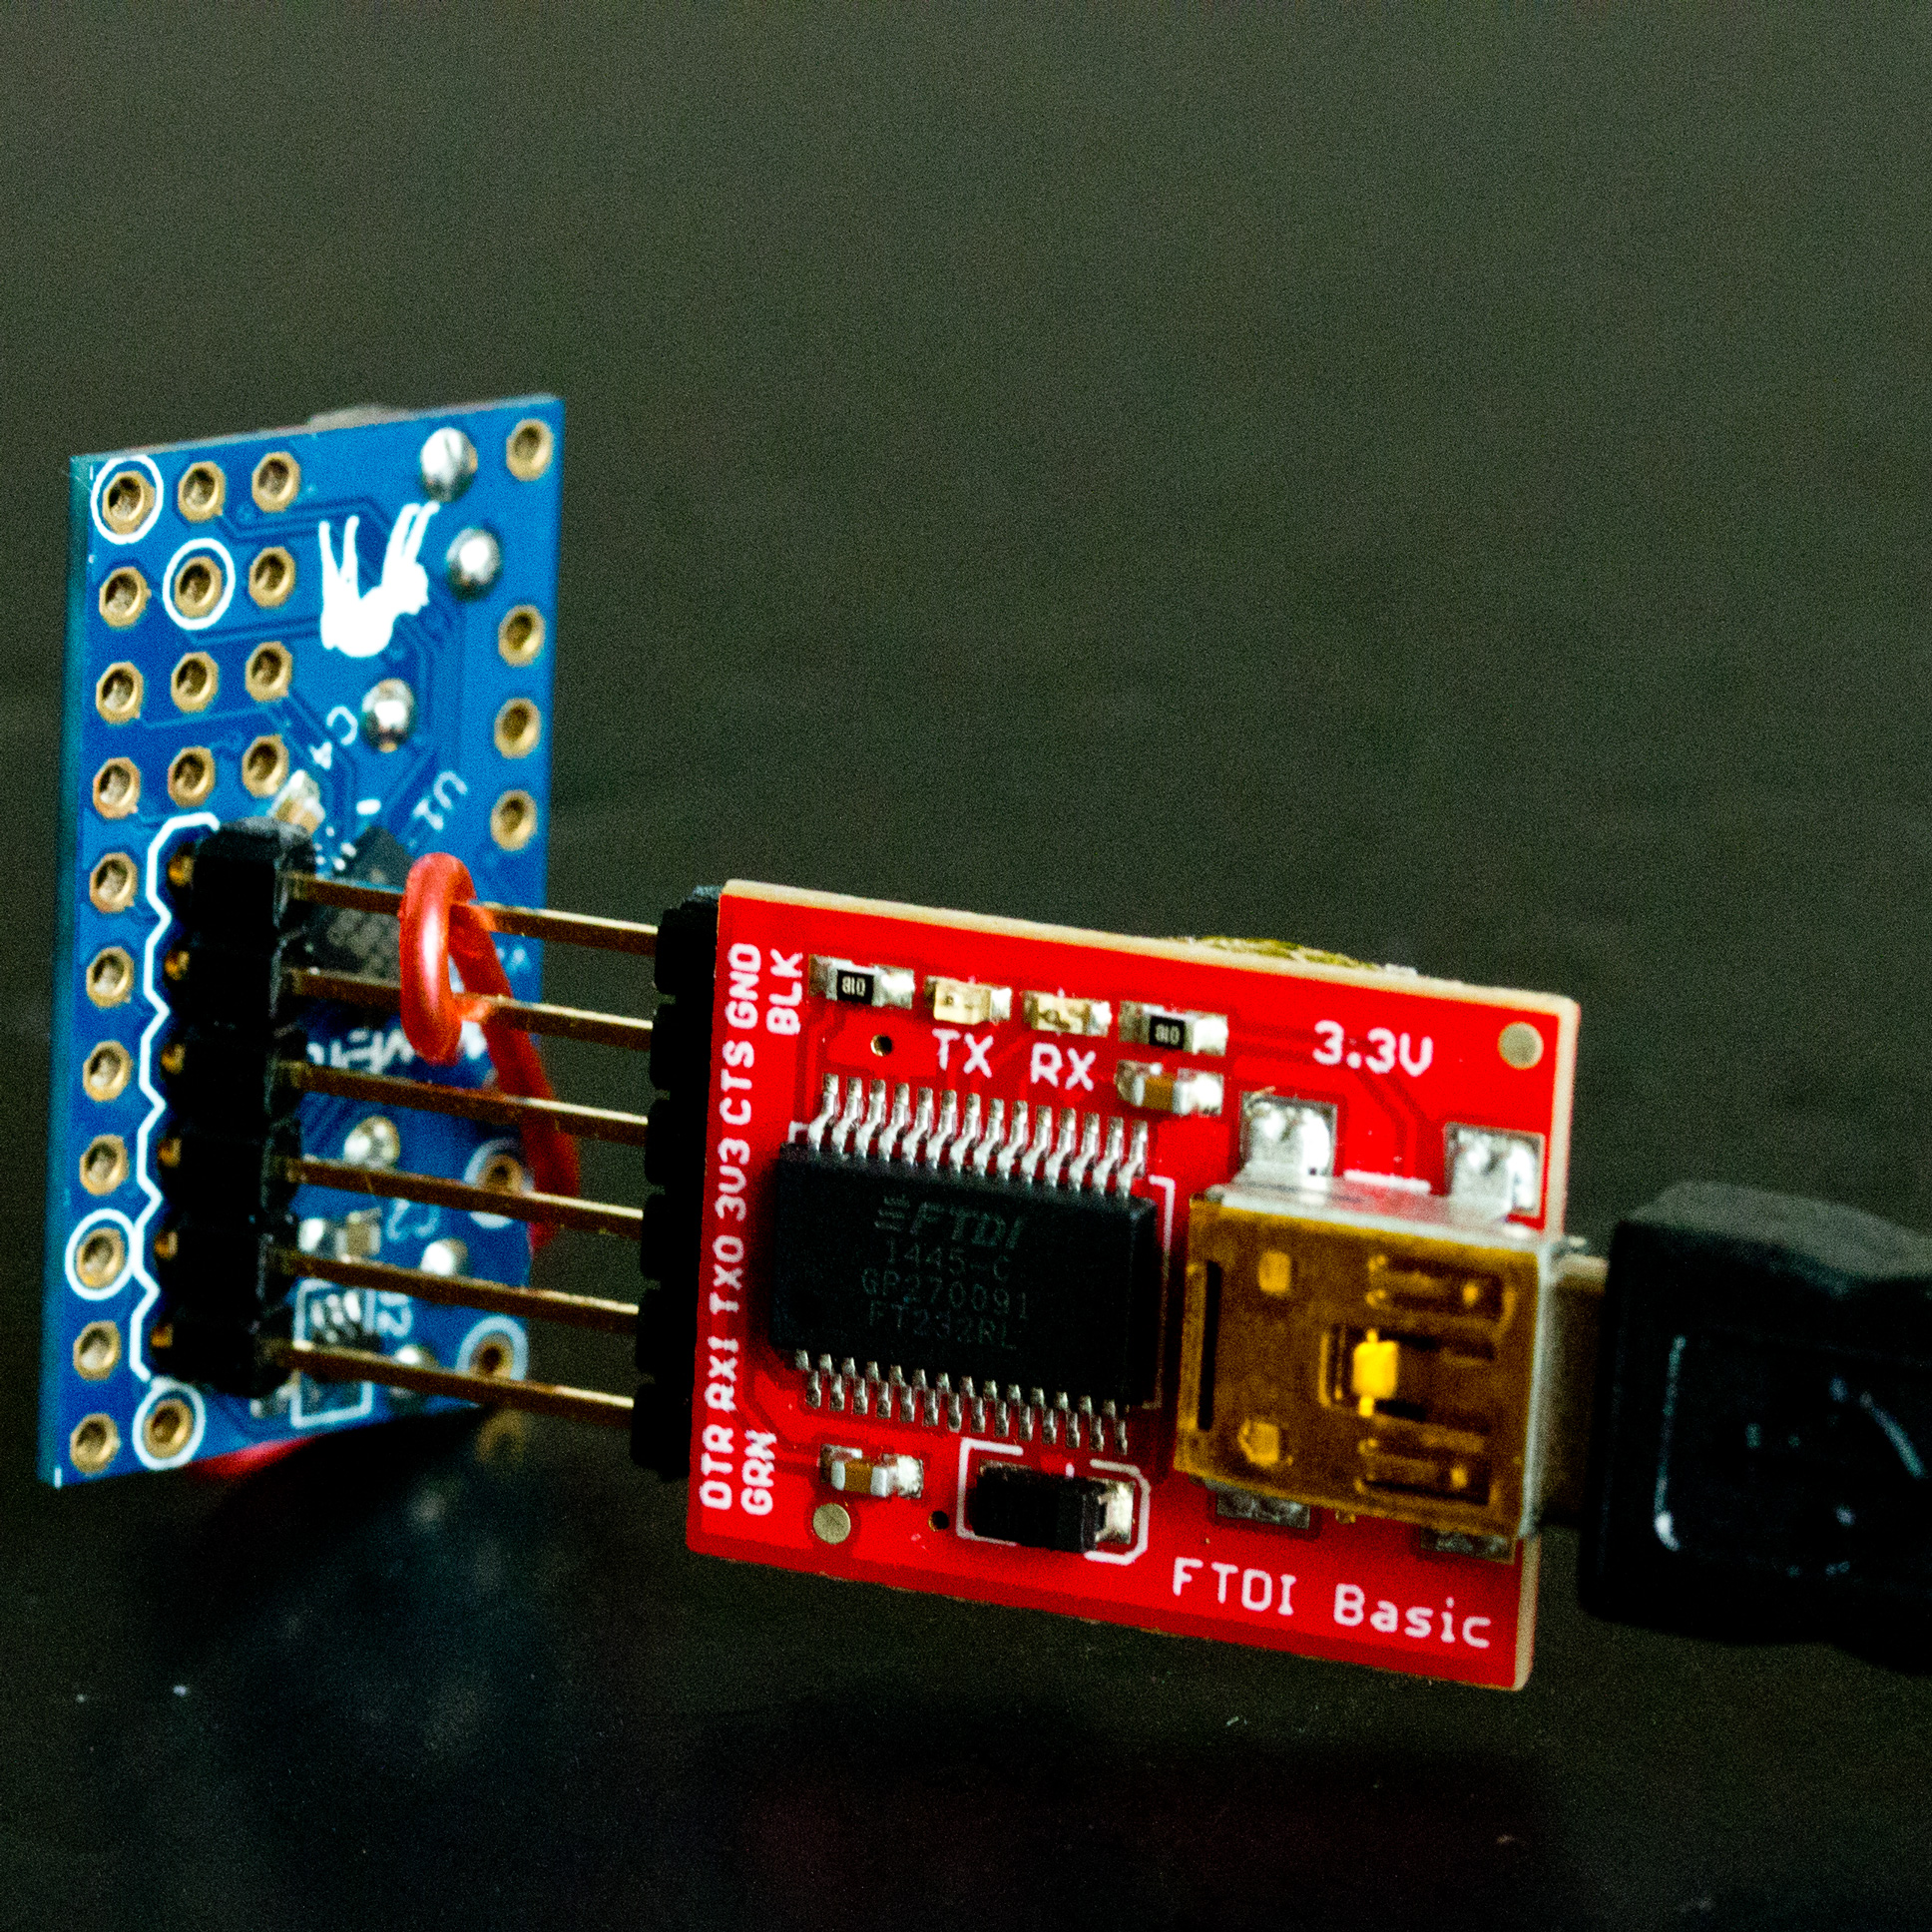
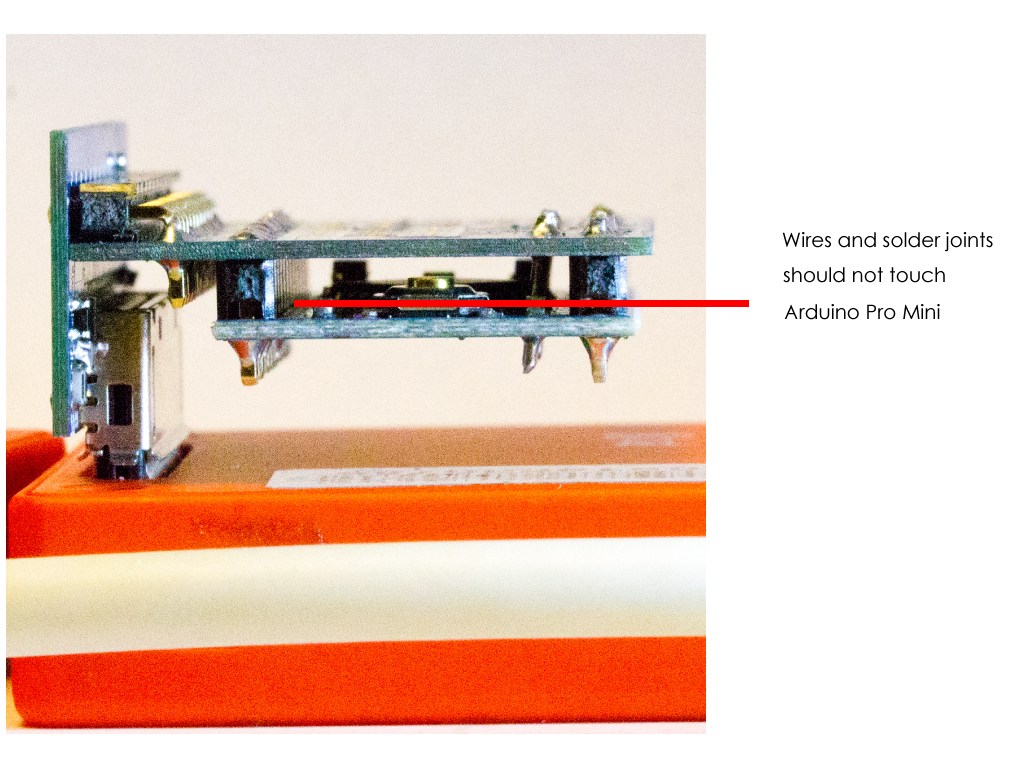
Wires and solder joints should not touch Arduino Pro Mini board of Genlock Dongle (photo: above) as they cause short circuit.

5. Temperature Controlled Soldering Iron Recommended

Don’t use old soldering irons before the sensitive electric era. Newer Atmel microcontroller forgets firmware or bootloader or everything, or dies if it is too hot.

6. B.O.D. Enabled

Distributed power system with a lot of batteries and wall chargers like GoPros + MewPros + Dongles + Dual Hero should have B.O.D. (Brown Out Detection) enabled whenever possible. Otherwise while connecting elements followed by an element a small amount of power might be unintentionally supplied to it through signal lines, even if the power lines disconnected or off, and its microcontroller will be likely to runaway because of insufficient voltage. According to this observation from now on our MewPro 2 will be shipped with bootloader in setting B.O.D. 1.7V.

Note

It is our pleasure to know/see how MewPro products are actually used. So please don’t hesitate to invite us! Our staff will go to your place immediately. 🙂

And please pronounce MewPro as /mjuːproʊ/ in English or cat meows/miaows + Pro(fessional). The author was very surprised in Germany that they say it differently.

Posted on Leave a comment

Visit In Jǐnán, China

Last week I went to China and visited the lab where a lot of MewPros are actually used to capture flying bats.

Shandong University – Virginia Tech International Laboratory is for biomimetic study for flying bat from a mechanical engineering viewpoint. The lab is located in a building of Shāndōng Univ., Jǐnán-city, Shāndōng-province in eastern China (山东大学, 中国山东省济南市). On the rooftop there are several rooms with bats and MewPros.

A bat is flying
A bat is flying

About 40 GoPros each of which is attached to MewPro 1 constitute a small tunnel and capture bats as genlocked, high quality videos. A researcher said that the genlock is the key to their study and the calibration of these GoPro angles is very important.

Maintaining Bat Tunnel

Bat Tunnel
Bat Tunnel

They are using MewPros and Dongles in “Double Dongle Configuration”. And they said that they have some plans to improve MewPro source code, especially to add a function of automatic downloading videos from GoPro’s microSDs.

Now lastly, I’d like to thank Hunter McClelland <hgm at vt dot edu> for inviting me to their lab. We would go to any part of the world if someone invites us where are some MewPros. 🙂

Posted on Leave a comment

How To Use MewPro 2 and Application

We will show you basics to use MewPro 2 for controlling GoPro Hero 3+ Black camera.

The post involves no external sensors.

UPDATE 25 Feb. 2017: Hero 4s are now supported: Please refer this post.

mew2-11


Prerequisites

In order to use MewPro 2 as a GoPro controller you need the following hardwares:

GoPro Hero 3+ Black
No previous editions work with MewPro 2.
MewPro 2
MewPro 2 is ready to use without soldering.
Arduino Pro Mini Temporary FTDI Header
If you buy a MewPro 2 from our shop the header is included in the package.
Sparkfun FTDI Basic Breakout – 3.3V and USB cable
Use 3.3V version of the breakout board. Any compatible board should work.

Softwares:

MewPro 2 is shipped with optiboot as well as MewPro software (for genlock) installed. But if you like to modify/update the software you will need to prepare the following IDE, core and library. To install each software please refer their documentations.

Arduino IDE 1.6.5 or newer
Older versions of Arduino IDE might work but we don’t confirm that.
ATTiny Core
1634, x313, x4, x41, x5, x61, x7, x8 and 828 for Arduino 1.6.x
WireS library
Slave only hardware Wire library for ATtiny1634 microcontroller.

Lastly grab the MewPro application:

MewPro Application
This is an open source software (MIT license). You can modify and distribute it as you like.

Connection

On your PC launch Arduino IDE that was installed as described in the above. In Arduino IDE [File]→[Open...]→ then open MewPro.ino.

Remark: MewPro.ino contains the following files as tabs; a_Queue.ino, b_TimeAlarms.ino, c_I2C.ino, d_BacpacCommands.ino, e_Shutter.ino, f_Switch.ino,g_IRremote.ino, h_LightSensor.ino, i_PIRsensor.ino, j_VideoMotionDetect.ino, and k_Genlock.ino. If you like to see what will be happen inside of your ATtiny1634 you could read any of them.

Connect MewPro 2
connection2

to your PC w/ FTDI board and the temporary header.
conne2

Connecting FTDI please refer the pinout image below:
MewPro2

Then connect them to GoPro Hero 3+ Black.
conne1

In Arduino IDE application, select [Tools]→[Board]→[ATTiny1634 (optiboot)] and [Tools]→[Port]→[(the port where you connected the FTDI cable)]. (B.O.D. and Clock settings are “don’t care” as these values are only effective when you burn a bootloader to the microcontroller by using an ISP programmer.)

The MewPro source code is originally targeted to MewPro 1, Arduino Pro Mini, so please change the following lines in MewPro.ino from

#include <Wire.h> // *** please comment out this line if __MK20DX256__ or __MK20DX128__ or __MKL26Z64__ or __AVR_ATtiny1634__ is defined ***
#if BUFFER_LENGTH < 64
#error Please modify Arduino Wire library source code to increase the I2C buffer size
#endif
//
// Teensy 3.0 or 3.1 or LC
//#include <i2c_t3.h> // *** please comment out this line if __MK20DX256__ and __MK20DX128__ and __MKL26Z64__ are not defined ***
//
// ATtiny1634 core https://github.com/SpenceKonde/arduino-tiny-841
// WireS library is downloadable from https://github.com/orangkucing/WireS
//#include <WireS.h> // *** please comment out this line if __AVR_ATtiny1634__ is not defined ***

to

//#include <Wire.h> // *** please comment out this line if __MK20DX256__ or __MK20DX128__ or __MKL26Z64__ or __AVR_ATtiny1634__ is defined ***
//#if BUFFER_LENGTH < 64
//#error Please modify Arduino Wire library source code to increase the I2C buffer size
//#endif
//
// Teensy 3.0 or 3.1 or LC
//#include <i2c_t3.h> // *** please comment out this line if __MK20DX256__ and __MK20DX128__ and __MKL26Z64__ are not defined ***
//
// ATtiny1634 core https://github.com/SpenceKonde/arduino-tiny-841
// WireS library is downloadable from https://github.com/orangkucing/WireS
#include <WireS.h> // *** please comment out this line if __AVR_ATtiny1634__ is not defined ***

that is, to use the WireS library instead of the standard Wire library.

The code should now be compiled successfully.
Verify” the MewPro sketch and “Upload” it to MewPro 2 board.

Remark: If you are using MewPro 2 board for genlocking, please modify MewPro.ino as

boolean debug = false;
#define USE_GENLOCK

and for MewPro #0 in double dongle configuration

#define UART_RECEIVER_DISABLE

Control GoPro

Controlling details through Arduino console is the same as MewPro 1.


Resources