Posted on Leave a comment

Mani Wheel Rig

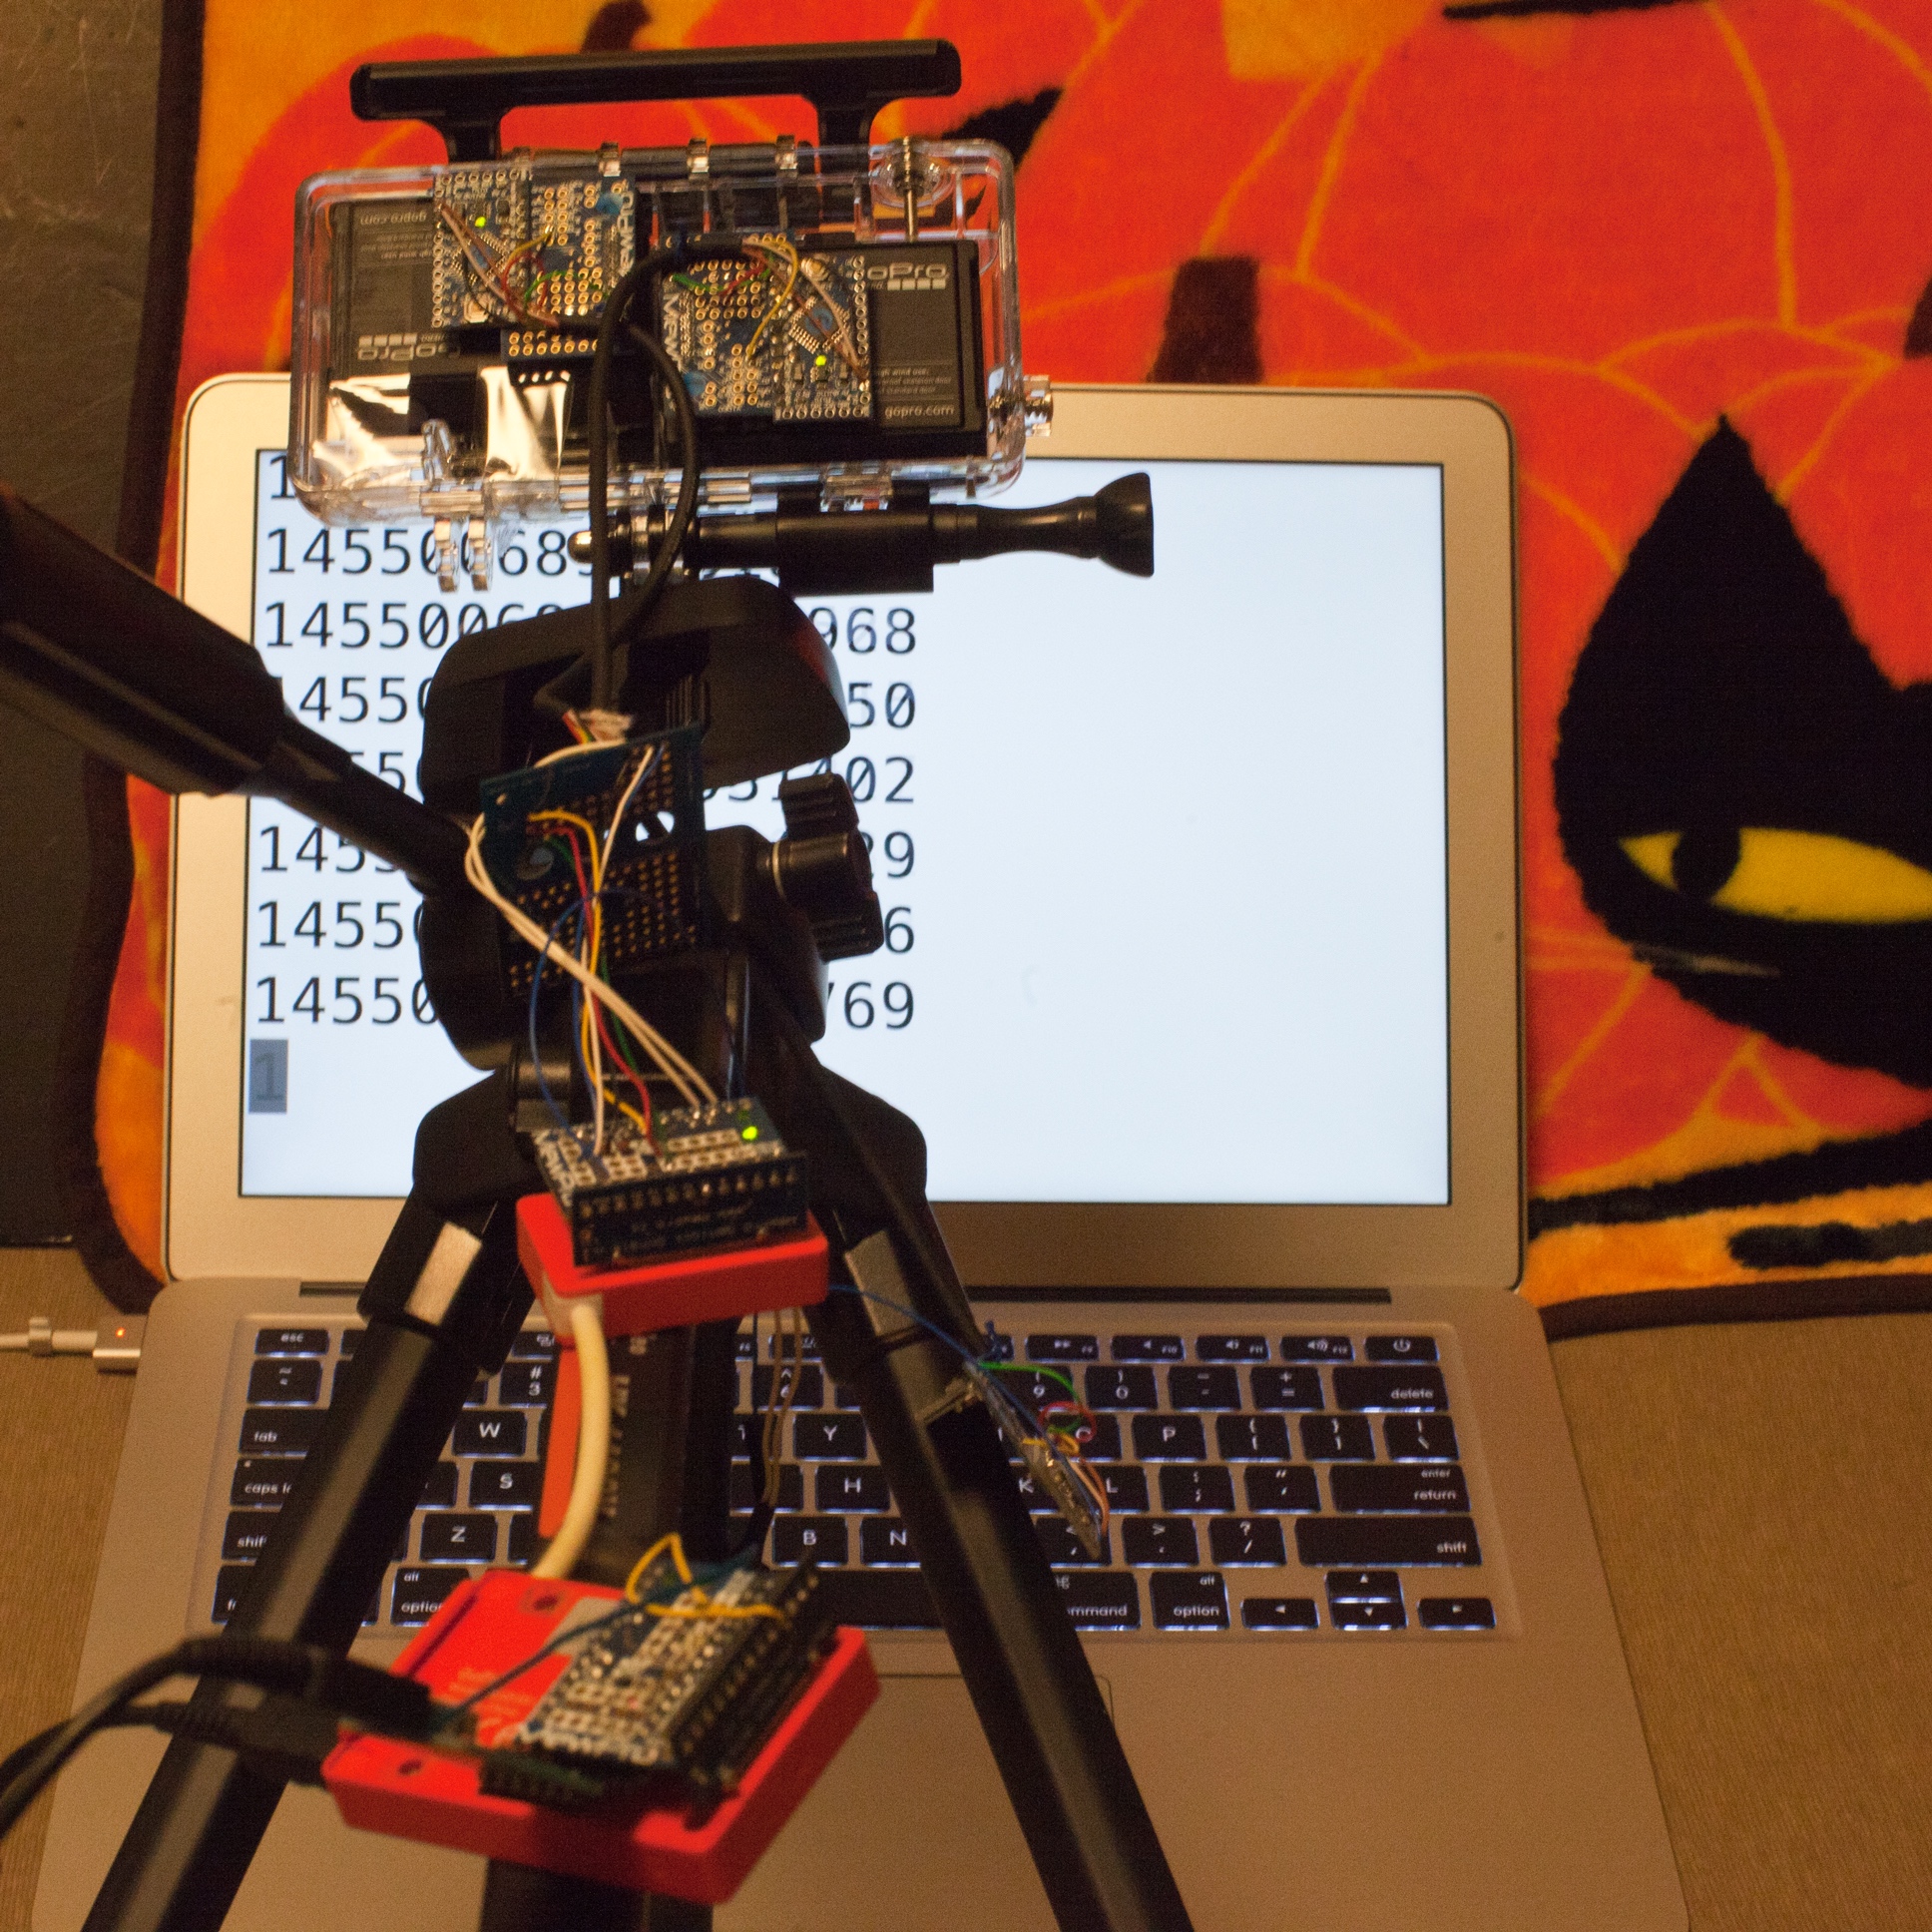
A detail of our open-hardware rig, Mani Wheel, which you can make or buy, is addressed in this article.

In the previous post we published two 360-degree videos of Japanese Cat/Rabbit Islands. These clips are made by using the following hardware and software:


Hardware

  • 6x GoPro Hero 3+ Black
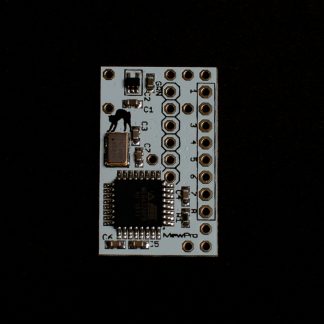
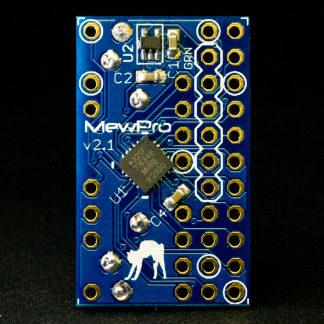
  • 6x MewPro Cable
    Plug’s enclosures removed. A newly designed, dedicated PCB disk is utilized to simplify solder works.
  • 3D printed top/bottom disk lids made of ABS
    (STL/IGES files are downloadable from our GitHub repo.)
  • GoPro Dual Hero
  • 2x MewPro Genlock Dongle
  • Adafruit Bluefruit LE UART Friend – Bluetooth Low Energy (BLE)
    Connected to the serial lines (RxD/TxD) of Dongle #0. And the whole system is controlled through BLE from the terminal application installed on iPhone or PC. (Note: In GenlockDongle source code, the serial baud rate must be modified from the default of 57600 to 9600 for Dongle #0.)

Software

  • Kolor Autopano Video Pro
    Exact sync is detected by the software automatically.
  • YouTube 360 Video Metadata Tool
    This is necessary for uploading 360-degree video to YouTube.

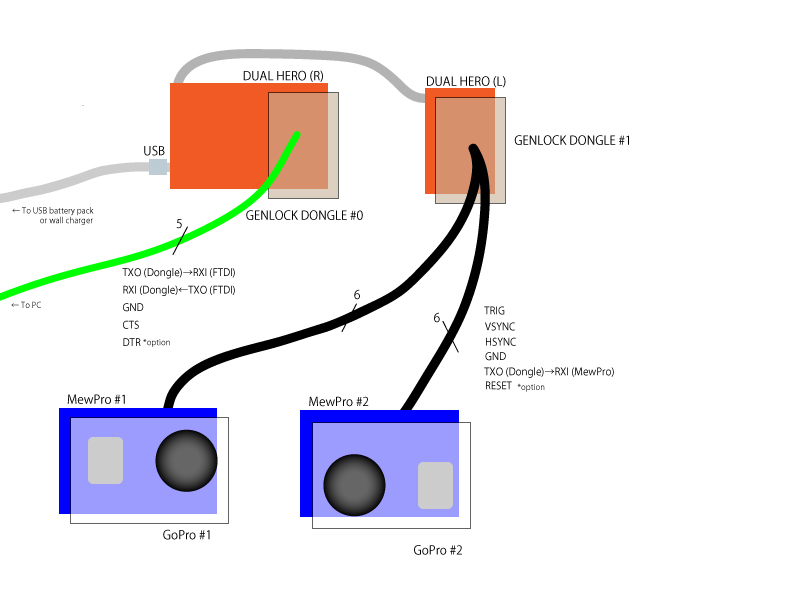
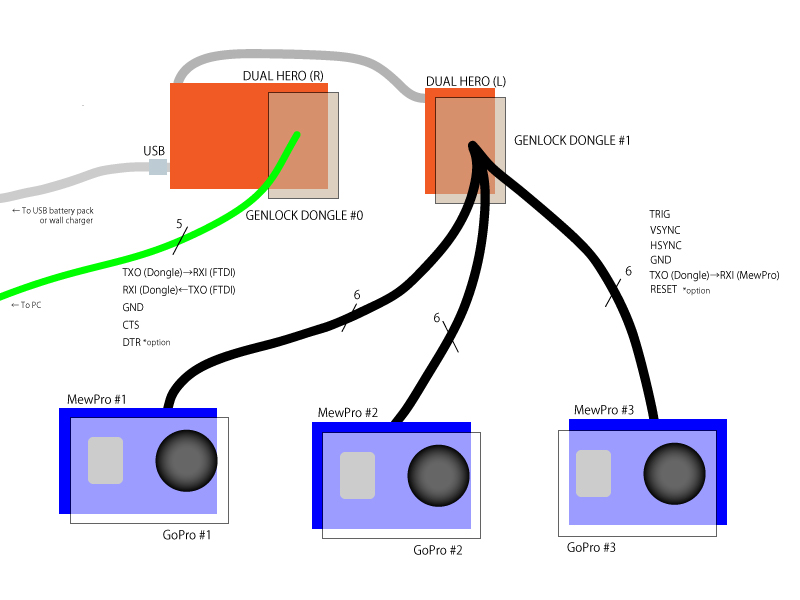
The hardware items are connected as in the following figure:
no-master-6-cam

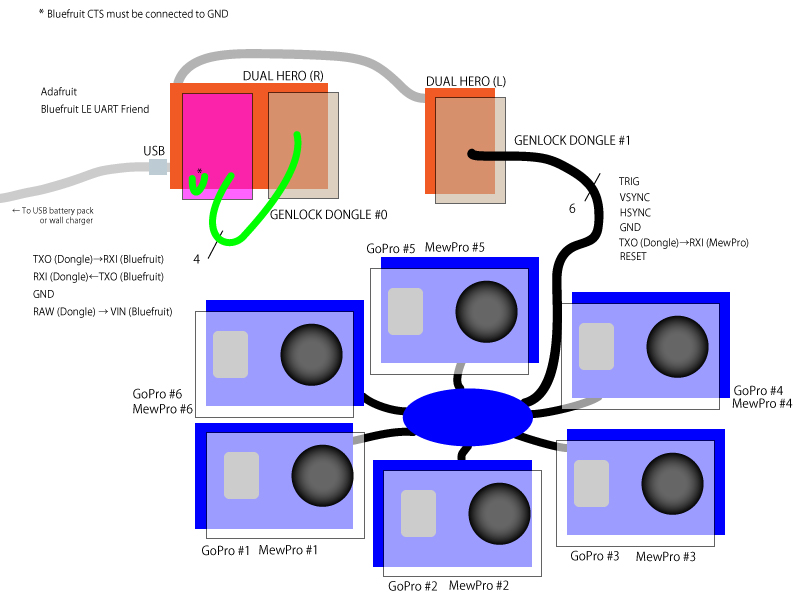
In addition to the above diagram we actually used

to supply 5V power to Dual Hero and Dongles through the USB connector. However, this can be done by any USB battery pack.

The following is top view of our Mani Wheel Rig:
topview
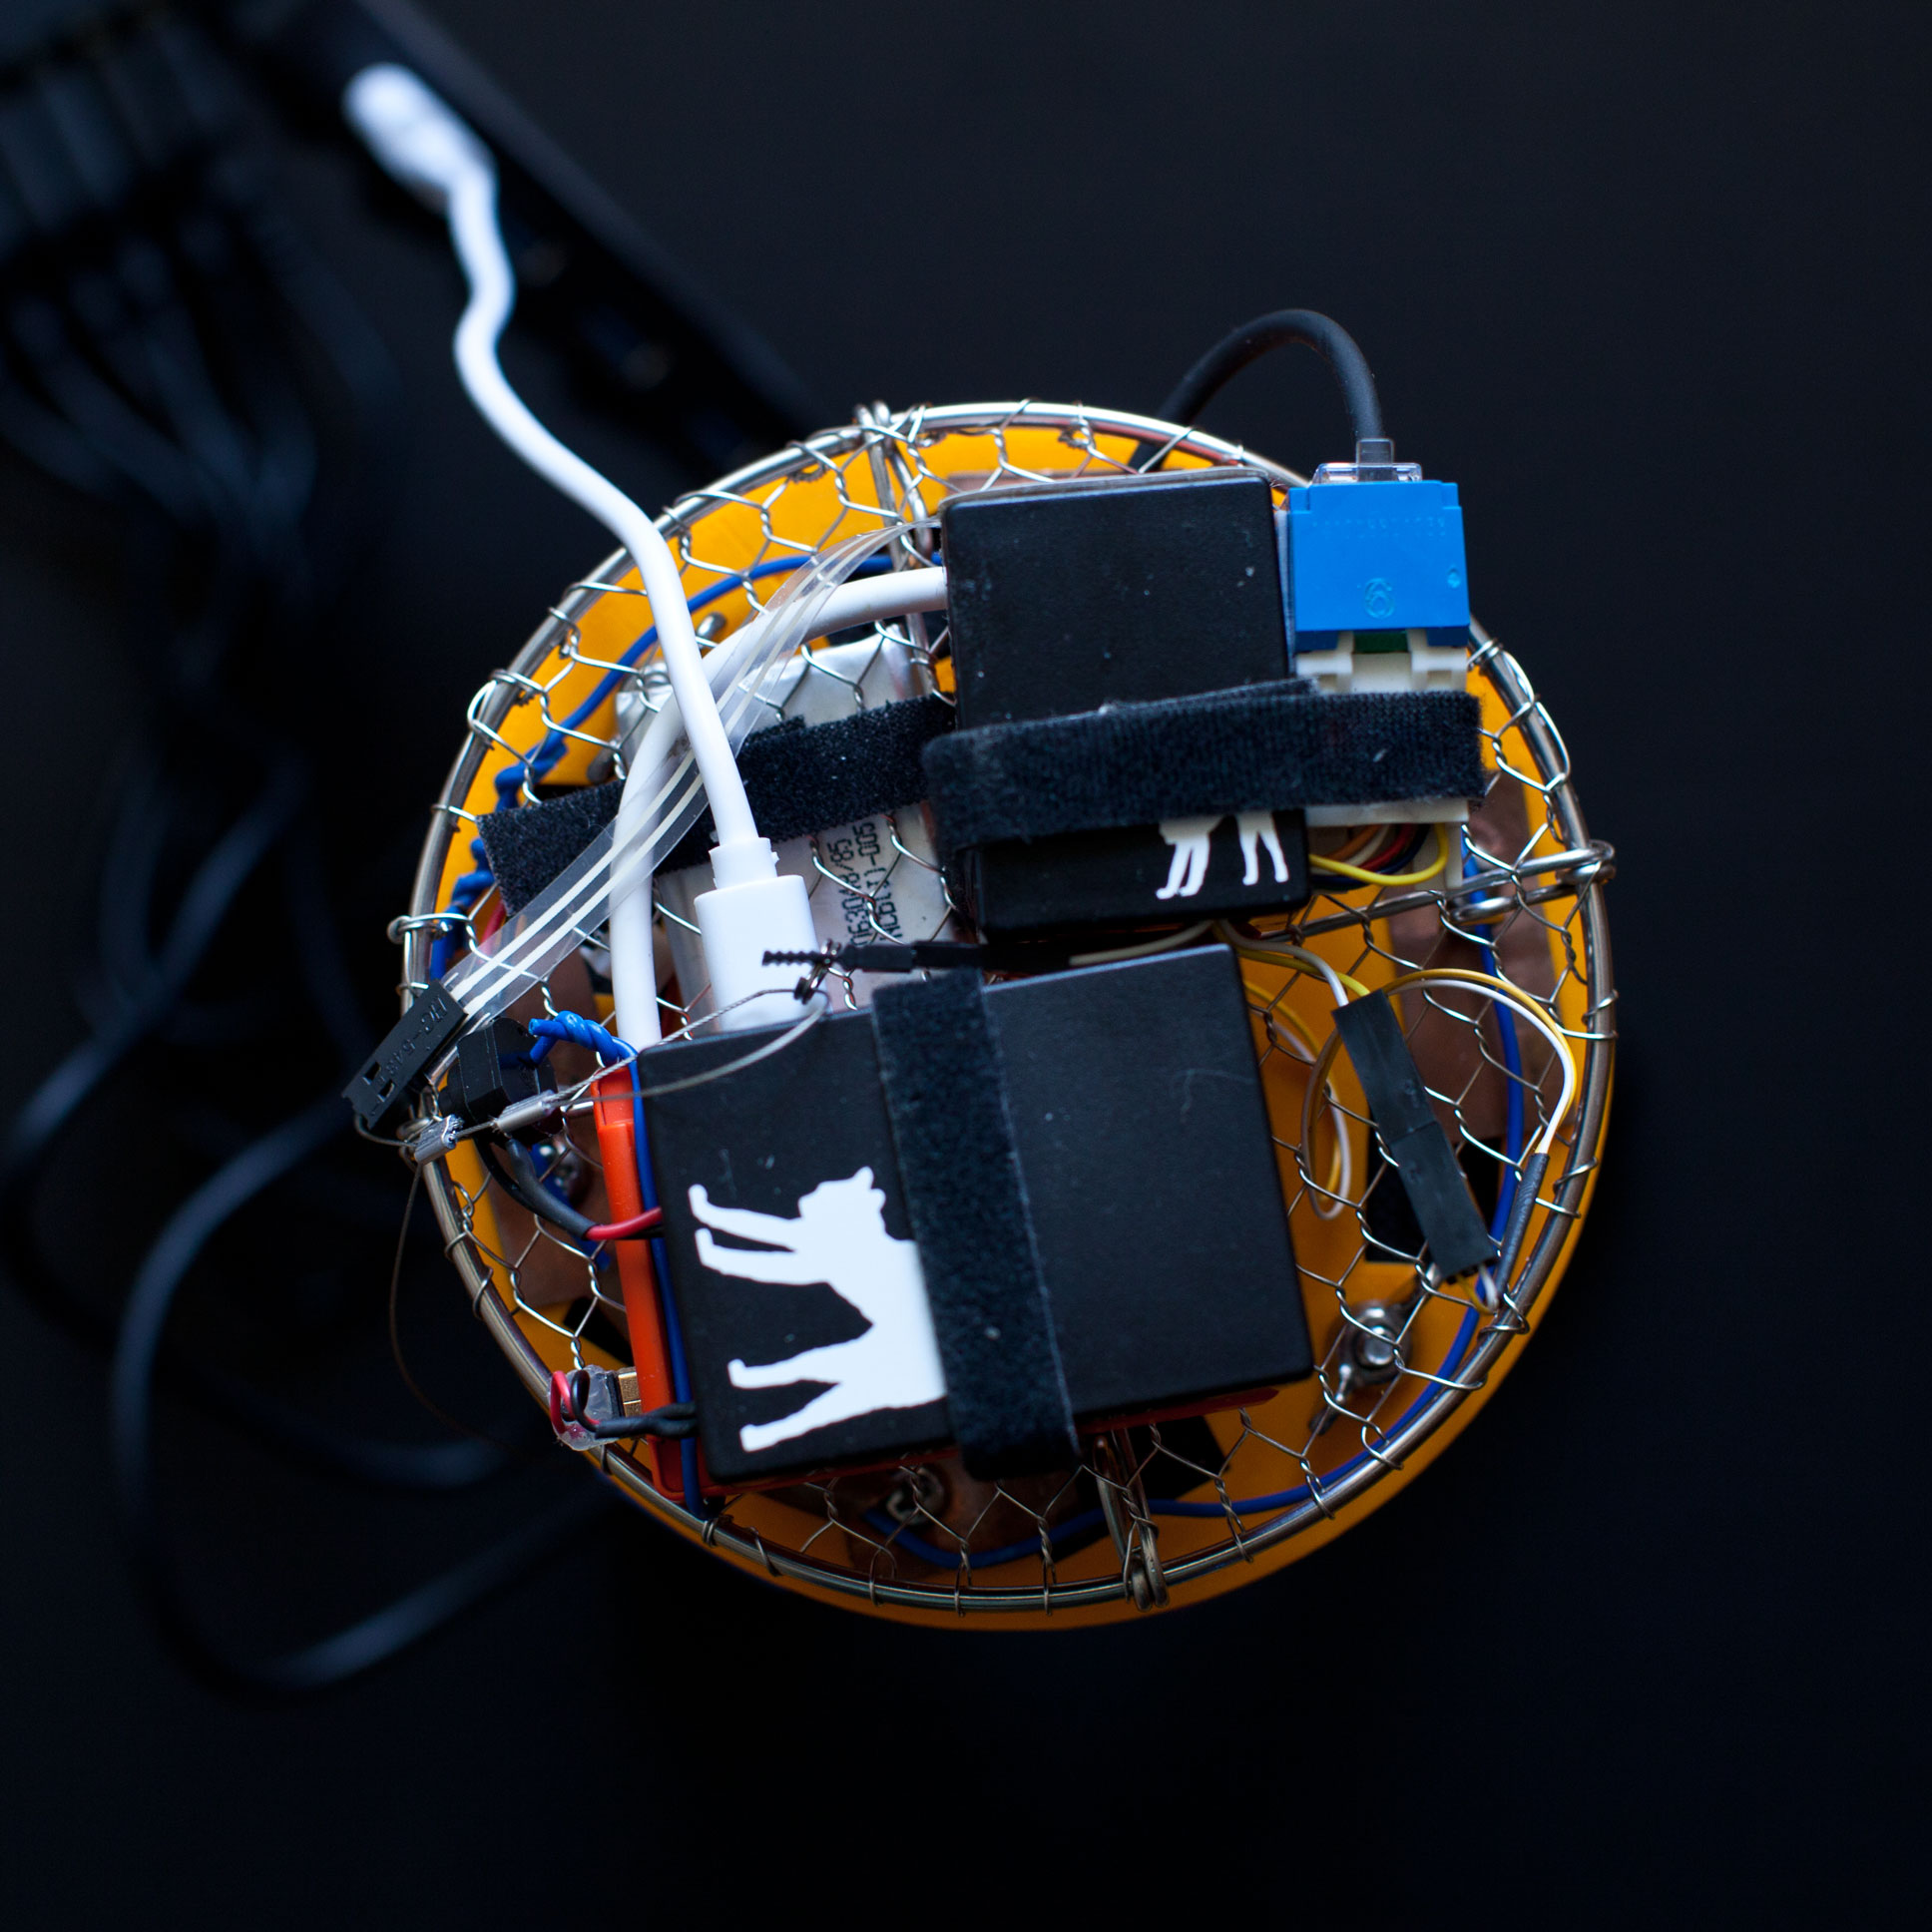
Two Dongles (black small/large casings) and a Lipo battery can be seen. Next photo shows the inside of Dongles’ casings:
topview2inside
Opening and removing the orange top lid enables us to look inside of the hexagonal cavity consisting of six cameras. There sits a dedicated PCB disk to simplify soldering:
toplidremoved

Note: We can sell 3D printed lids (top and bottom) and dedicated PCB disks starting from 200.00USD. Please ask us for detailed pricing of the items and/or extra soldering charge if you don’t want to do it by yourself.

UPDATE 22 May 2017: We received a STL file from Julien Brault-Chénier at LEOFILMS.CA. Thank you, Julien! The file can be 3D-printed and fit to use in place of our top lid so that the Mani Wheel rig can hold one more camera for shooting the zenith. (The STL file is also downloadable from our GitHub repo.)

Posted on Leave a comment

360° Videos at Cat and Rabbit Islands, Japan

We have uploaded two 360-degree videos shot using six GoPro Hero 3+ Blacks and MewPros.

Note 1. Please watch these clips in HD settings and use the navigation wheel at the top left corner. Currently 360-degree viewing is possible in Chrome, Edge or Firefox.
Note 2. If you are viewing them on iPhone please launch the YouTube app and flick to turn around. Current Google Cardboard app for iOS doesn’t support any 360-degree video view of YouTube yet, meantime with VR glasses as Google Cardboard please try in360Tube app.

1. Japanese Cat Island 360°

youtubeiconiOS: Open this video in YouTube app

2. Japanese Rabbit Island 360°

youtubeiconiOS: Open this video in YouTube app

These footages were taken using our original “Mani Wheel” rig:

Rig holding 6 cameras
Mani Wheel Rig holding 6 cameras

Note 3. We are now preparing for selling parts of the rig. So please wait a few days if you want to buy or make it.

Posted on Leave a comment

First Frame Sync Bug Fixed

The bug caused the first frame asynchronous in either double dongle or no master configurations is fixed now.

New source codes for MewPros and Dongles are always available at our GitHub repos.

Single dongle configuration didn’t suffer from the bug. It always syncs the first frame. But the following improvements for all configurations have been made:

  • Power on camera without crash
  • Shortened stop recording delay
  • I2C and serial command data collisions are well prevented

Example Videos

The following two videos are shoot in no master configuration as in the next figure:
no-master

Video by GoPro #1:

(Download MP4)

Video by GoPro #2:

(Download MP4)

In the videos above you can see a stopwatch command is running in the window (precisely, the laptop is a Mac OSX machine and the command is
while :; do gdate +%s.%6N; done
to show the current system time again and again in microsecond accuracy).
Using the videos you can check all frames from the first are synced. And if you are very cautious the video by GoPro #2 has extra one frame at the end as compared to the other. But don’t blame MewPro for this extra frame. We can say Dual Hero also sometimes has these kind of extra frames at the end of a footage, and you can safely cut them when editing for your final video products.

Acknowledge

The bug was firstly found by the researchers at Shandong Univ – Virginia Tech (SDU-VT) team. And also some other university researchers and professional videographers pointed out the bug but it was very difficult to fix for us until recently.

Note: The SDU-VT team told us that they published a result obtained by using MewPros:
Matt J. Bender, Hunter G. McClellandy, Andrew Kurdilaz, and Rolf Müller, “Recursive Bayesian Estimation of Bat Flapping Flight Using Kinematic Trees”, AIAA Modeling and Simulation Technologies Conference, 2016-0945, 4-8 January 2016, San Diego, California, USA. http://arc.aiaa.org/doi/abs/10.2514/6.2016-0945 (see VI. Acknowledgements section as there is a mention to MewPro 🙂 )

Posted on Leave a comment

No Master Configuration For Genlocking

A PC controlled genlock system support is added to Dongle’s source code.

For genlock rigs we’ve offered two configurations, namely

  1. Single Dongle configuration
  2. Double Dongle configuration

and these are described in this post. The latter is usable with PC by connecting MewPro #0 to FTDI serial USB breakout and by sending commands from its console.

Shāndōng University – Virginia Tech researchers use a double dongle configuration, as I know so far, and also use a PC that is connected to MewPro #0 in order to control the whole system. (For their recent progress, a blog post is here: Matt Bender, Mincan Cao, Yu Wei, Shaoxu Xing “Tracking of Fiducial Markers for Bat Flight Motion Capture Experiments)

To control the whole system from PC, today we added support for

  • 3. no master configuration.

Control everything from PC. No master camera.

(DTR connection between Dongle #0 and FTDI is for resetting Dongle #0 when uploading a sketch to the dongle or opening the Arduino Monitor in PC.)

As you can see this is the same to the single dongle configuration but GoPro #0 is replaced by Genlock Dongle #0 connected to PC through FTDI serial USB breakout board.

The no master configuration is completely symmetric and everything is PC controllable but there is no master camera that you might be accustomed to push mode/shutter buttons or to browse through menus on LCD.

How To Use No Master Configuration

You should follow the instructions for single dongle configuration first. And don’t forget to prepare/buy one more Genlock Dongle for Genlock Dongle #0 in the figure above.

You must update the dongles with the latest version of Dongle source code that supports no master configuration. It is always available at the GitHub repo.

For dongles the initial value of bool debug and the directive UART_RECEIVER_DISABLE should be set as follows:

bool debug UART_RECEIVER_DISABLE
Dongle #0 true or false #undef
Dongle #1 false #undef or #define

(Bold face is the default in the GitHub source code.)

In this configuration usable commands from PC are those which are listed in the I2C command list and its label contains _BACPAC_.

Example:

  • SH1 start recording/shutter
  • SH0 stop recording
  • CM1 change mode to camera
  • VV0A change video resolution to 720p Super
  • etc., etc.

The dongle also suports two more commands:

  • @ power on
  • & toggle debug output

Enjoy!