Our product MewPro Cable was mistakenly set as “Out of Stock”. Now it’s corrected to “In Stock” and ready for purchase.
Sorry if you wait for it…
 Amabie Pass Holder
$9.40
Amabie Pass Holder
$9.40
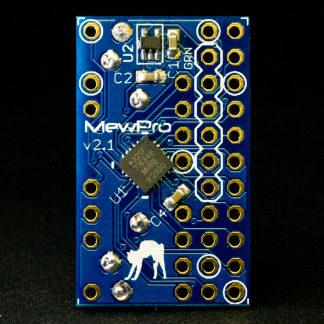
 MewPro Bastet
$99.95 excl. VAT
MewPro Bastet
$99.95 excl. VAT
 Face Mask Strap Extender of Amabie
$6.54
Face Mask Strap Extender of Amabie
$6.54
 History of Momozono Bridge
$6.00
History of Momozono Bridge
$6.00
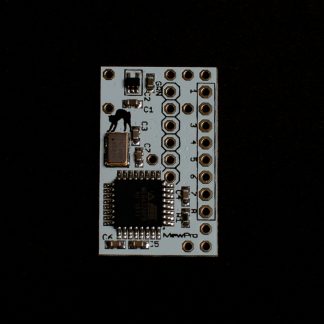
 MewPro 2
$99.95 excl. VAT
MewPro 2
$99.95 excl. VAT
Our product MewPro Cable was mistakenly set as “Out of Stock”. Now it’s corrected to “In Stock” and ready for purchase.
Sorry if you wait for it…
We will show you basics to use MewPro 2 for controlling GoPro Hero 3+ Black camera.
The post involves no external sensors.
UPDATE 25 Feb. 2017: Hero 4s are now supported: Please refer this post.
In order to use MewPro 2 as a GoPro controller you need the following hardwares:
Softwares:
MewPro 2 is shipped with optiboot as well as MewPro software (for genlock) installed. But if you like to modify/update the software you will need to prepare the following IDE, core and library. To install each software please refer their documentations.
Lastly grab the MewPro application:
On your PC launch Arduino IDE that was installed as described in the above. In Arduino IDE [File]→[Open...]→ then open MewPro.ino.
Remark: MewPro.ino contains the following files as tabs; a_Queue.ino, b_TimeAlarms.ino, c_I2C.ino, d_BacpacCommands.ino, e_Shutter.ino, f_Switch.ino,g_IRremote.ino, h_LightSensor.ino, i_PIRsensor.ino, j_VideoMotionDetect.ino, and k_Genlock.ino. If you like to see what will be happen inside of your ATtiny1634 you could read any of them.
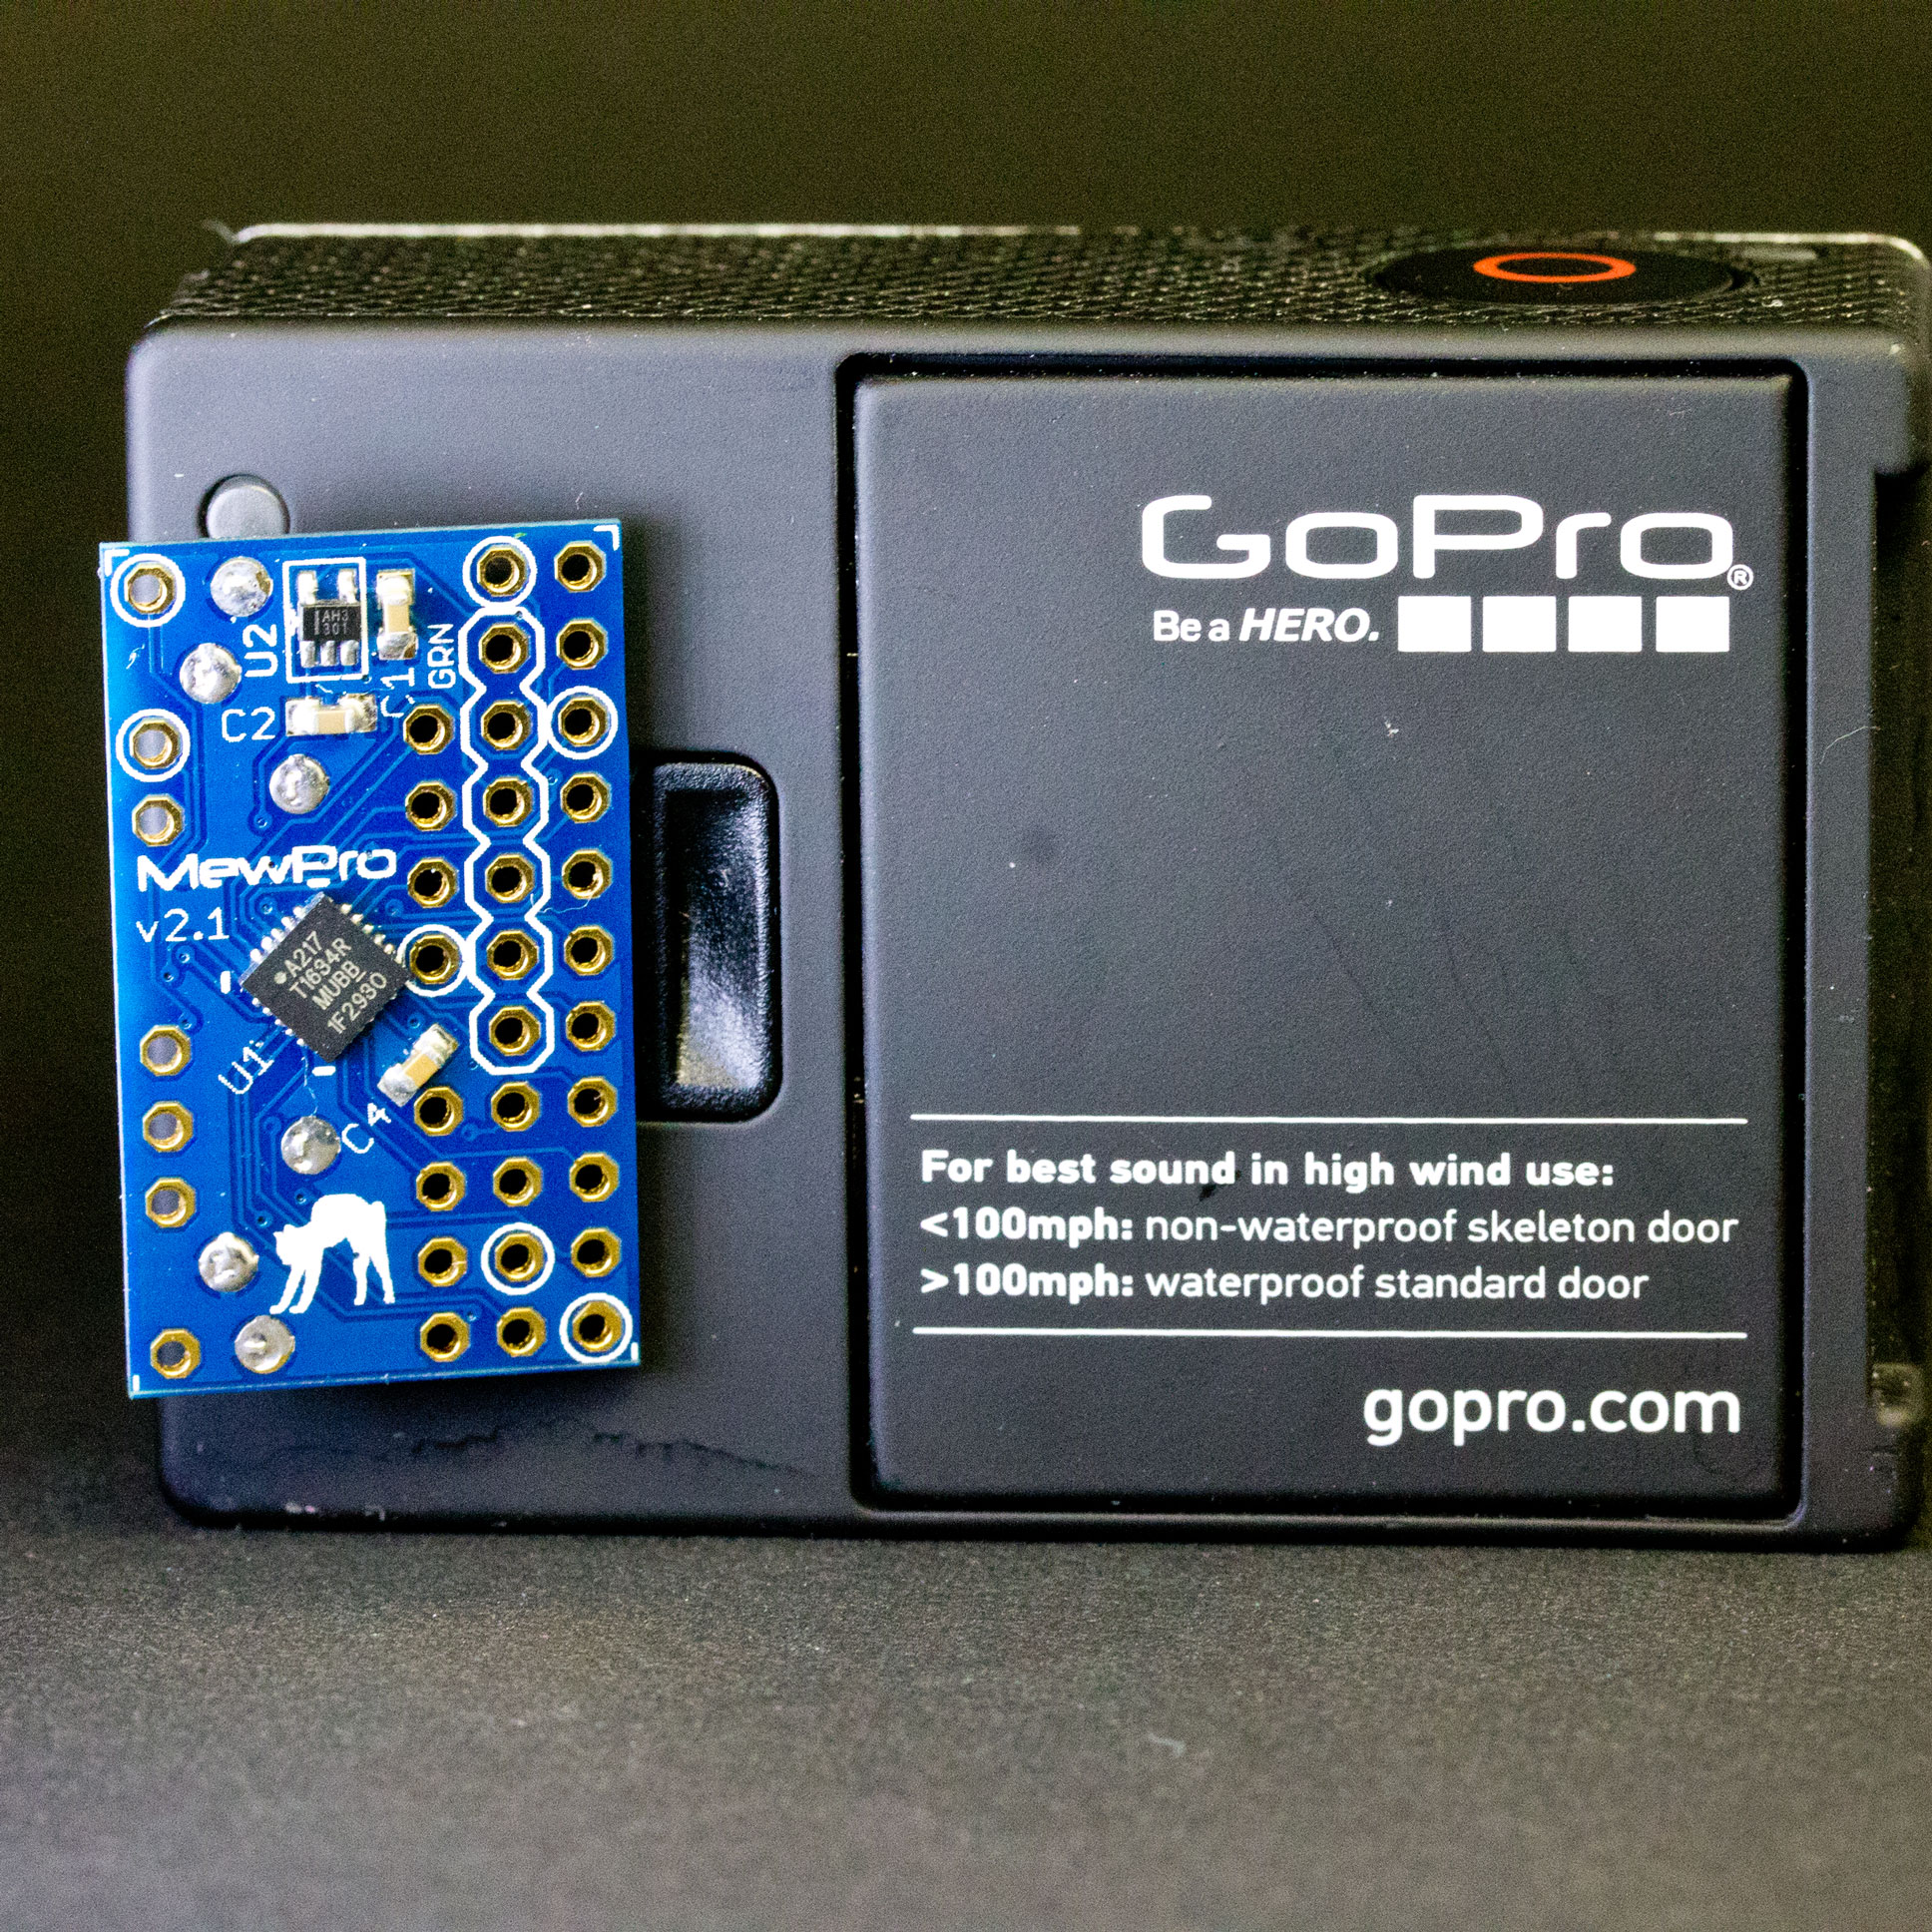
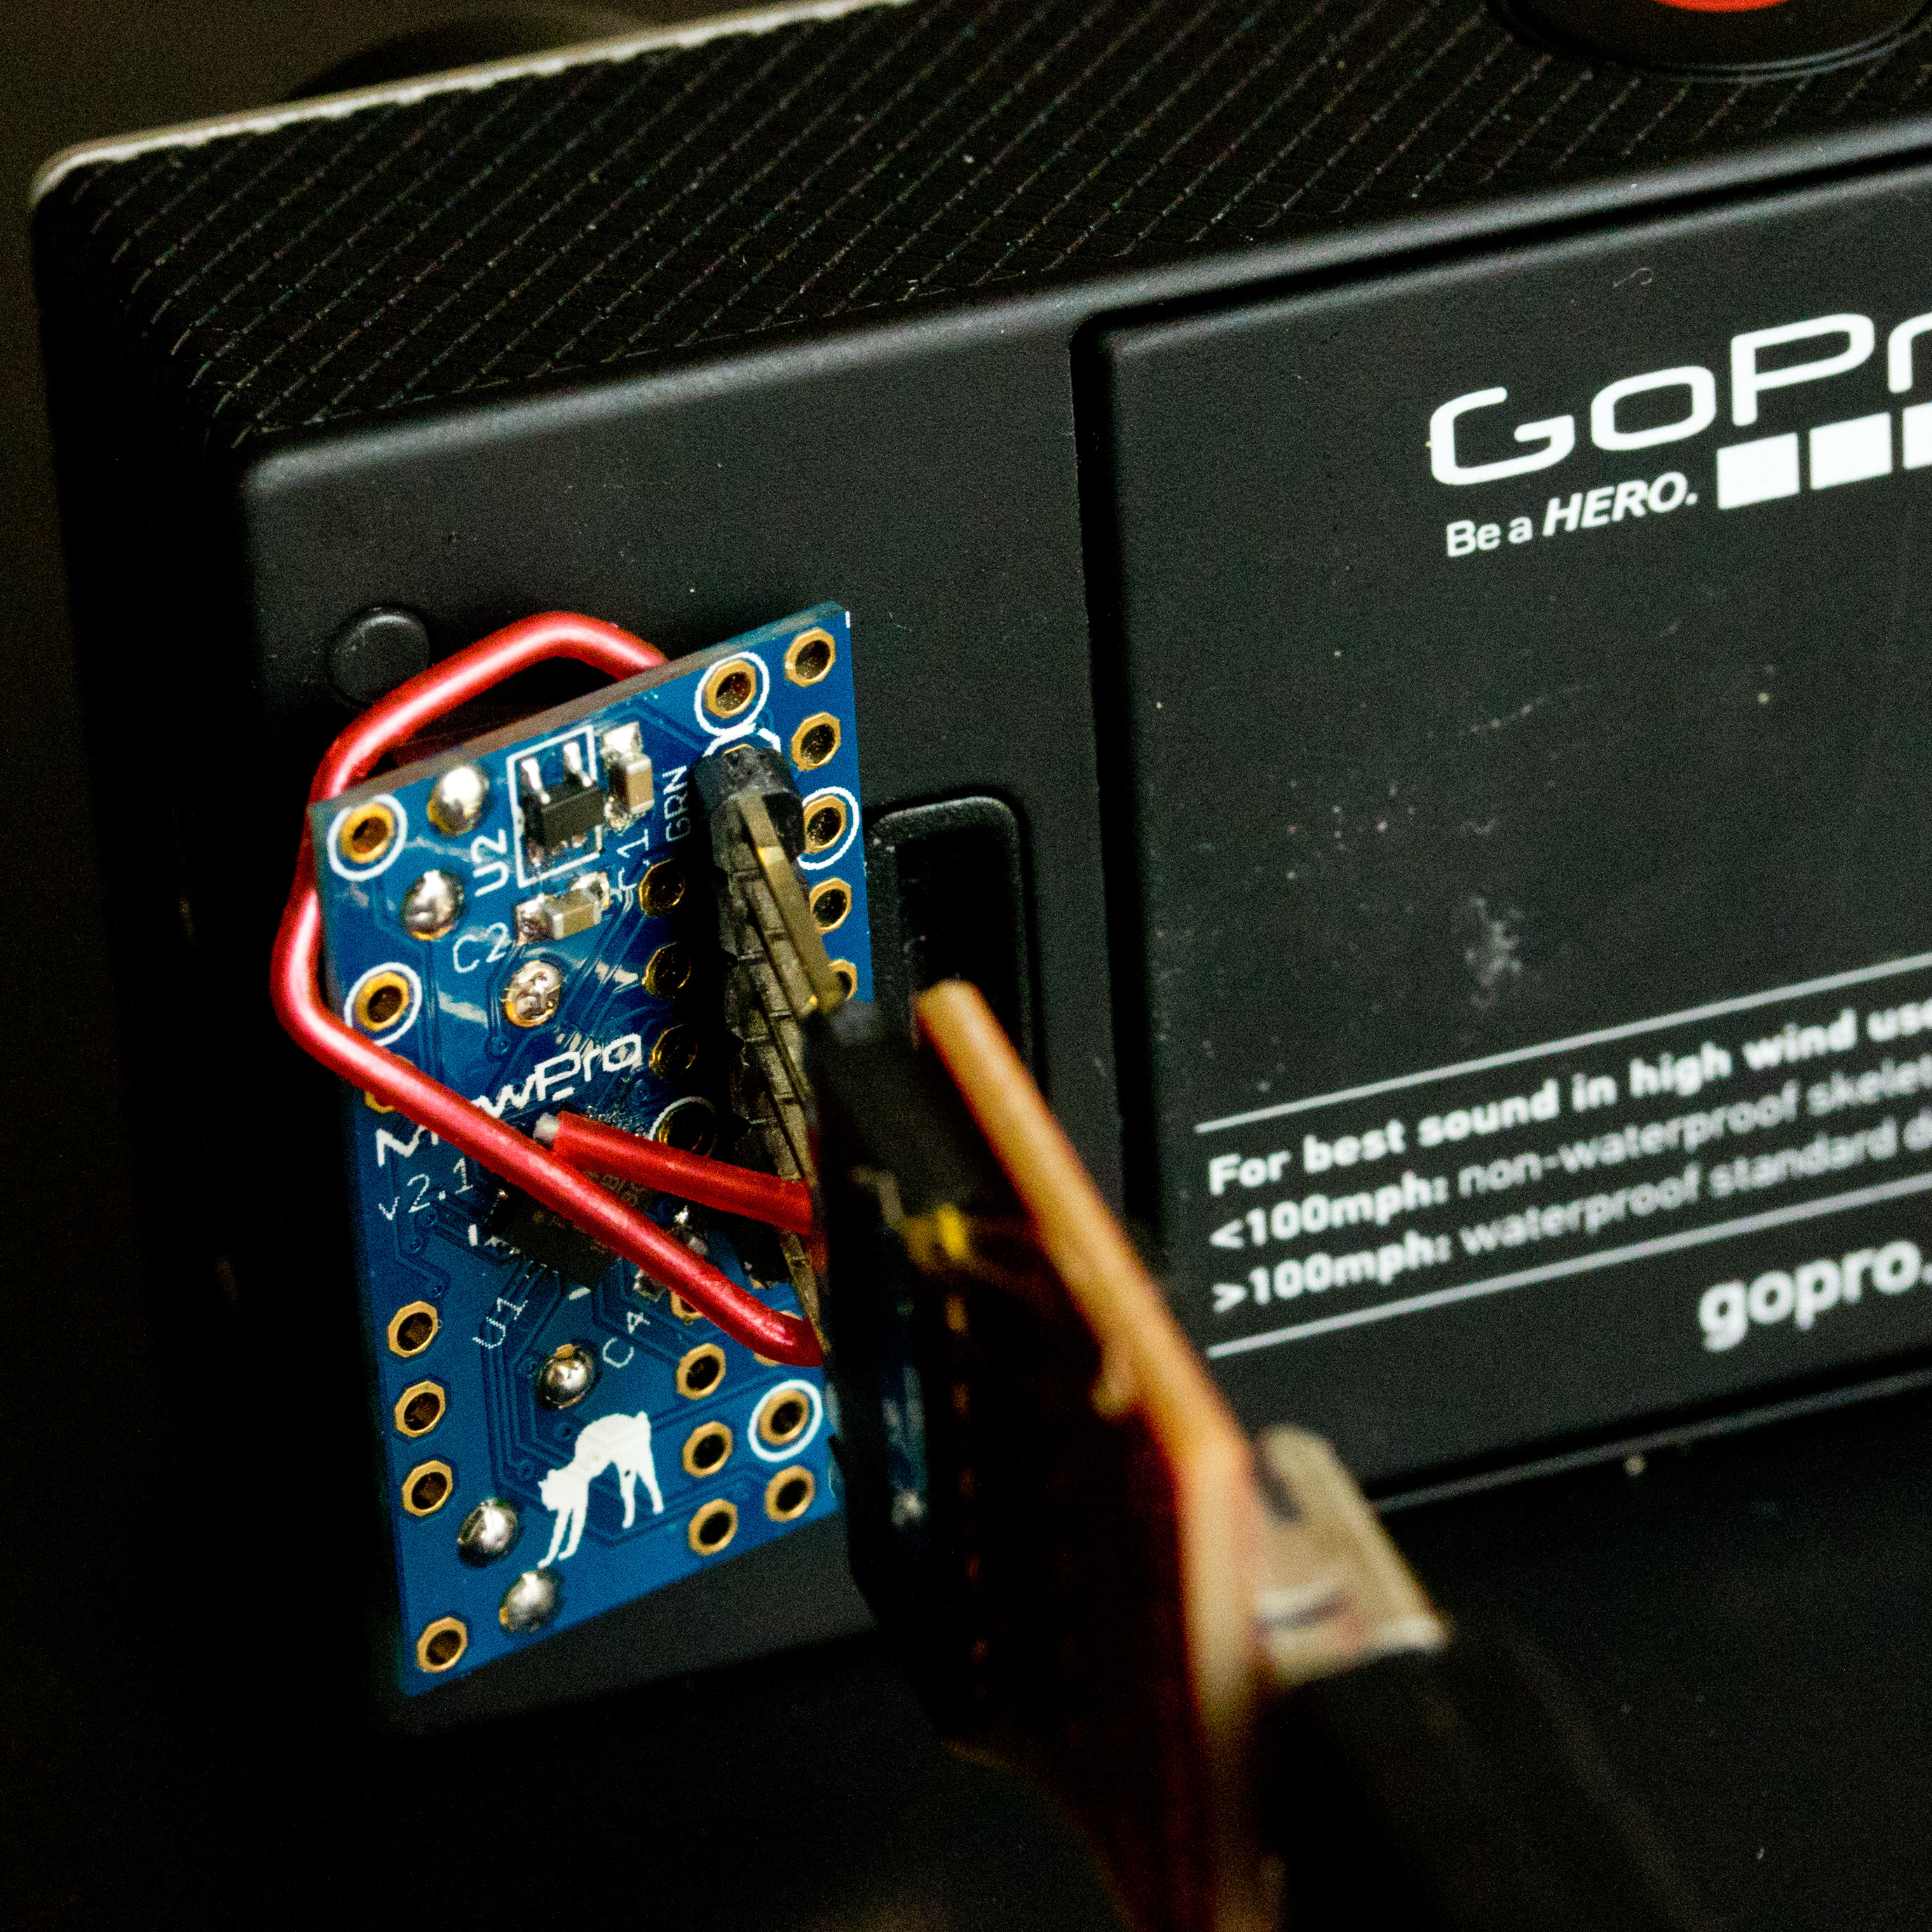
Connect MewPro 2

to your PC w/ FTDI board and the temporary header.
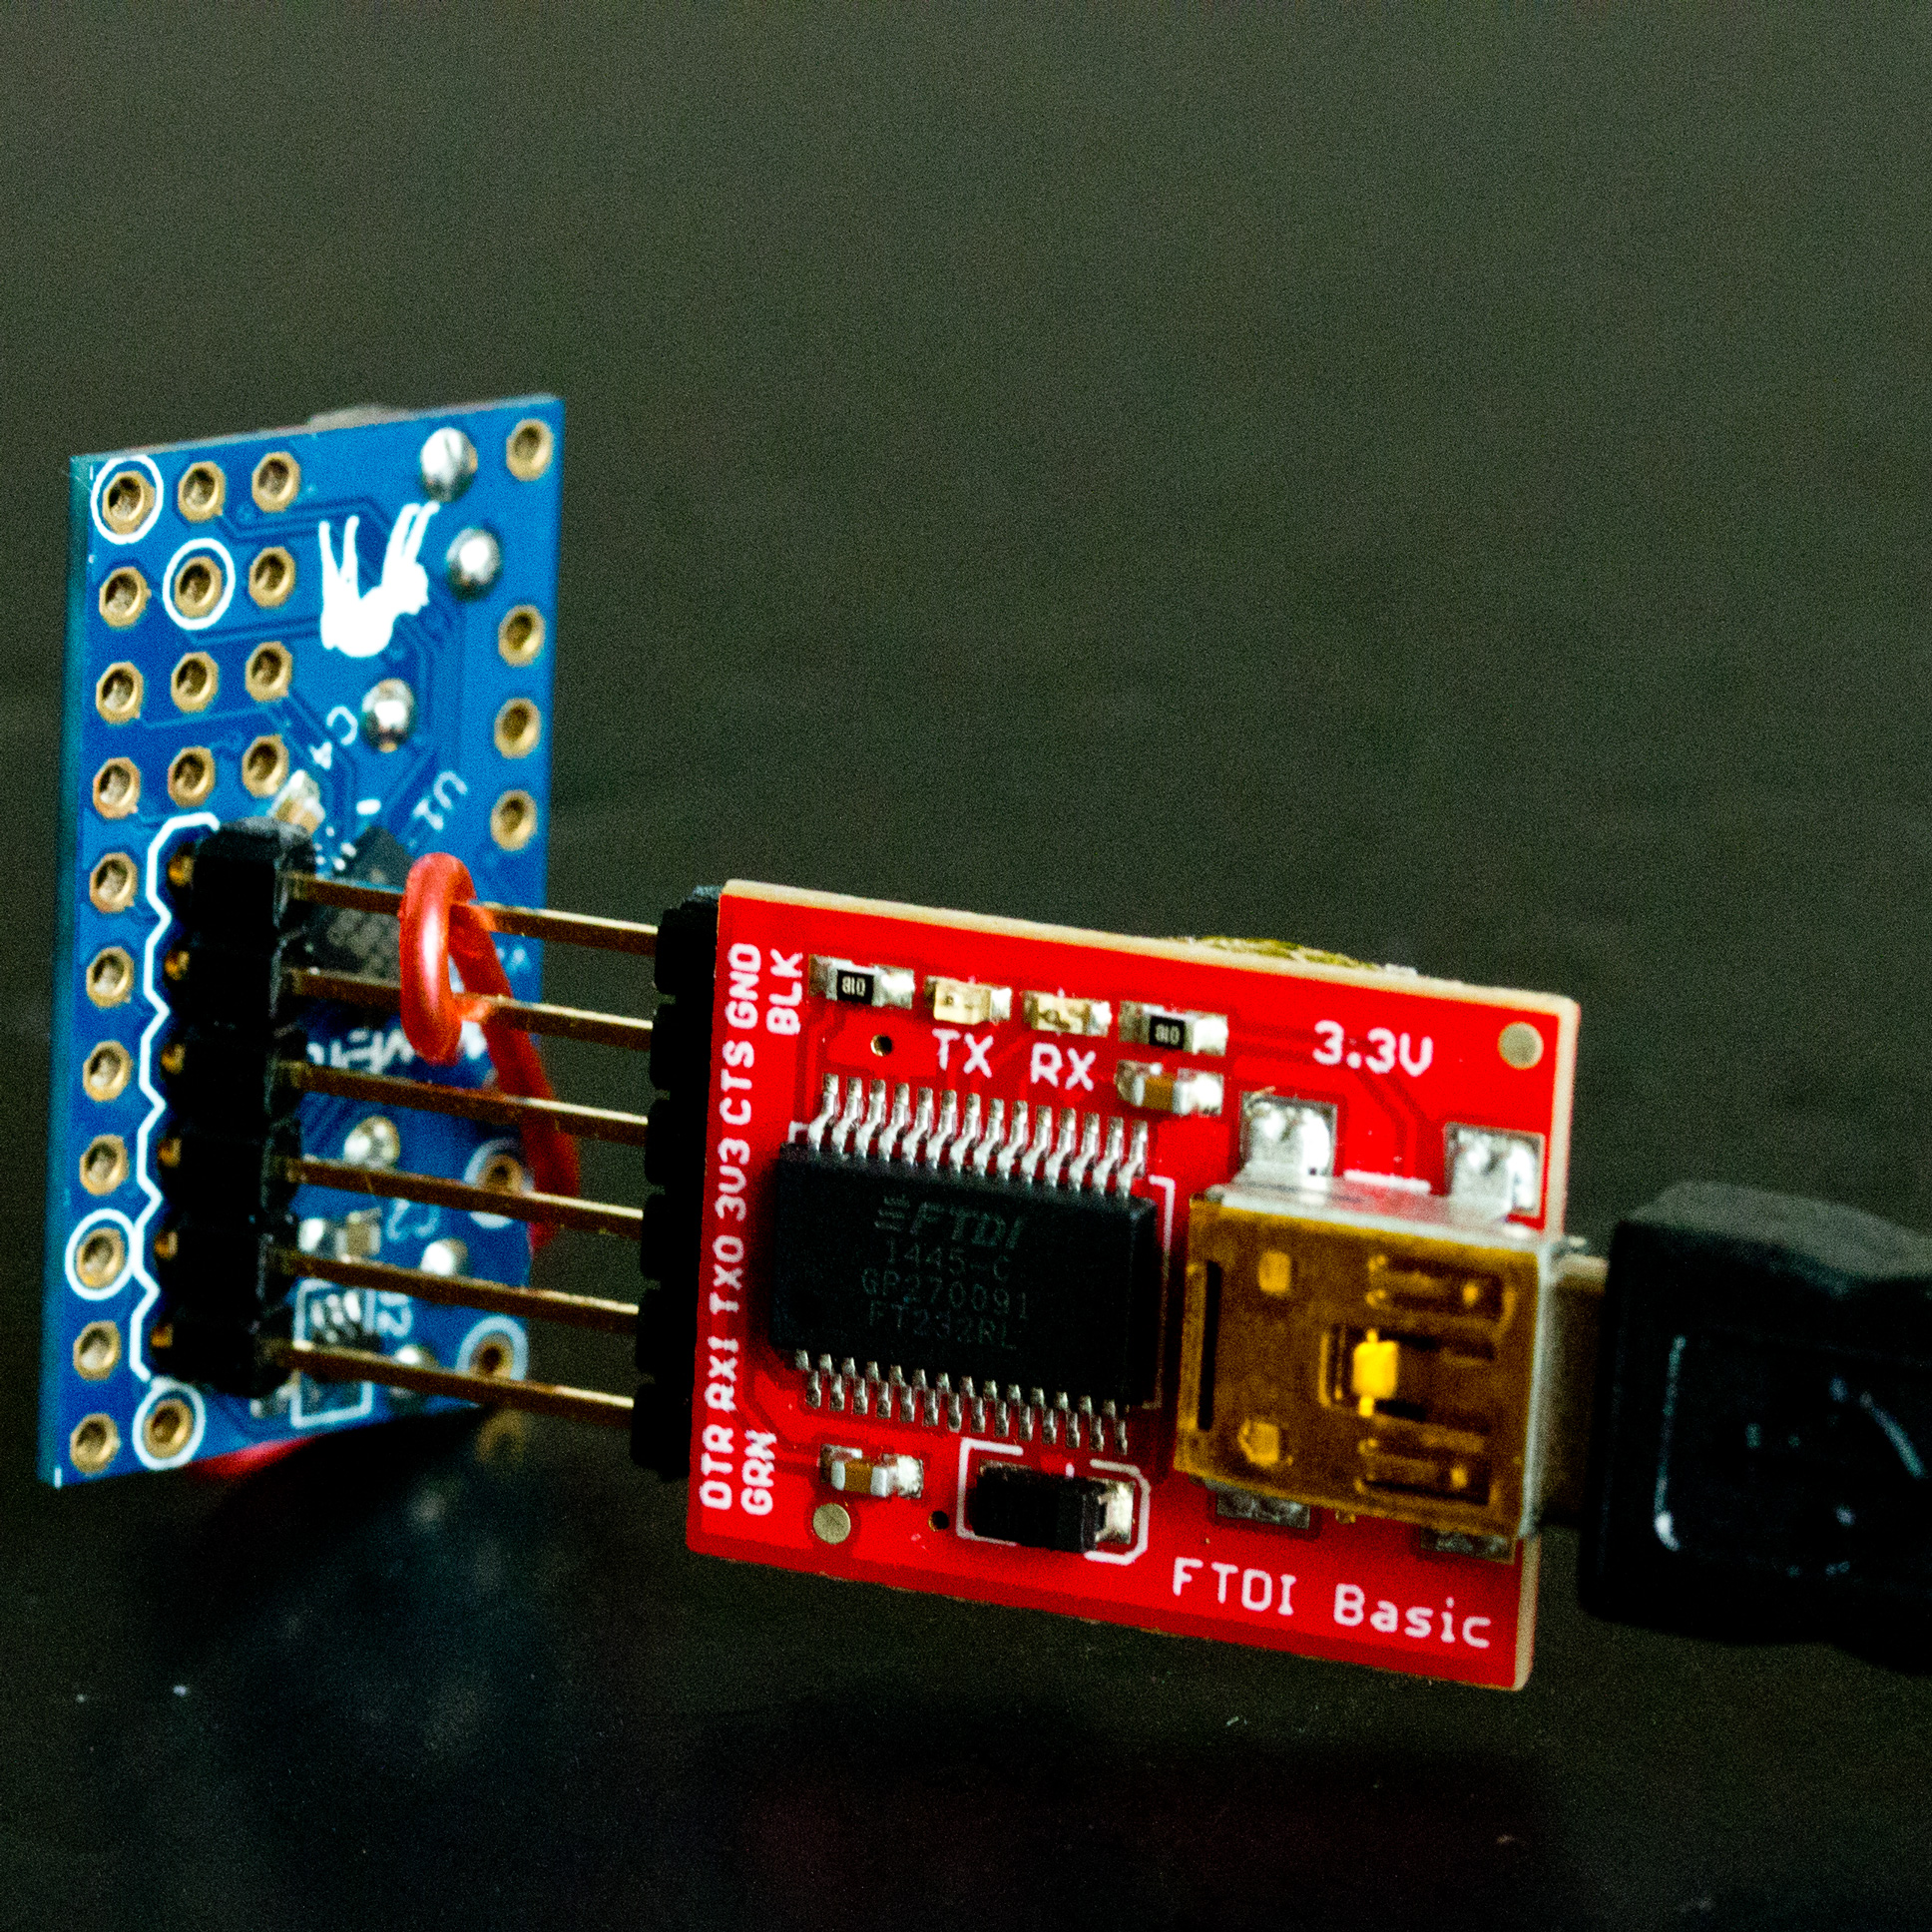
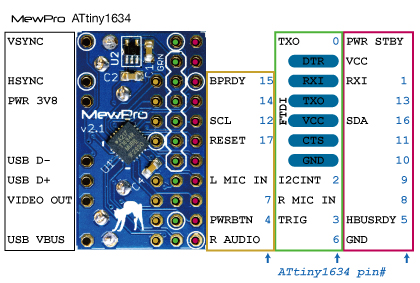
Connecting FTDI please refer the pinout image below:
Then connect them to GoPro Hero 3+ Black.
In Arduino IDE application, select [Tools]→[Board]→[ATTiny1634 (optiboot)] and [Tools]→[Port]→[(the port where you connected the FTDI cable)]. (B.O.D. and Clock settings are “don’t care” as these values are only effective when you burn a bootloader to the microcontroller by using an ISP programmer.)
The MewPro source code is originally targeted to MewPro 1, Arduino Pro Mini, so please change the following lines in MewPro.ino from
#include <Wire.h> // *** please comment out this line if __MK20DX256__ or __MK20DX128__ or __MKL26Z64__ or __AVR_ATtiny1634__ is defined ***

#if BUFFER_LENGTH < 64

#error Please modify Arduino Wire library source code to increase the I2C buffer size

#endif

//

// Teensy 3.0 or 3.1 or LC

//#include <i2c_t3.h> // *** please comment out this line if __MK20DX256__ and __MK20DX128__ and __MKL26Z64__ are not defined ***

//

// ATtiny1634 core https://github.com/SpenceKonde/arduino-tiny-841

//    WireS library is downloadable from https://github.com/orangkucing/WireS

//#include <WireS.h> // *** please comment out this line if __AVR_ATtiny1634__ is not defined ***
to
//#include <Wire.h> // *** please comment out this line if __MK20DX256__ or __MK20DX128__ or __MKL26Z64__ or __AVR_ATtiny1634__ is defined ***

//#if BUFFER_LENGTH < 64

//#error Please modify Arduino Wire library source code to increase the I2C buffer size

//#endif

//

// Teensy 3.0 or 3.1 or LC

//#include <i2c_t3.h> // *** please comment out this line if __MK20DX256__ and __MK20DX128__ and __MKL26Z64__ are not defined ***

//

// ATtiny1634 core https://github.com/SpenceKonde/arduino-tiny-841

//    WireS library is downloadable from https://github.com/orangkucing/WireS

#include <WireS.h> // *** please comment out this line if __AVR_ATtiny1634__ is not defined ***
that is, to use the WireS library instead of the standard Wire library.
The code should now be compiled successfully.
“Verify” the MewPro sketch and “Upload” it to MewPro 2 board.
Remark: If you are using MewPro 2 board for genlocking, please modify MewPro.ino as
boolean debug = false;

#define USE_GENLOCK
and for MewPro #0 in double dongle configuration
#define UART_RECEIVER_DISABLEControlling details through Arduino console is the same as MewPro 1.
When genlocking in dual dongle configuration a serial terminal such as Arduino IDE’s console can be attached to MewPro #0 that is on the back of GoPro #0 (see top-right of the following figure).
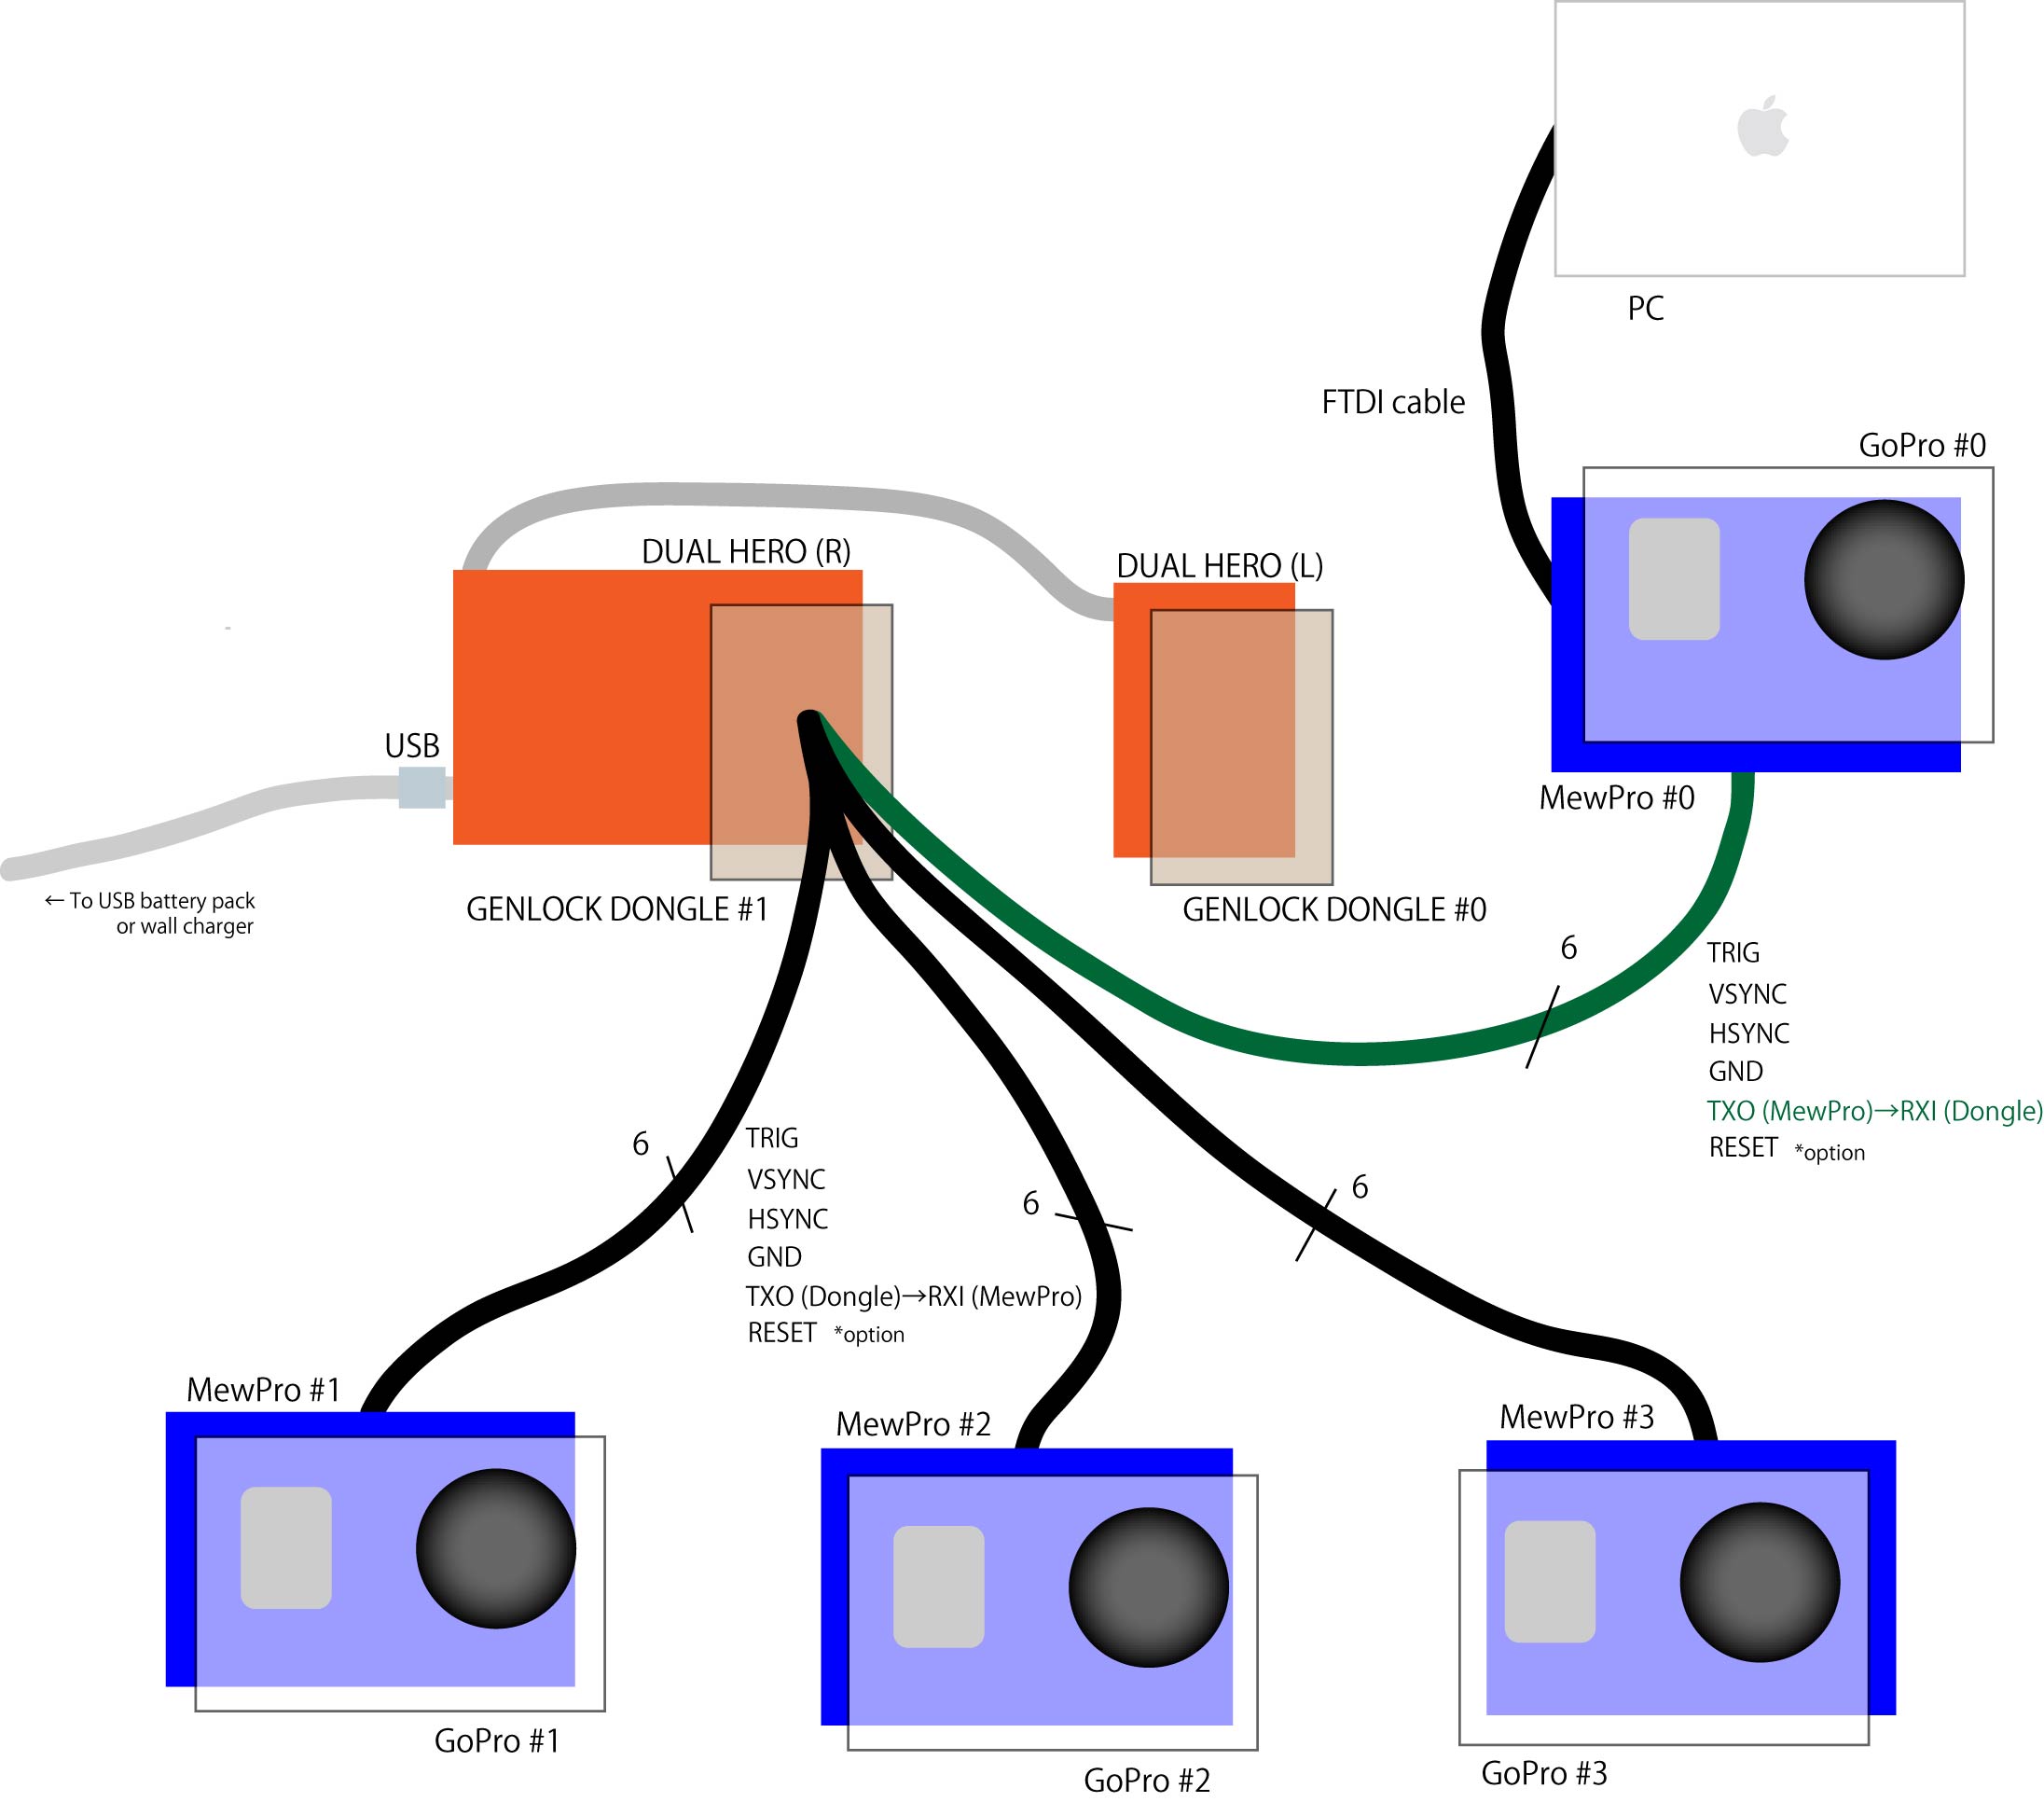
Any sensors or switches can be also installed to the board and they will work for starting/stopping of all cameras.
Note: In single dongle configuration the controlling GoPro #0 has no MewPro board attached. So the method described in this post is not relevant.
Two new products, MewPro Cable for genlocking GoPro and MewPro 2 for general purposes are available in our shop.
MewPro Cable is designed for genlocking GoPro Hero 3+ Black cameras. It has a microcontroller ATtiny1634 inside the plug enclosure and controls camera into 3D capture mode as easy as just plug the connector into Herobus socket. For genlock purpose it is interchangeable to our previous product “MewPro 1 w/ SMD parts, Herobus connector and Arduino Pro Mini compatible (soldered)”.
As there were many requests from our customers that if there were a plug-and-play genlock solution, now we sell bare plugs as well as fully assembled/soldered, plug-and-play packs with cables and Dongle(s). But we should say soldering a lot of wires to small plugs and dongle is extremely weary task. So if you order a plug-and-play pack please allow us minimum of 4 days before ship.
Product page: MewPro Cable
An article, introduction to MewPro Cable is to appear soon.

MewPro 2 uses the microcontroller ATtiny1634 and is a redesigned version of MewPro 1 that used in conjunction with Arduino Pro Mini. All signals of Herobus and the microprocessor are broken out to 2.54mm pitch pins for hand-soldering convenience. ATtiny1634 can act as complete I2C slave, hence the new board comes without I2C EEPROM that is emulated.
Product page: MewPro 2
An article, introduction to MewPro 2 is to appear soon.
The following is the comparison table of our MewPro line of products: